Have a Question?
How to Install Windows 98 Second Edition as a VM on Proxmox VE
Overview
Windows 98 is a classic operating system developed by Microsoft, and was originally released to the public on June 25th, 1998. Windows 98 is a web-integrated OS that was built to be a replacement of Windows 95. Windows 98 Second Edition was the final updated edition which was originally released on May 5th, 1999. This operating system is no longer being supported by Microsoft, obviously.
In modern times there is no legitimate need for the OS, unless you crave nostalgia or simply wish to play some old games. A virtual machine (VM) of the OS can indeed be configured and installed via Promxox VE on all Protectli Vault models. If you'd like to take a trip down memory lane, or are looking for a fun experiment, follow along to this guide to create a functioning VM of Windows 98 Second Edition.
Note: It is recommended to not connect the VM to the internet for security concerns
Acquiring the ISO
This guide is under the assumption that you have legally acquired an authentic Windows 98 Second Edition OEM .iso image as well as a product key.
Uploading the ISO to Proxmox VE
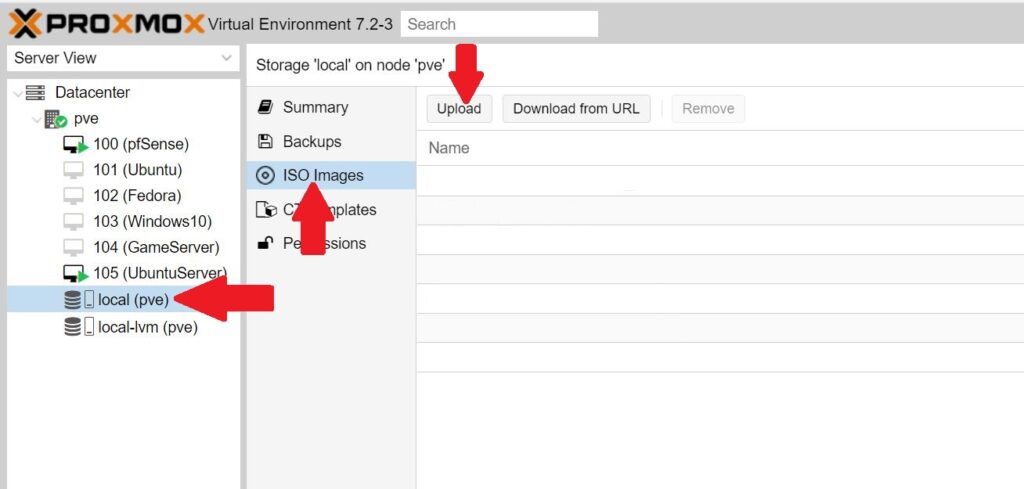
- Login to your Proxmox VE dashboard via your web browser
- On the left side of the dashboard, expand the Datacenter drop-down, and the node with your server name.
- Select your local storage, select ISO Images, and click Upload
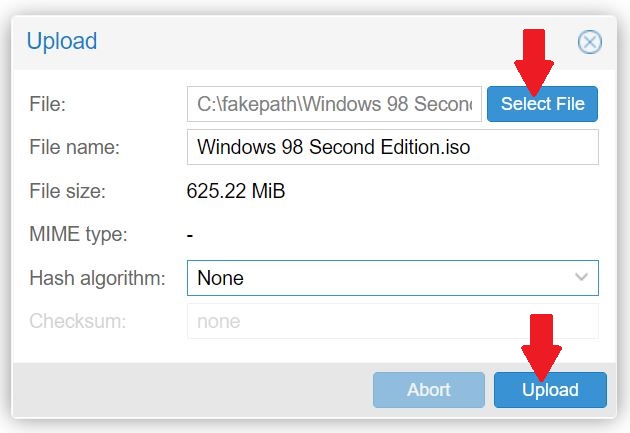
- Choose your Windows 98 Second Edition ISO and Upload
- Verify the ISO has successfully uploaded
Creating and Configuring the VM
- At the top right of the Proxmox VE dashboard, click the blue Create VM button:
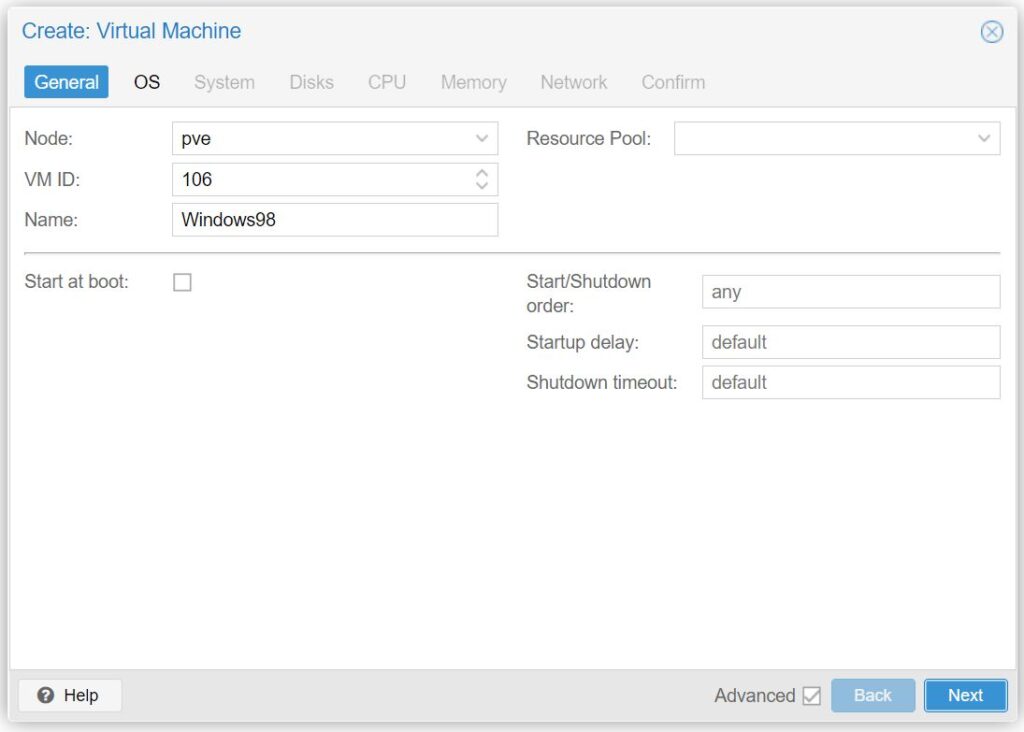
- Under the General tab:
- Choose a VM ID number and enter a name for the VM.
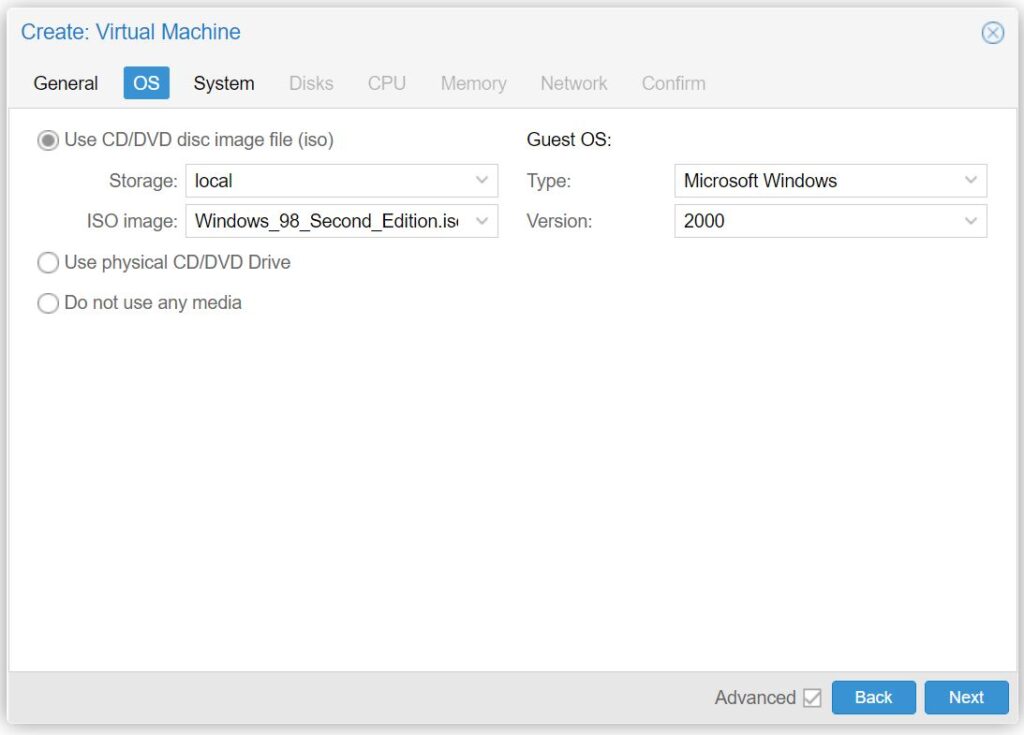
- Continue to the OS tab:
- Choose Use CD/DVD disc image file:
- For Storage: leave the default value of local
- For ISO image: select the Windows 98 iso you uploaded earlier
- For Guest OS Type: select Microsoft Windows
- For Version: select 2000
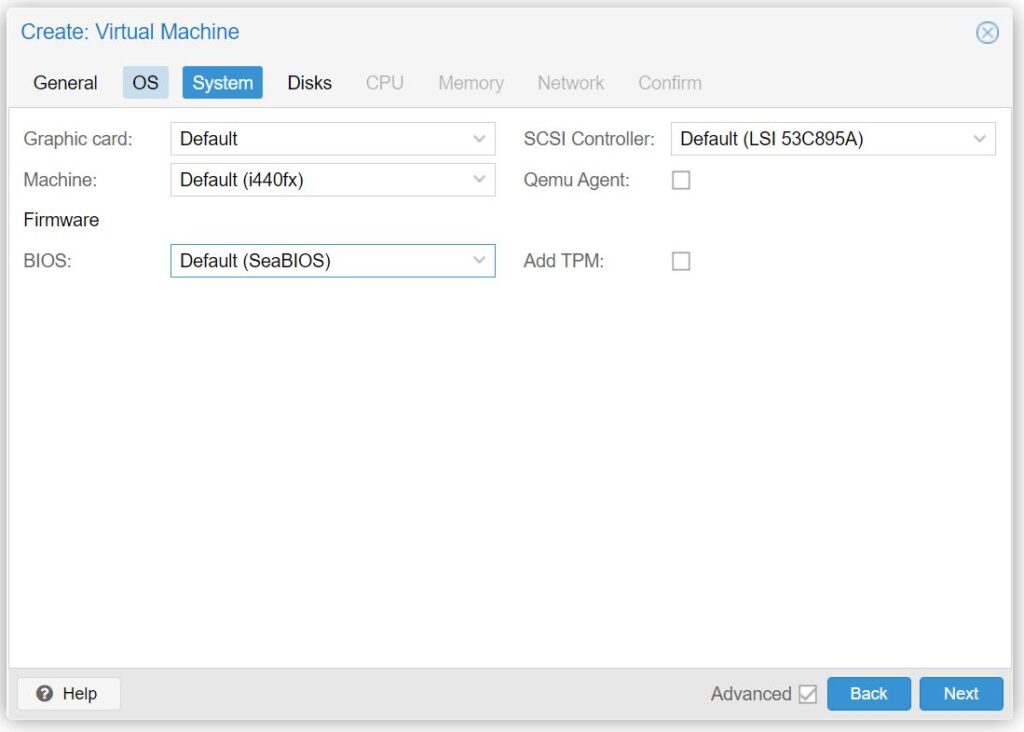
- Continue to System tab:
- For Graphic card: select Default
- For Machine: select i440fx
- For SCSI Controller: select Default (LSI 53C895A)
- For BIOS: select Default (SeaBIOS)
- Continue to Disks tab:
- For Bus/Device: select IDE
- For Disk size(GiB): choose at least 1GB. In this example we select 32GB.

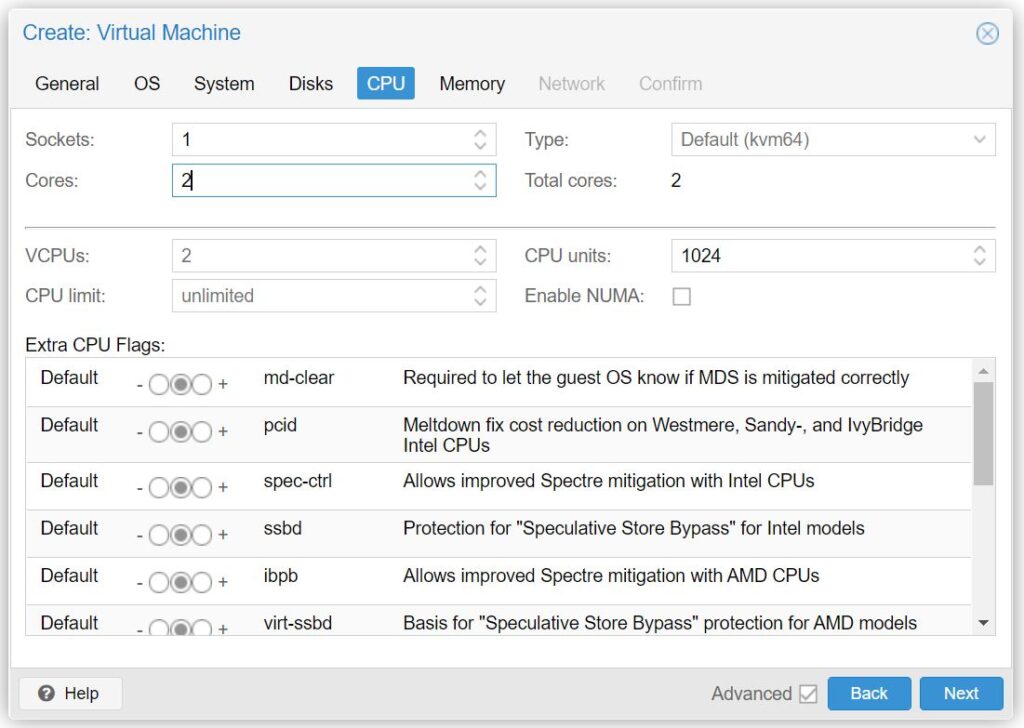
- Continue to CPU tab:
- For Sockets: select 1
- For Cores: select 1
- We selected 2 cores for this example, mostly to test the limits of the Windows 98 VM, but the VM most likely is not utilizing the second core
- For Type: select Default (kvm64)
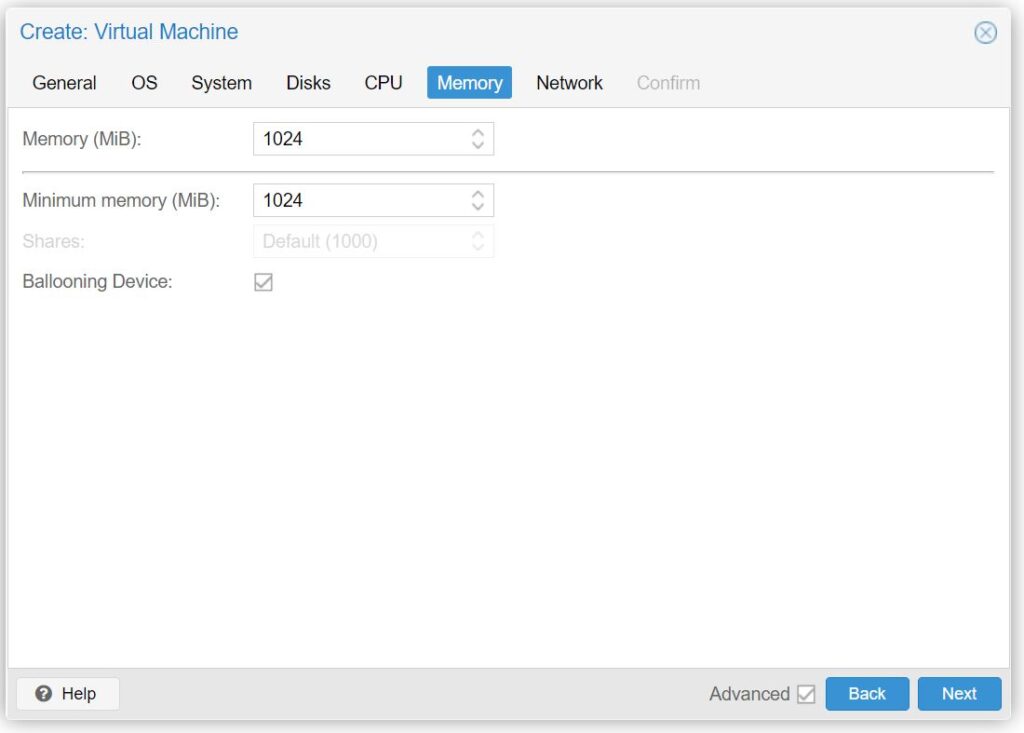
- Continue to the Memory tab:
- For Memory (MiB): select at least 32MB of RAM, and no more than 1024
-
- We selected 1024 in our example
- Anything above 1024MB will cause issues with the Windows 98 VM
- Windows 98 was realistically not designed to handle more than 512MB of RAM
-
- For Memory (MiB): select at least 32MB of RAM, and no more than 1024
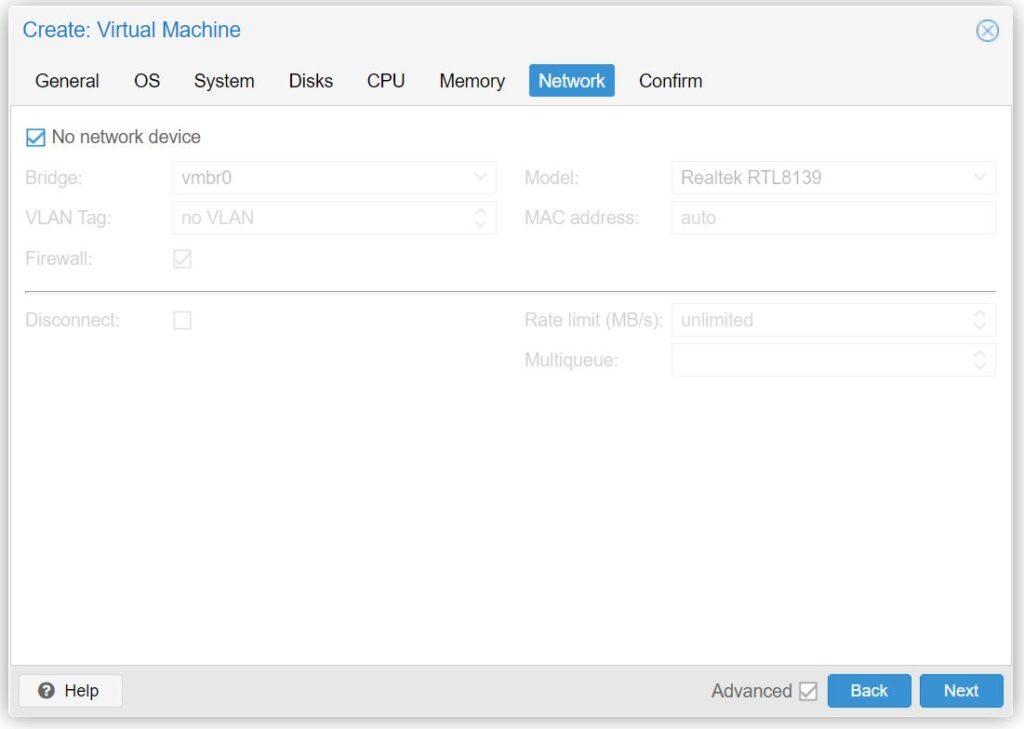
Continue to the Network tab:
- Select No network device
- It is recommended to not connect this VM to the internet for security reasons
- Continue to the Confirm tab:
- Click Finish
- Allow the VM to finalize setup, until it is visible on your list of VMs
Starting and Installing the Operating System
The VM is now ready to be started for the first time in order for proper installation.
- Select your Windows 98 VM on the Server View window on the left side of the Proxmox Dashboard
- Click the Start button
- Choose the Console tab to view the video output
- When the OS loads, choose option 2. Boot from CD-ROM
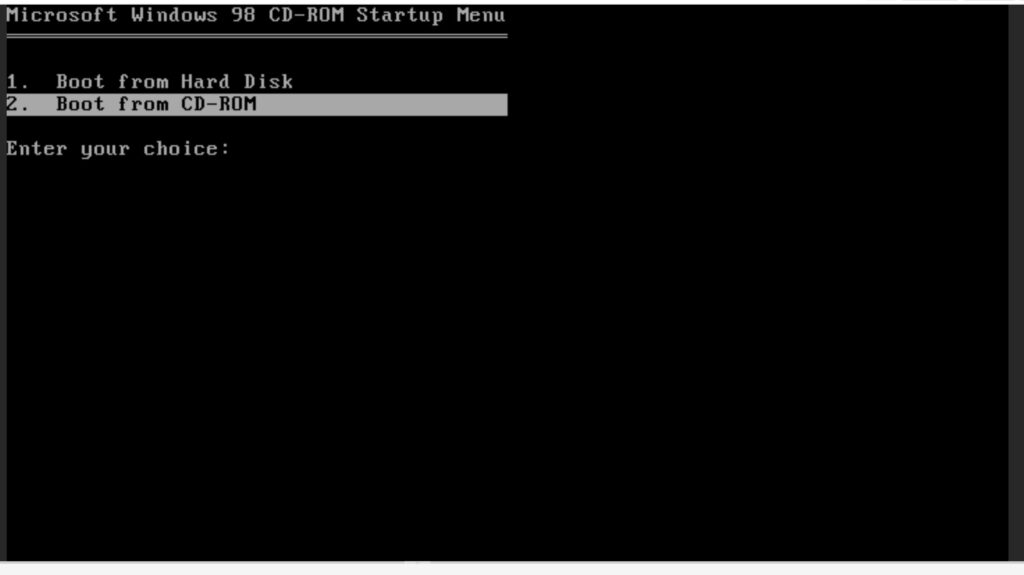
- Select option 1. Start Windows 98 Setup from CD-ROM
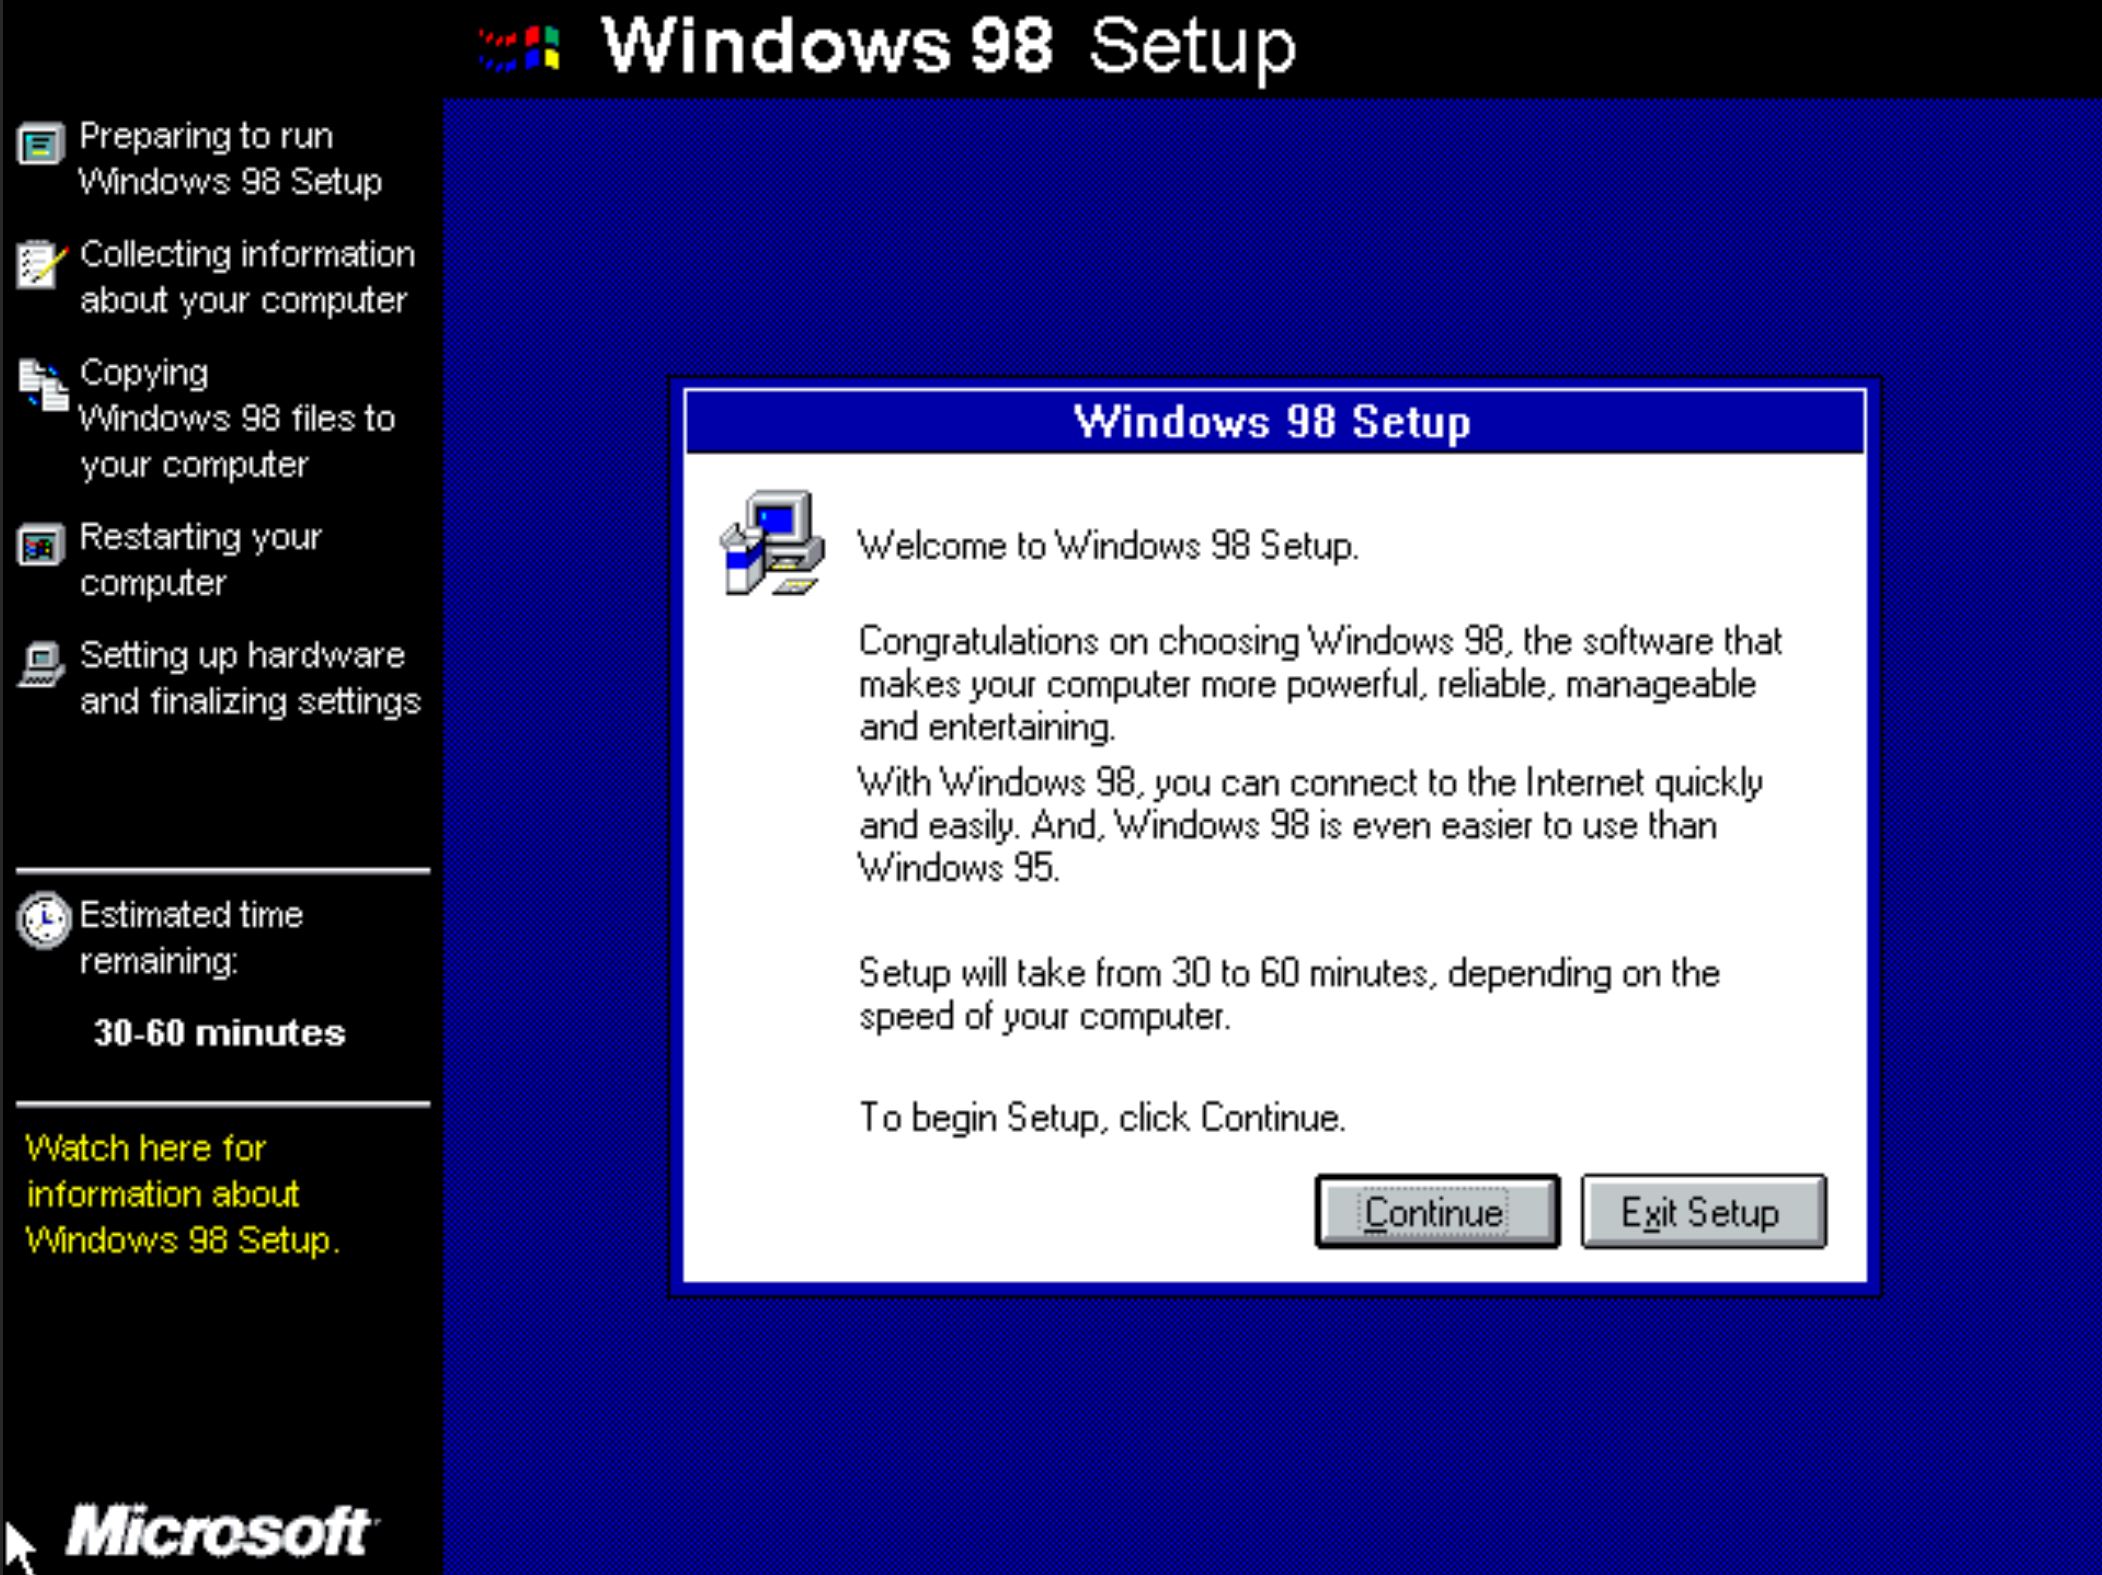
- You may have to wait about 1 minute, ignore any status messages until the Microsoft Windows 98 Setup page shows:
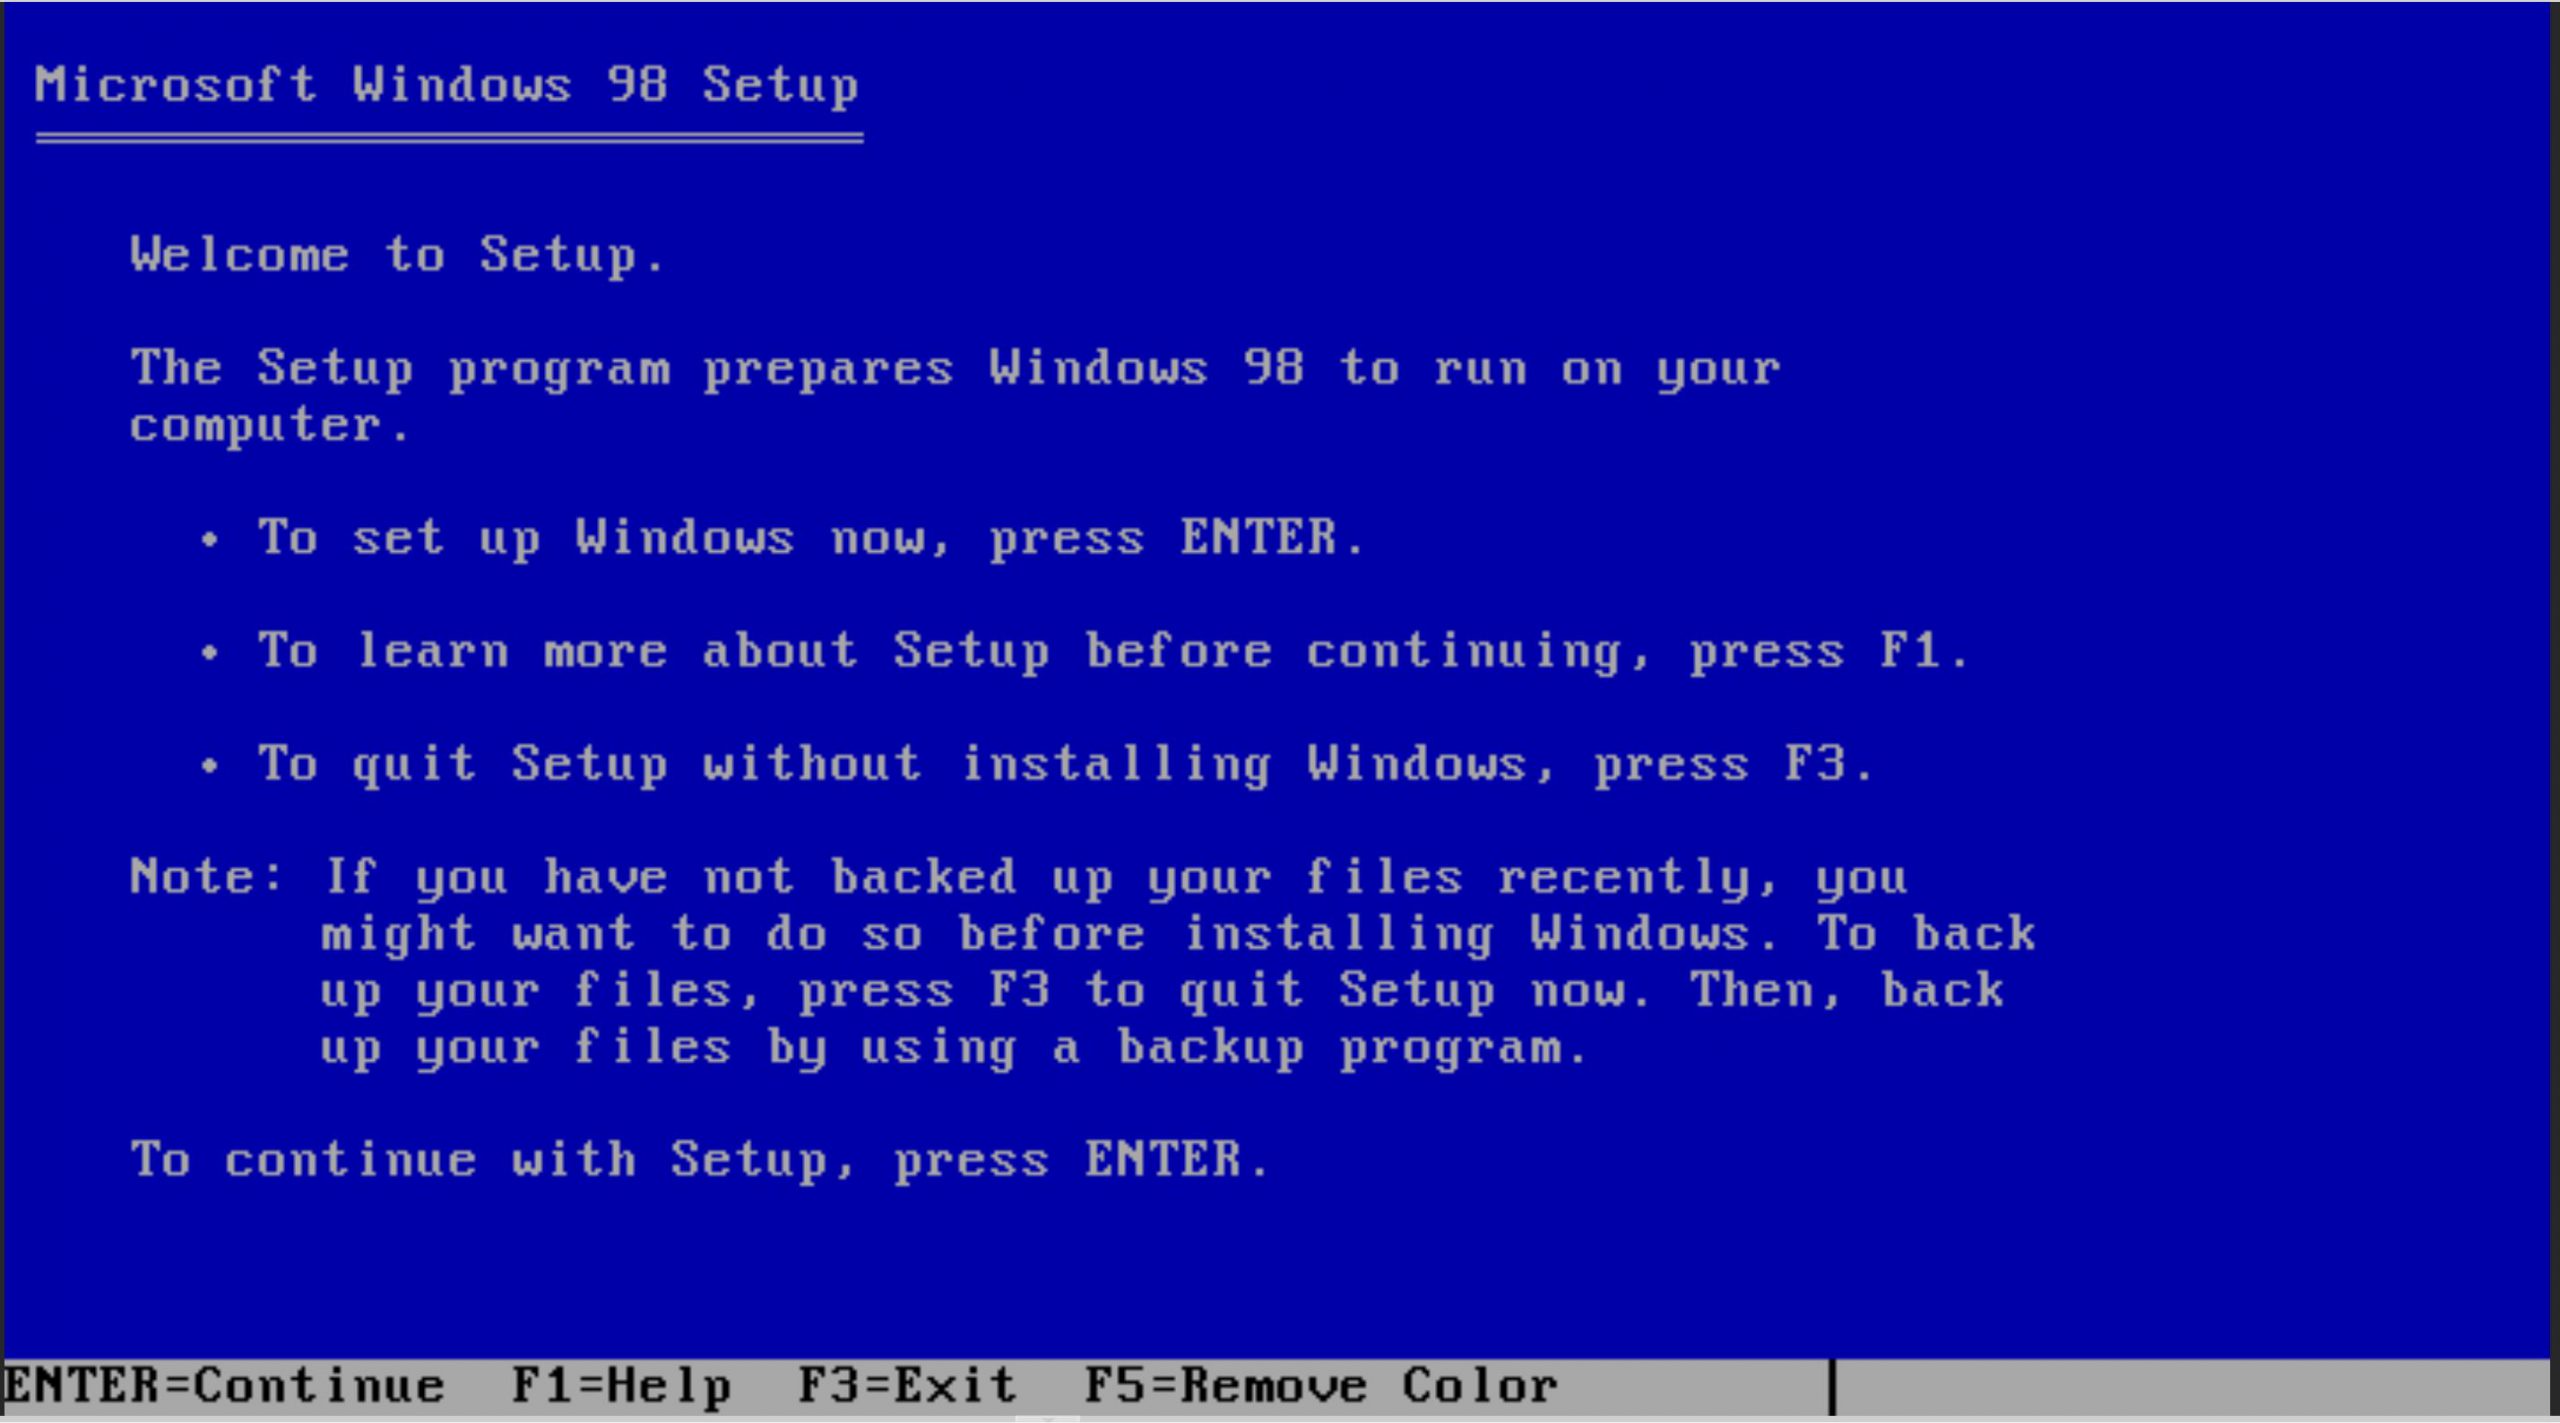
- Press your Enter key to continue past the "Welcome to Setup" page
- If a prompt to "Configure unallocated disk space" shows hit your Enter key
- If using over 512MB drive space, choose "Yes, enable large disk support"
- When you get to the step regarding restarting your computer, hit Enter
- VM will reboot
- Select option "2. Boot from CD-ROM"
- Wait a minute or so until you see the following screen:
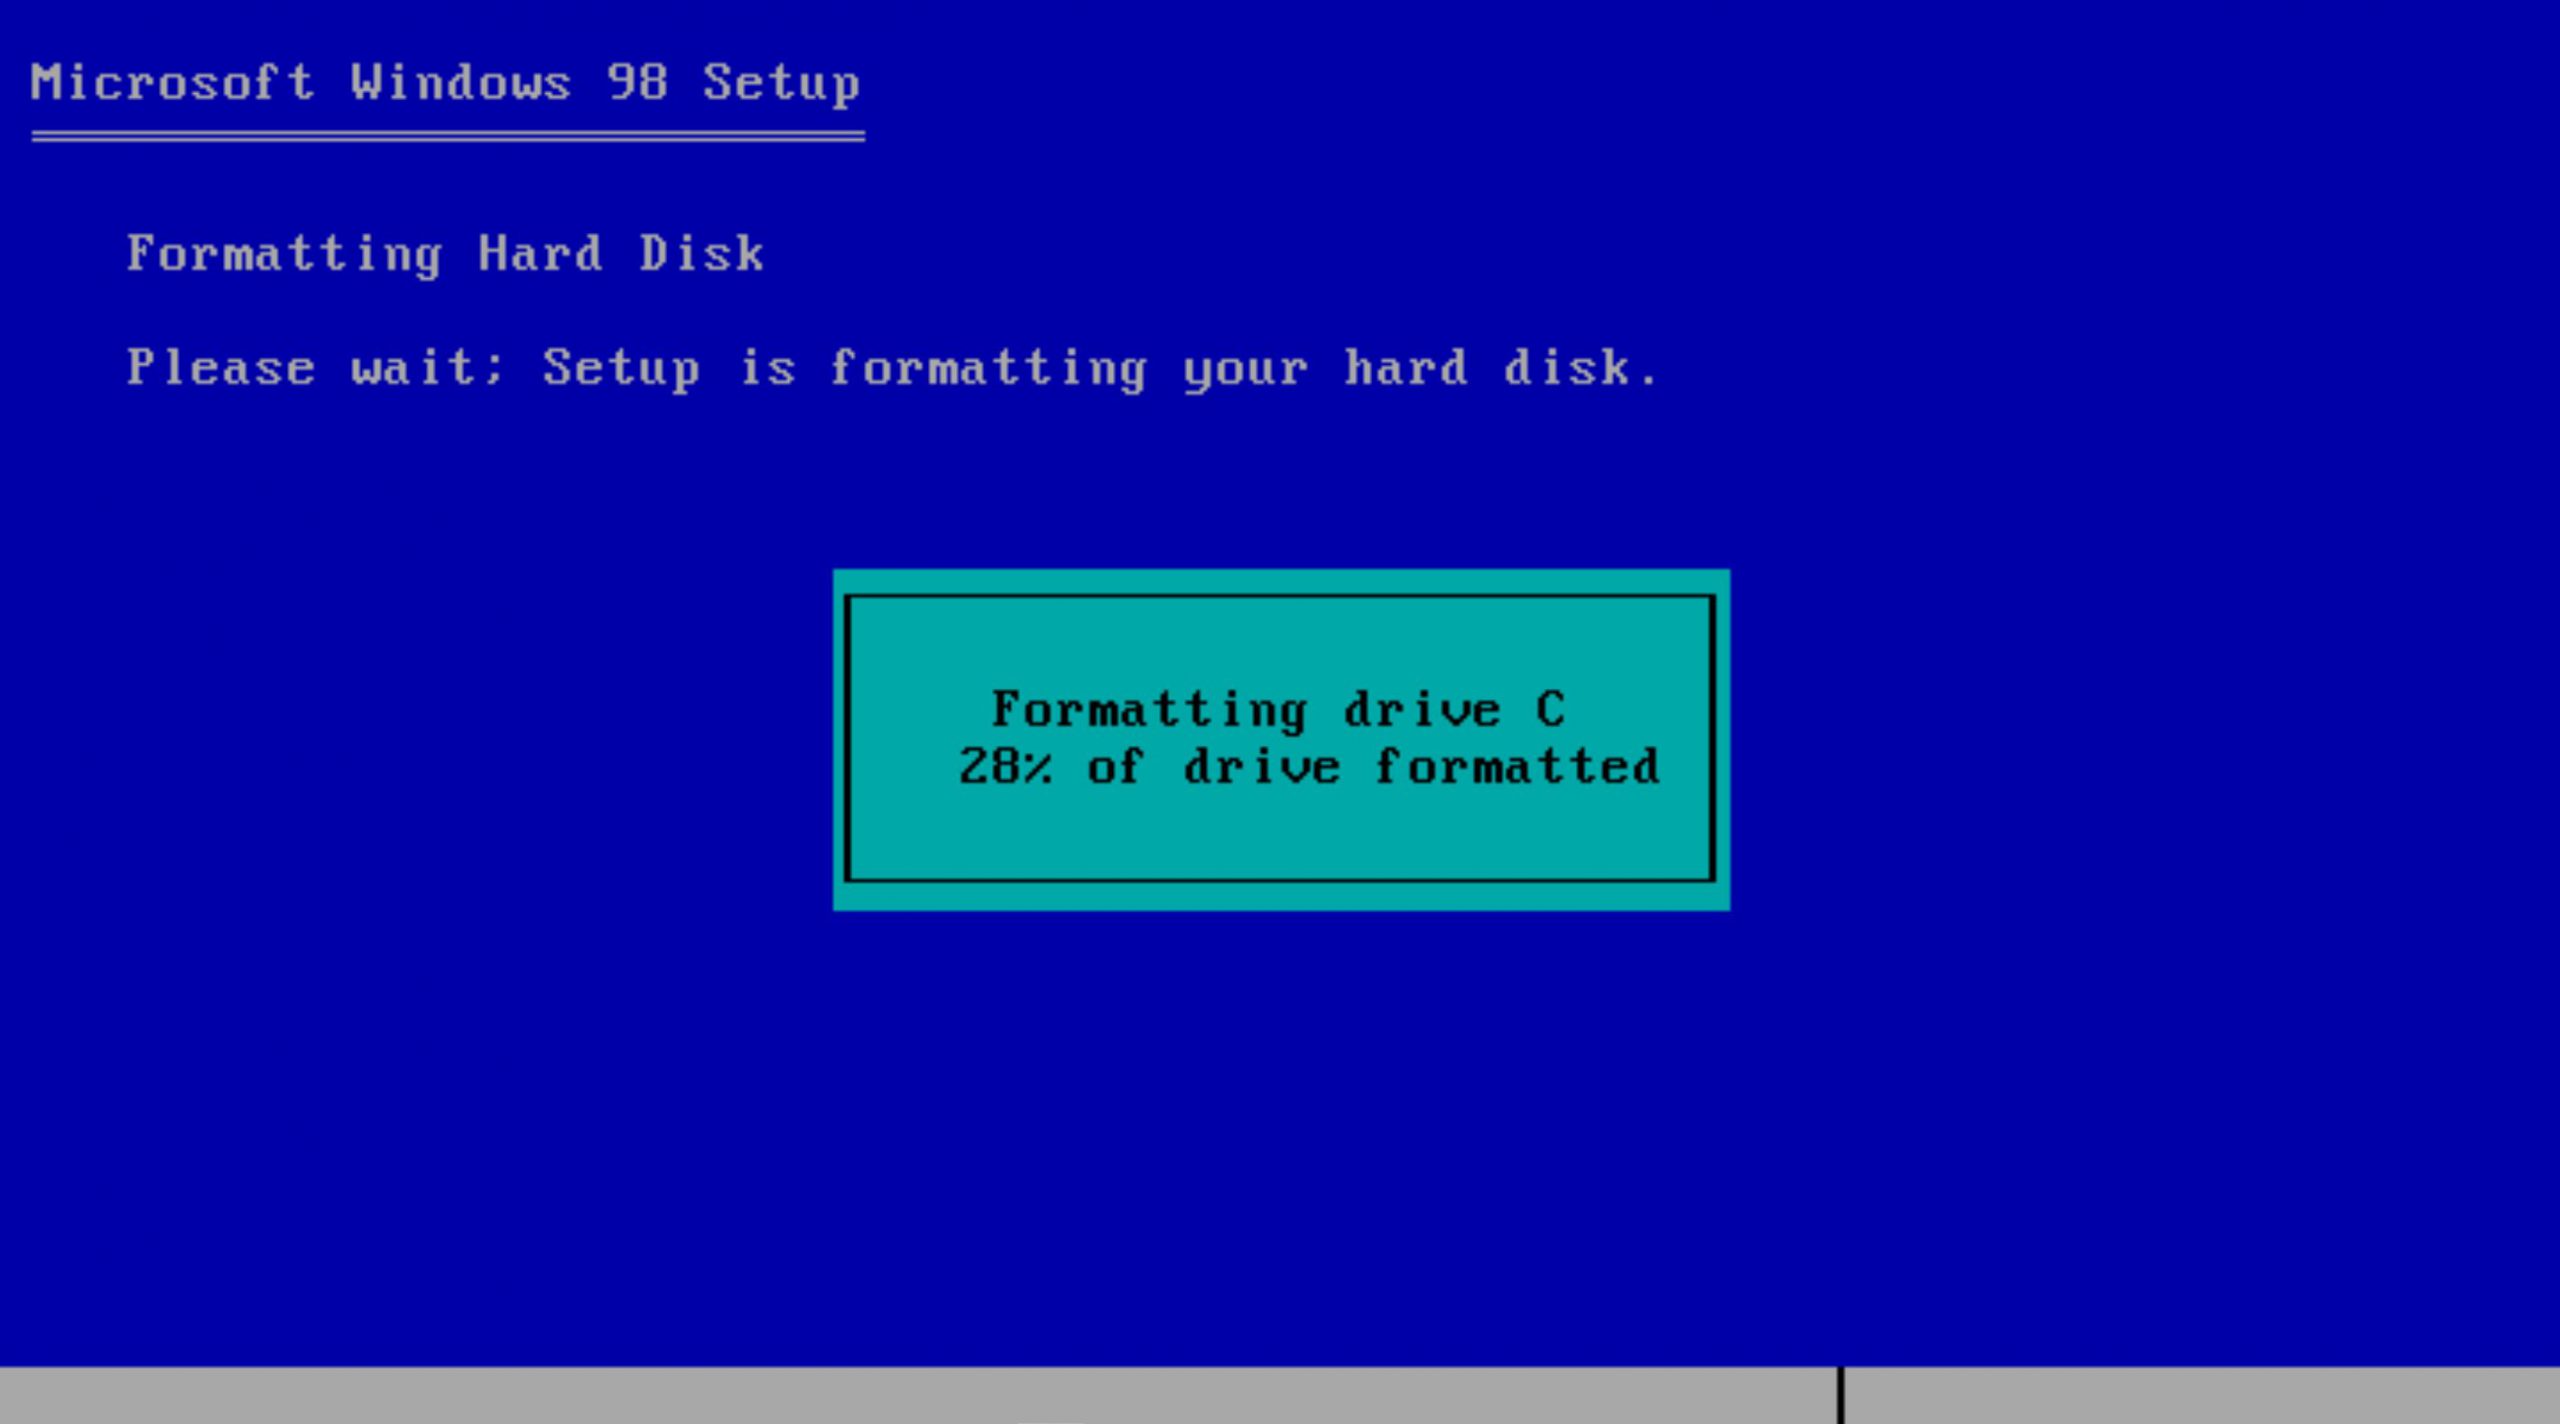
- Wait for drive to format
- Verify you are thinking about playing Minesweeper
- After drive is formatted, hit the Enter key to "perform a routine check on your system"
- Allow Microsoft ScanDisk to check drive C:
- Verify the Windows 98 Setup screen shows up
- Press "Continue"
- The mouse will be difficult to use
- Setup is preparing the Windows 98 Setup wizard, let the process continue
- Select C:\Windows for Directory, hit Next
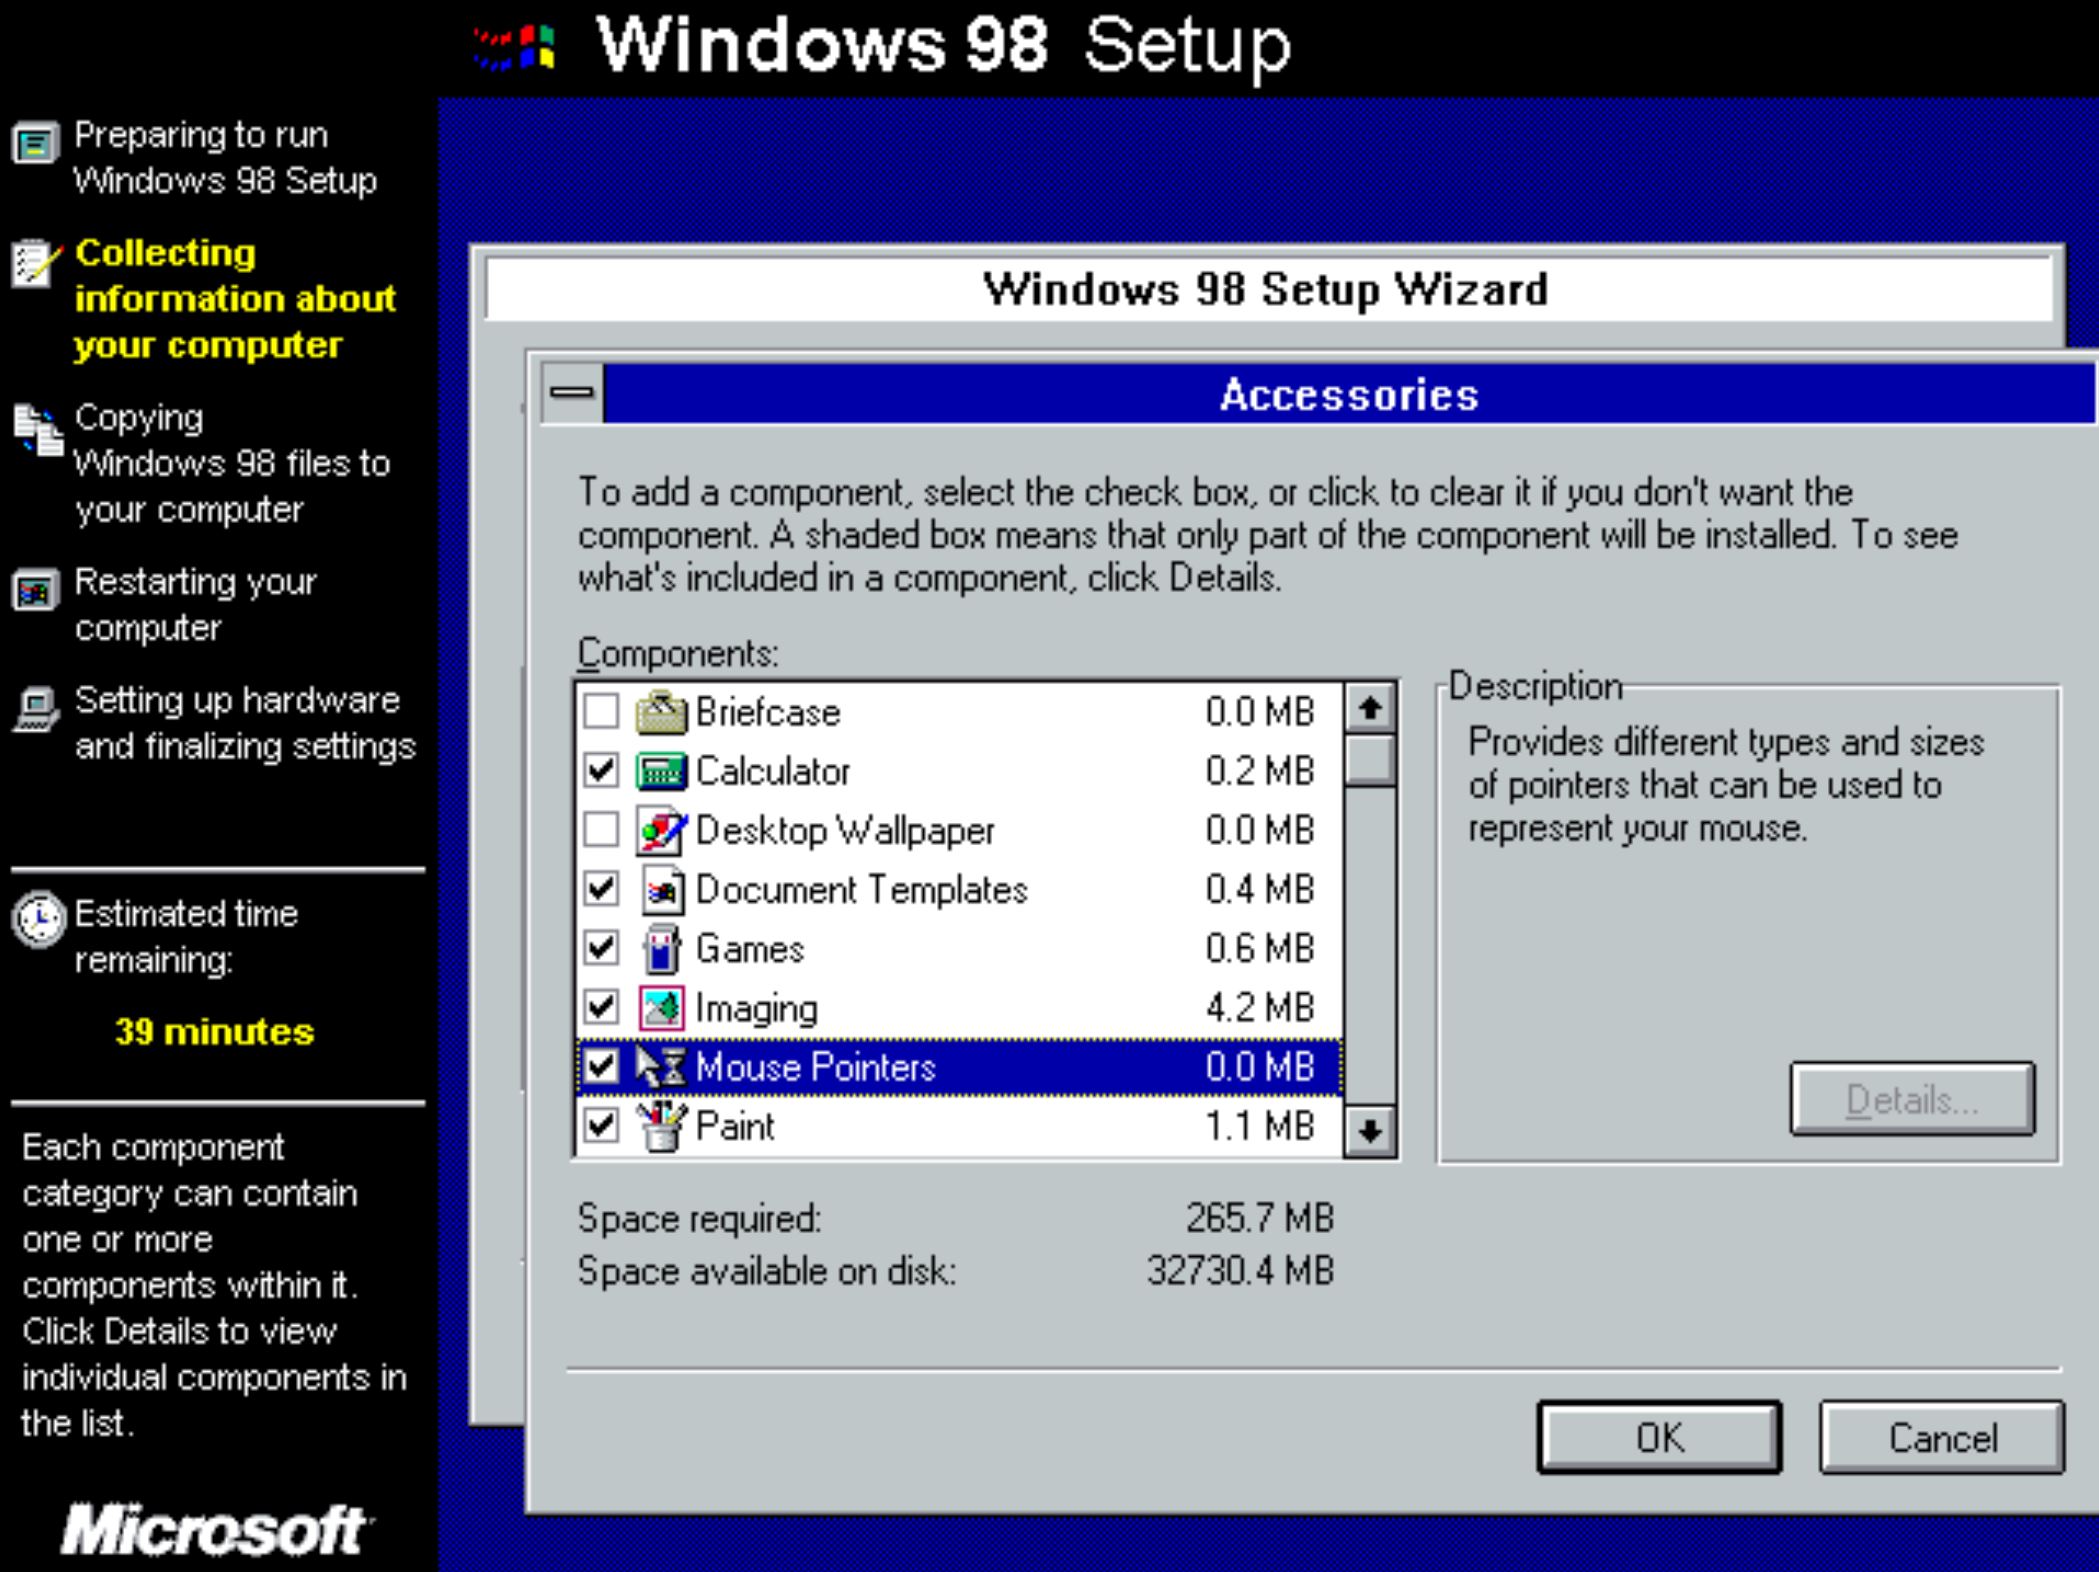
- Select Custom Install if you want to add more programs (You know you want the games)
- For adding games, go to accessories and click 'Details'
- Check the box for Games (You definitely want the extra Mouse Pointers too)
- Click "OK" to confirm
- Hit "Next"
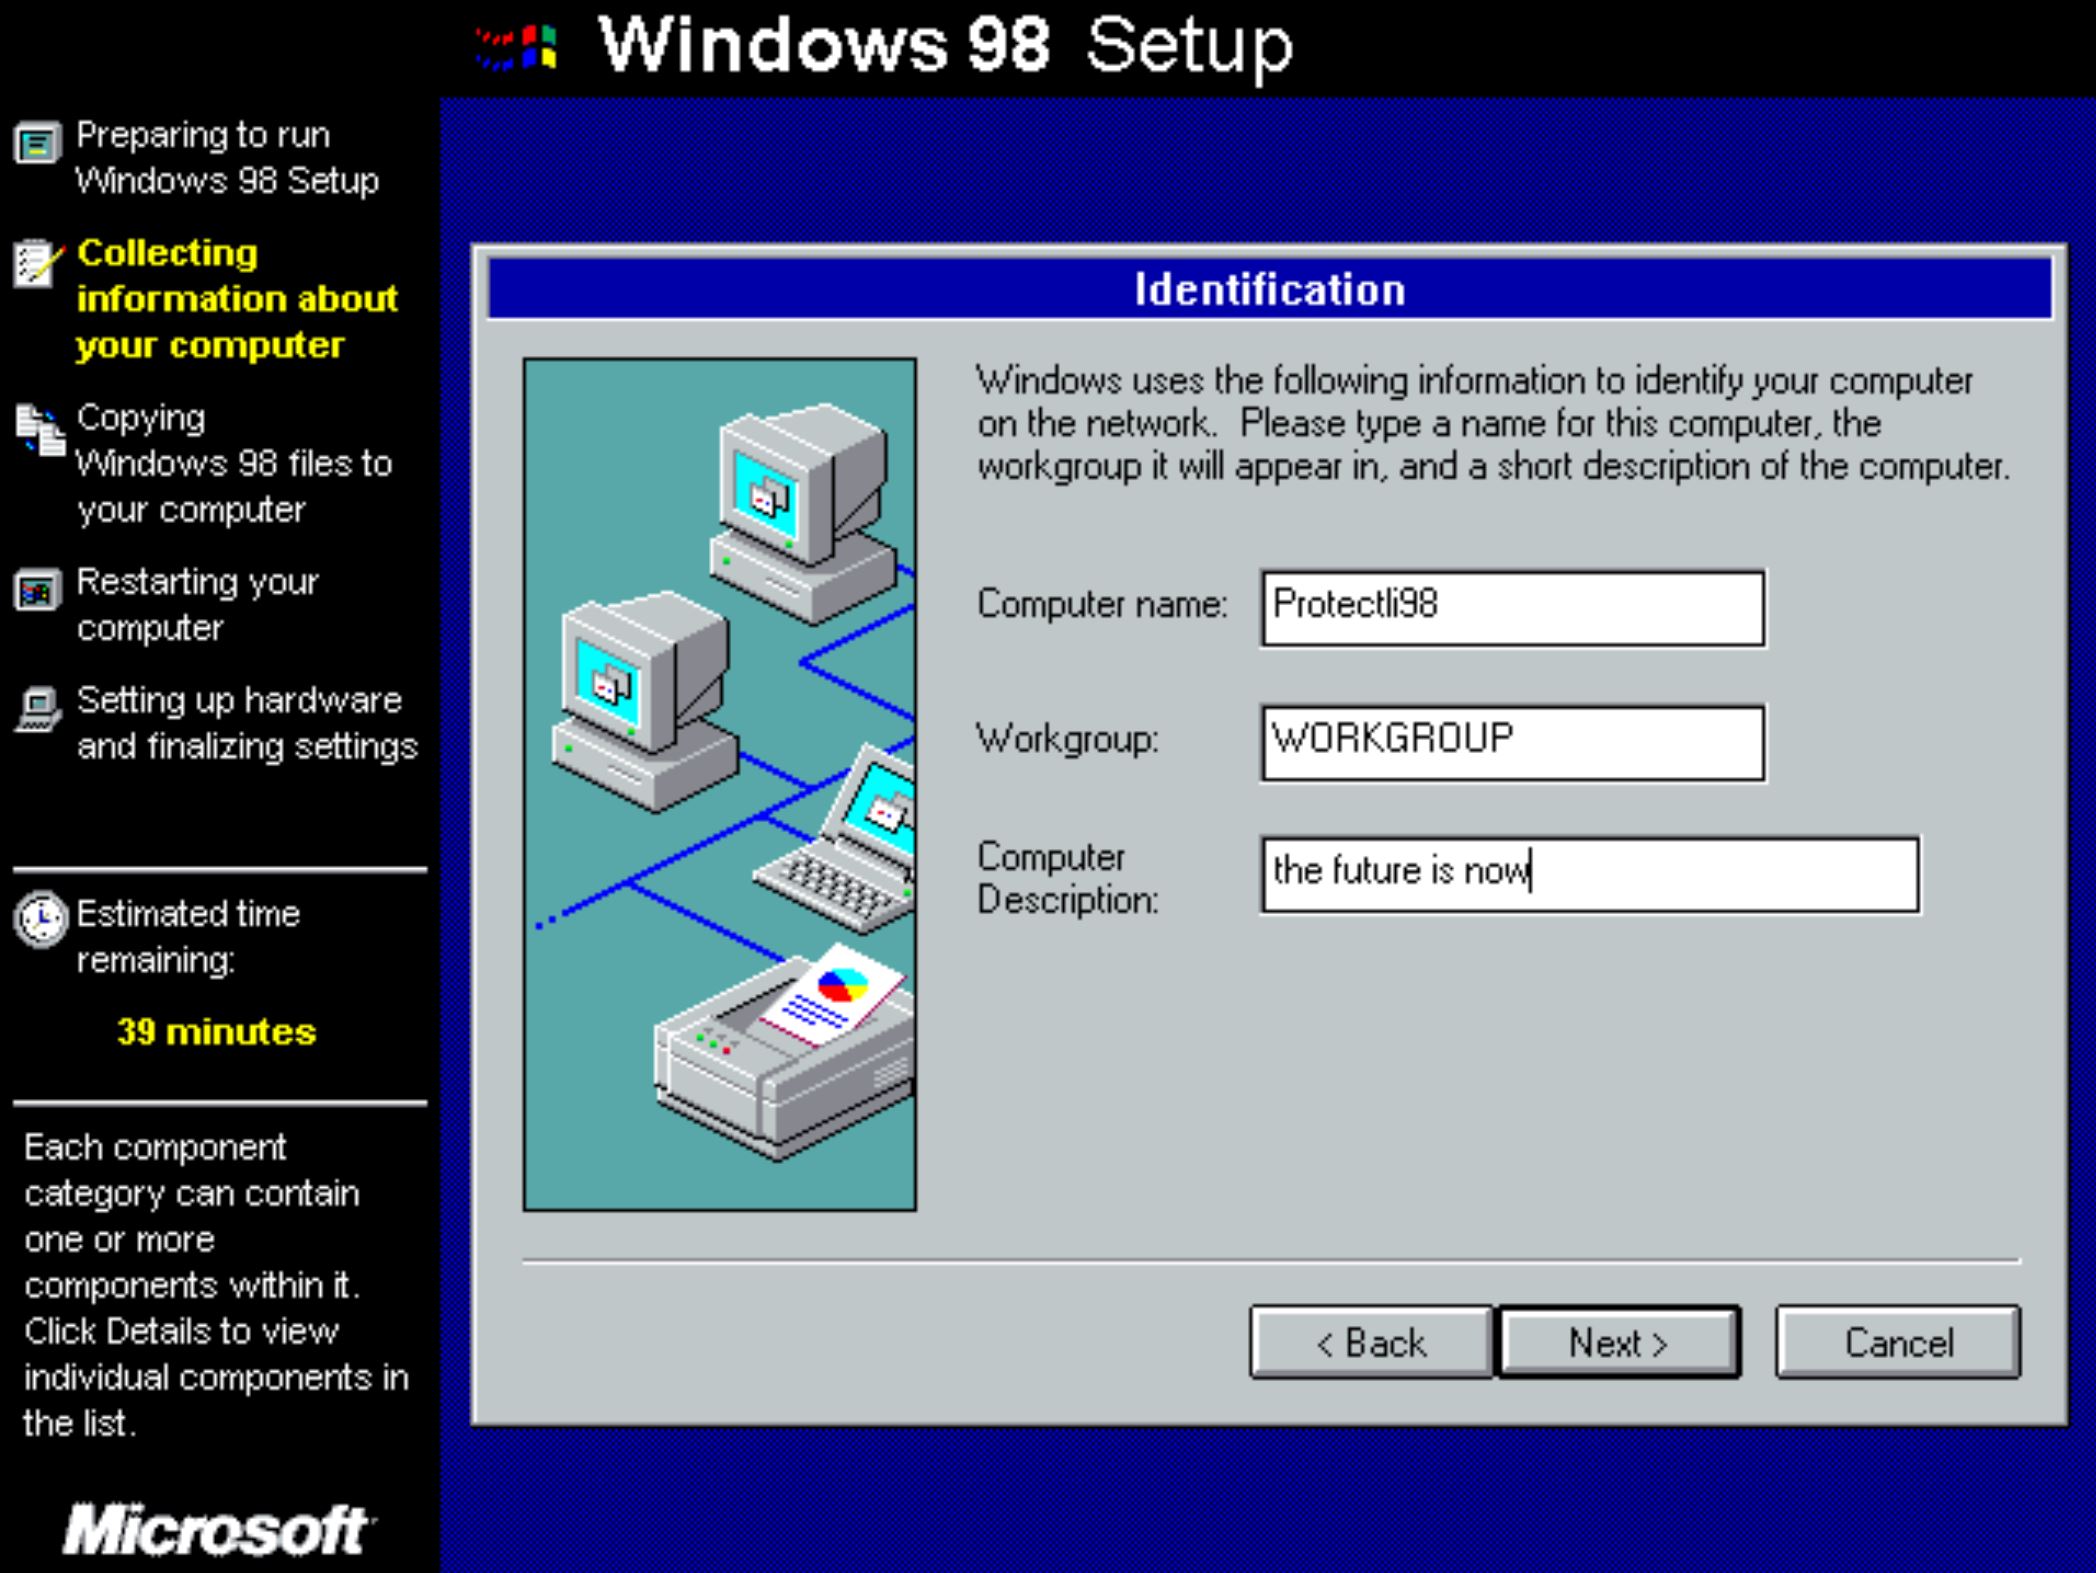
- Choose your computer name
- Hit "Next"
- Select "Next" for Computer Settings to confirm keyboard layout and regional settings
- Select your country for Establishing Your Location, hit "Next"
- Hit "Next" on Start Copying Files page
- Verify you are" sitting back and relaxing while Windows 98 installs on your computer"
- Verify you are reminiscing of the dial up connection tone
- After an excruciatingly long amount of time, a "Restart Computer" prompt should display
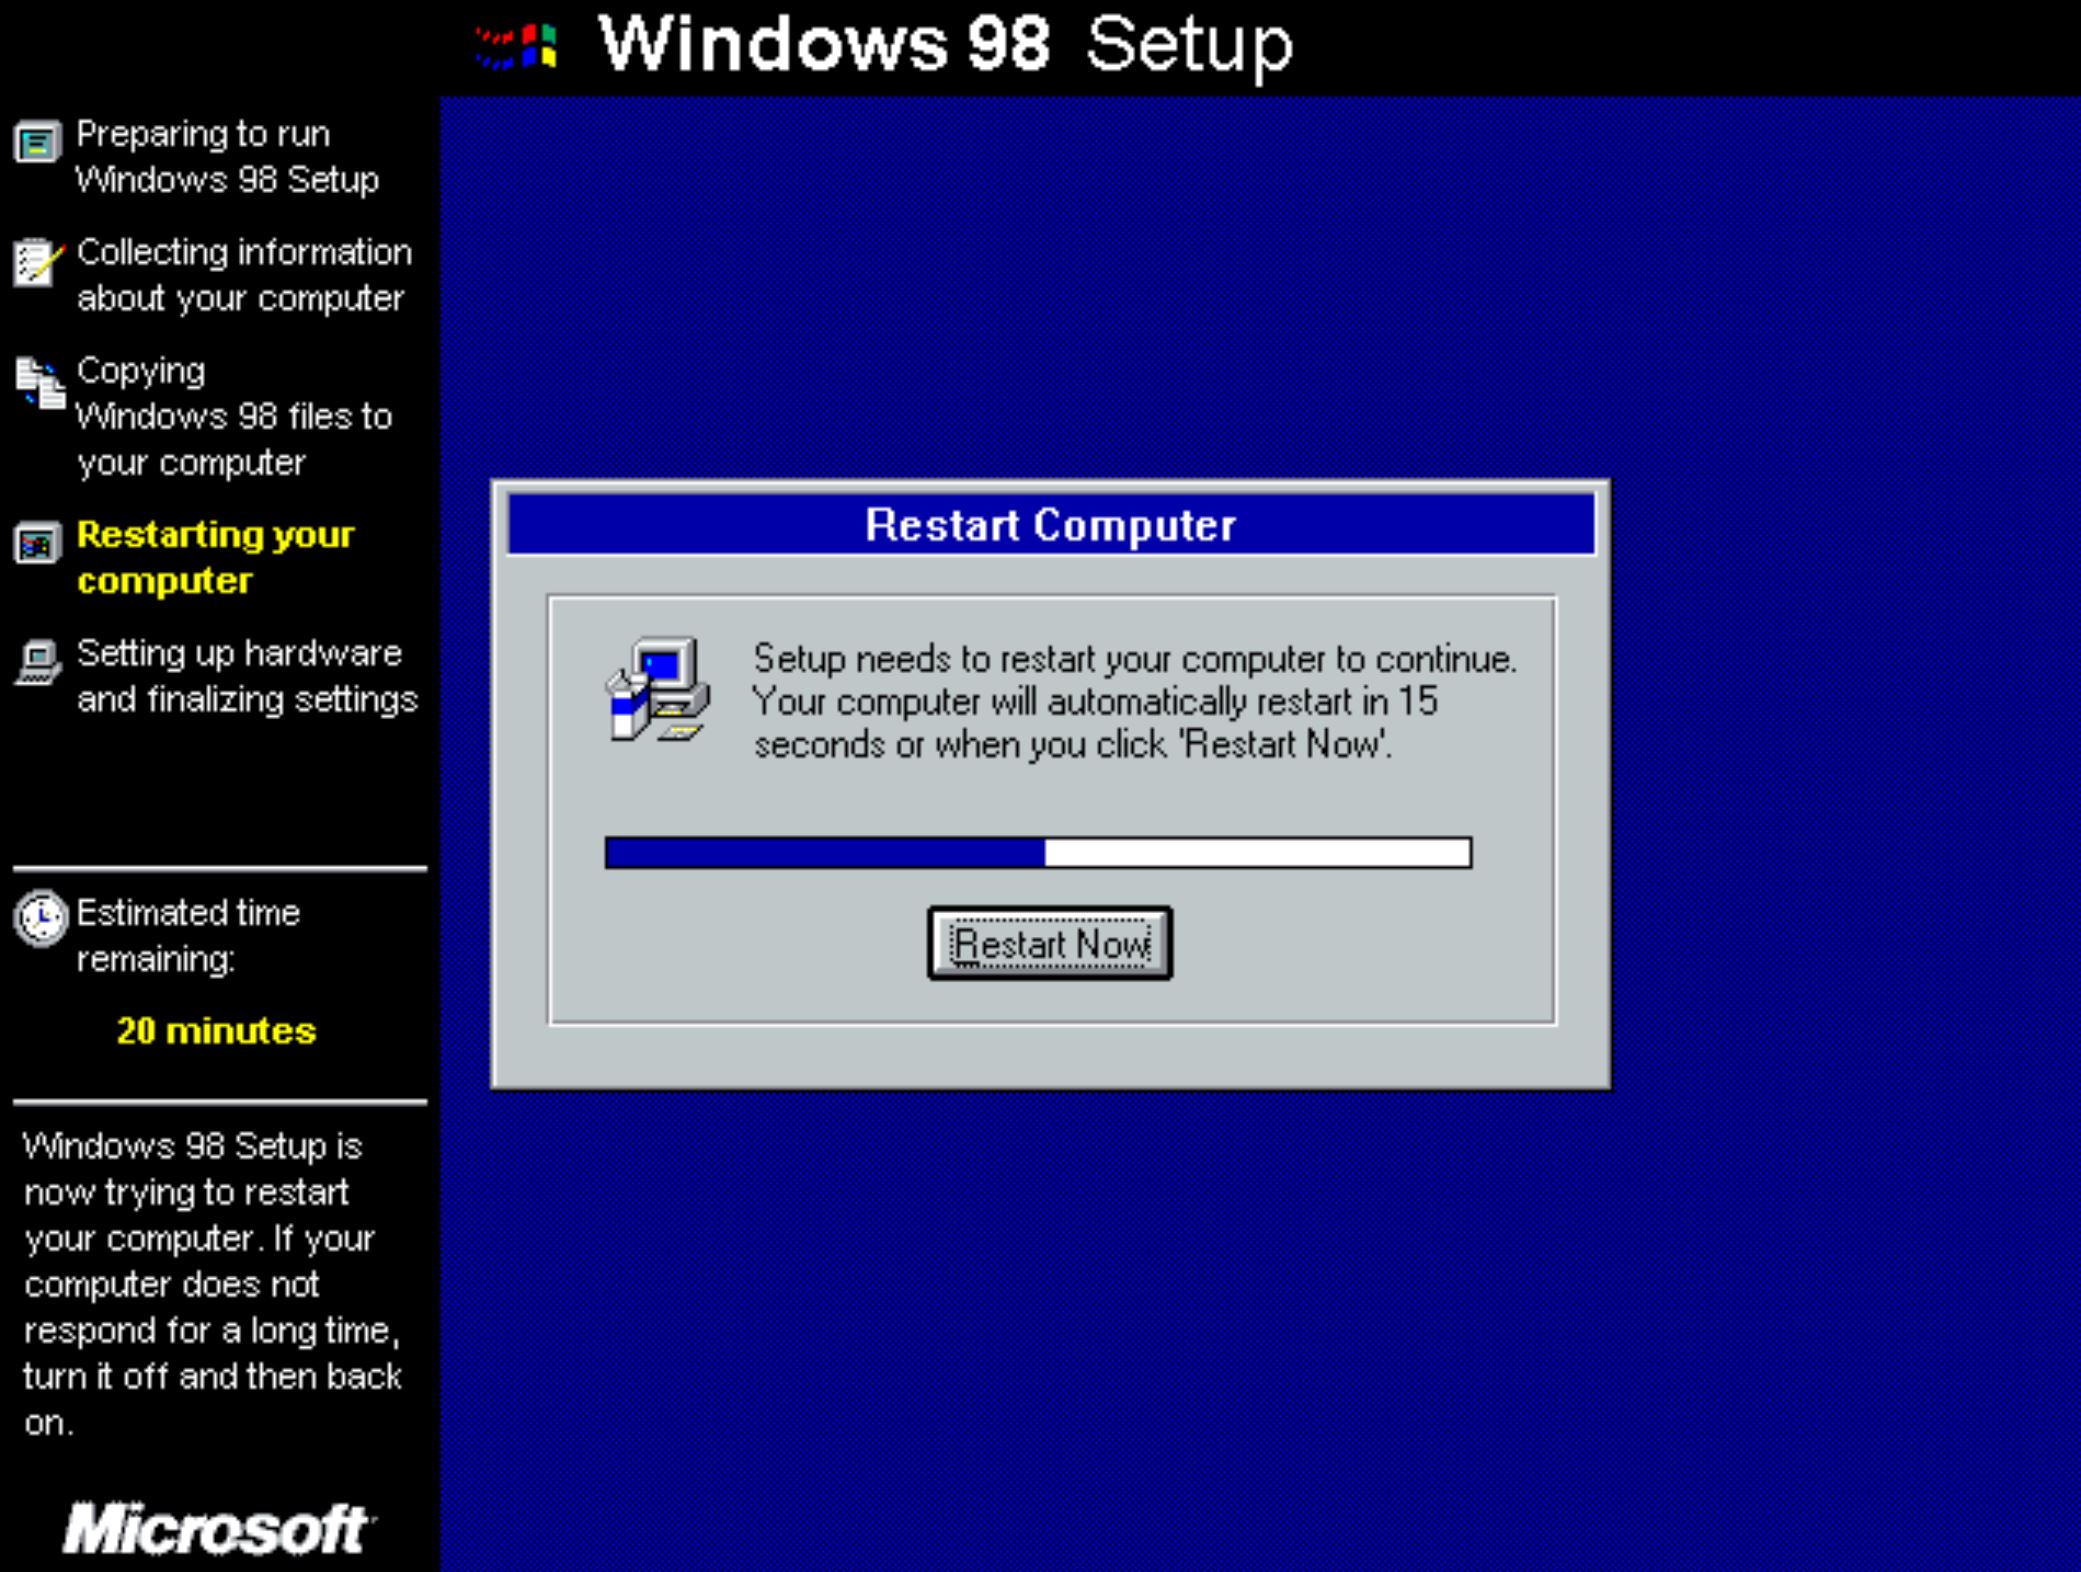
- Restart, let the OS reboot
- If any errors arise, try to ignore them and hit enter to continue
- Enter your name when prompted
- Accept agreement
- Enter your product key (no we won't supply one)
- Continue by hitting "Finish" and allow installation to continue
- Reboot if prompted
- Set date/time
- Let setup continue
- Windows will restart until Prompted for a Password
- Enter your desired Password
- Drivers will install
- Windows 98 is now installed! Wow! Look at that GUI! Isn't it beautiful? Bill, you've done it again.
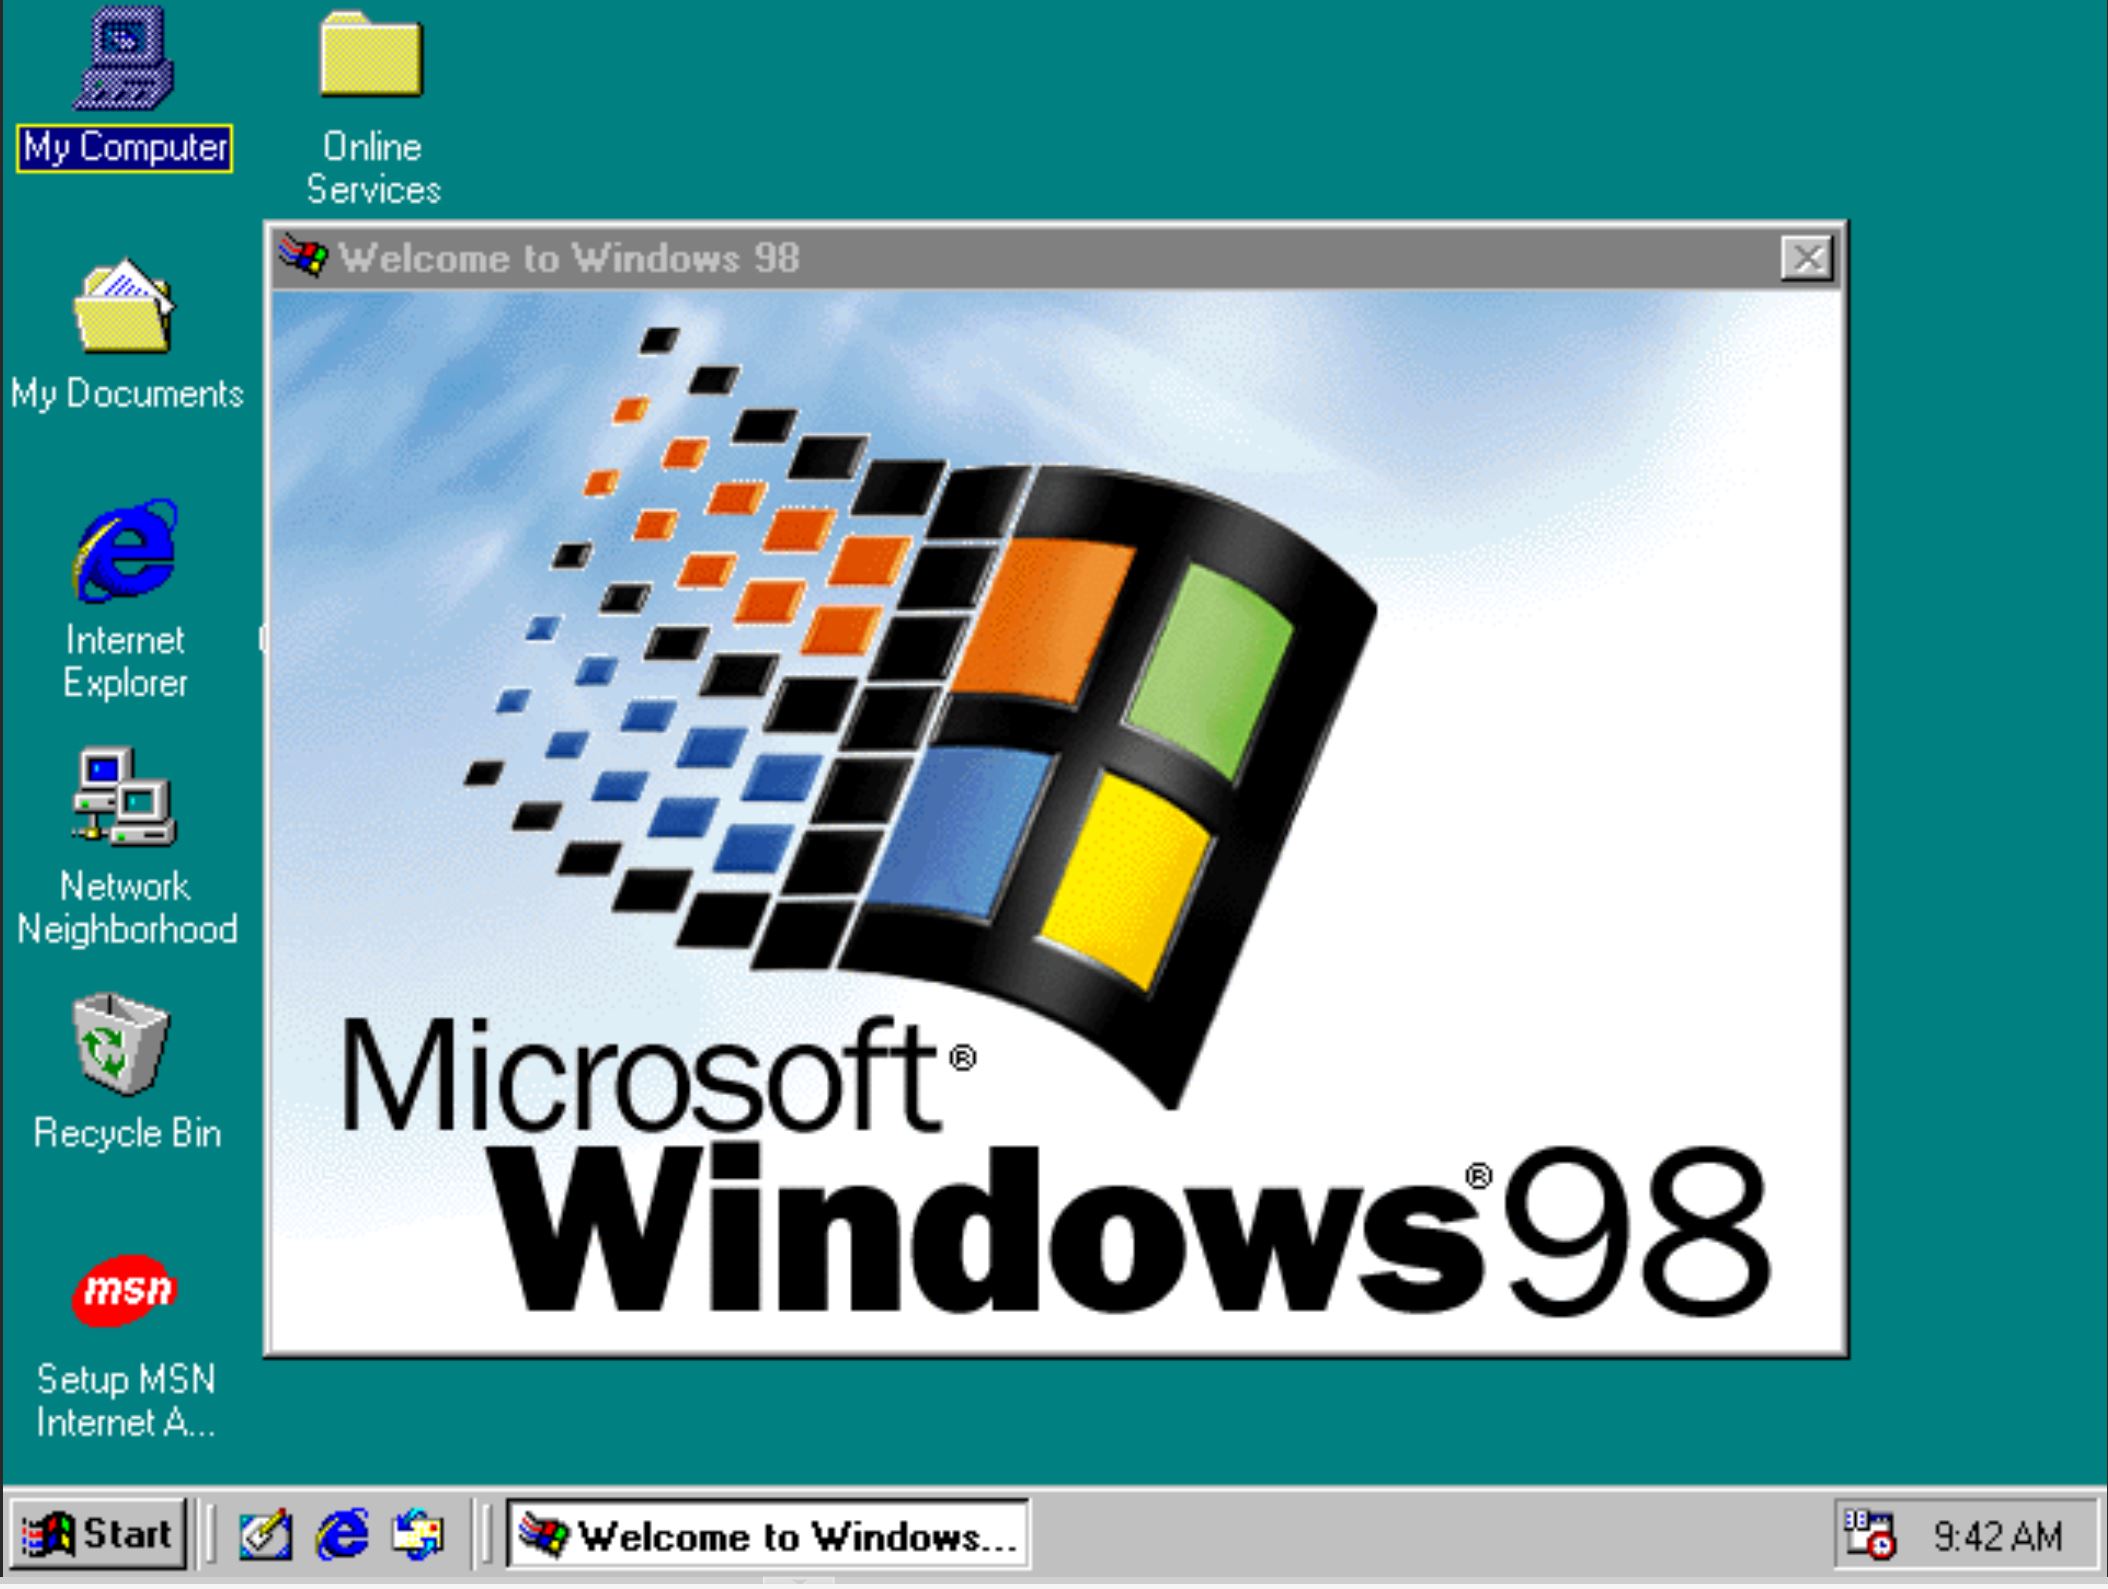
At this point Windows 98 is installed and useable. You may want to change the display resolution to get a better view of that gorgeous teal colored background. Doesn't get much better than that…
There are some better Graphics Adapter drivers available out there, those may be useful too.
If you have any problems with your Windows 98 VM install, we'd appreciate if you didn't open a ticket about it. Not to be rude, but it can't be that important…right?
Maybe you should just take Window's advice if you have any issues: