Have a Question?
How to install OPNsense in ESXi 7 on the Vault
ESXi Overview
This article explains how to install OPNsense 22.1.2 Community Edition (CE) on ESXi 7.0U3d using our FW6A vault. We installed 64GB of RAM and 480GB of mSATA, but your configuration may differ. Although ESXi 6.5 and 7.0 tested successfully, we recommend using our higher-end vaults, such as the VP or FW6 series. Hypervisors and virtual machines utilize significant resources; therefore, you should consider your current and future goals. Visit our knowledge base to learn how to install ESXi7 on the vault.
*Note: This is a basic install; therefore, consider your security requirements or organizational standards.*
1. Verify Hardware Recommendations
- Consider the following hardware requirements;
- vSphere ESXi 7
- VMware provides a hardware compatibility list and best practices based on available resources. Visit their website to ensure compatibility or our knowledge base installation guide.
- OPNsense
- OPNsense has three hardware specifications based on usage; minimum, reasonable, or recommended. For a detailed explanation of the above specifications and their minimum hardware requirement, visit the OPNsense website here.
- Virtual Machines
- Installation requirements apply to every OS. Identify your needs based on your selection by visiting their website. For example, we used Ubuntu 22.04 (Focal Fossa) recommendation.
- vSphere ESXi 7
2. Configuring ESXi for OPNsense
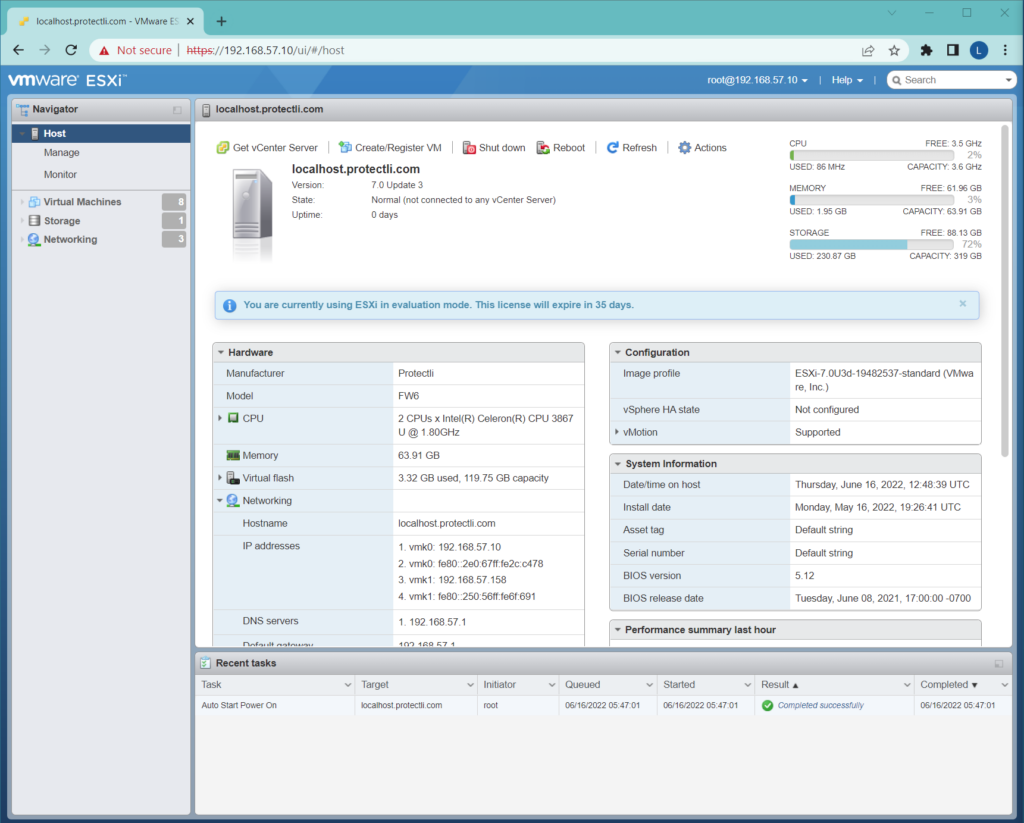
- Log in to the user interface via the IP you established during your ESXi installation. The home page should look similar to the image below.
*Note: ESXi's paid and trial versions provide different features; this example uses ESXi 7 evaluation mode.*
2.1 Verify Physical NICs
- Check your physical NICs by navigating to Networking > Physical NICs. Each NIC correlates to a physical port on the vault. Remember, the management network was to "vmnic0" during installation. Listed below are the FW6A available NICs and a table on how ESXi recognizes each port on the vault.
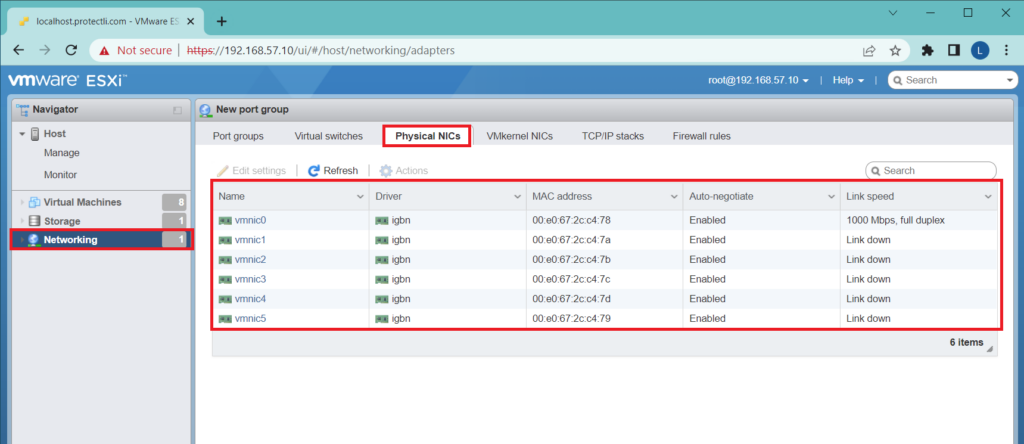
| Name | Vault |
|---|---|
| vmnic0 | WAN |
| vmnic1 | OPT1 |
| vmnic2 | OPT2 |
| vmnic3 | OPT3 |
| vmnic4 | OPT4 |
| vmnic5 | LAN |
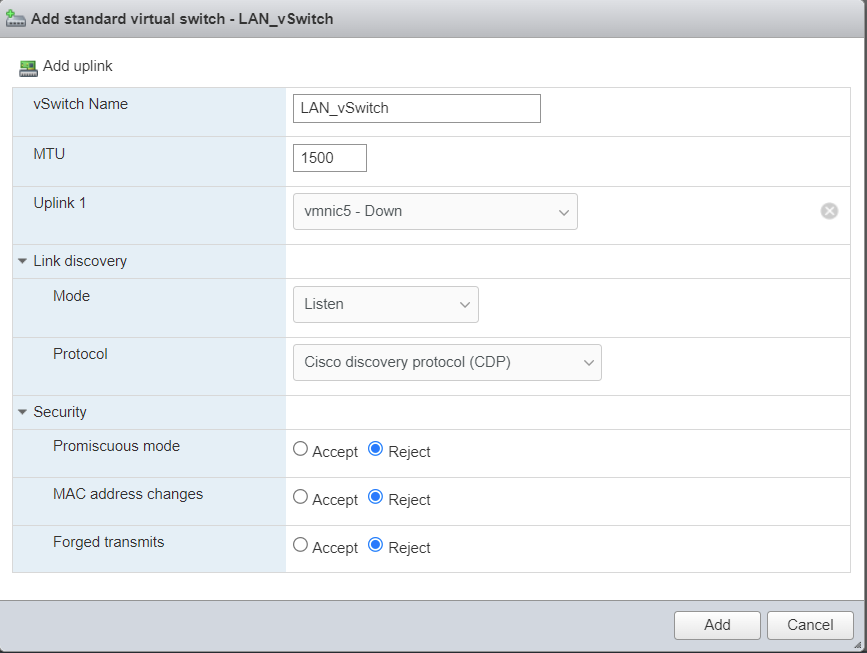
2.2 Create a Virtual switch
- Select the Virtual switches tab; ESXi creates a standard switch named "vSwitch0" during installation. By default, vSwitch0 connects two port groups; the Management Network and a VM Network. We need to create a LAN network to join all VM hosts; we use the name LAN_vSwitch. Start by selecting the Add standard virtual switch link. Only modify the vSwitch Name and Uplink 1 rows. We will use the default vSwitch0 for the WAN port group.
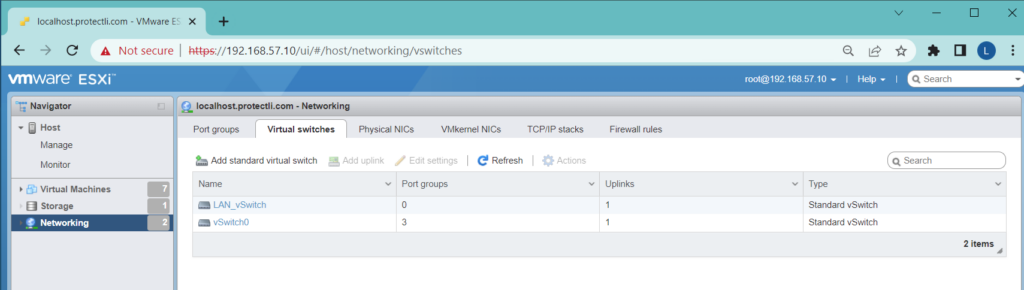
- The image below shows all virtual switches.
2.3 Create & Link Port Groups to vSwitches
- Navigate to the Port groups tab, where you will see the two default port groups. Start configurations by selecting Add port group. Ensure you assign the correct vSwitch to its port group, see the image below.
- Assign a name: LAN_PG
- Virtual switch: LAN_vSwitch
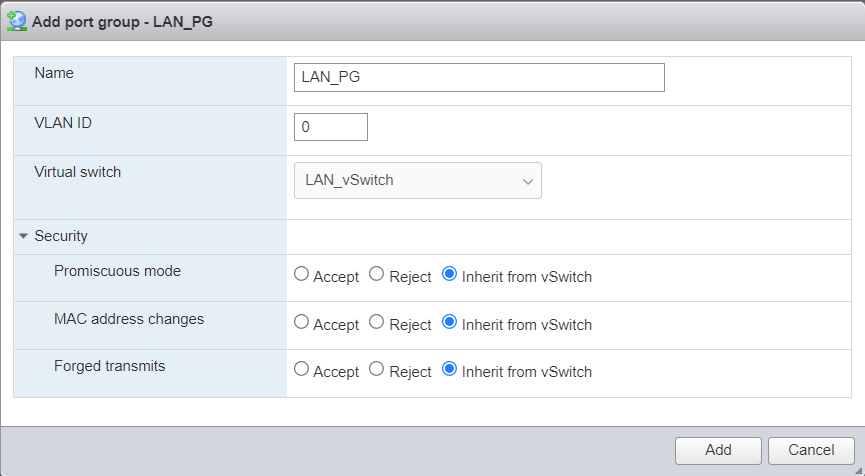
- Use the same steps to assign the WAN_PG.
- Assign a name: WAN_PG_FW
- Virtual switch: vSwitch0
- Promiscuous mode: Accept
- MAC address changes: Accept
- Forged transmits: Accept
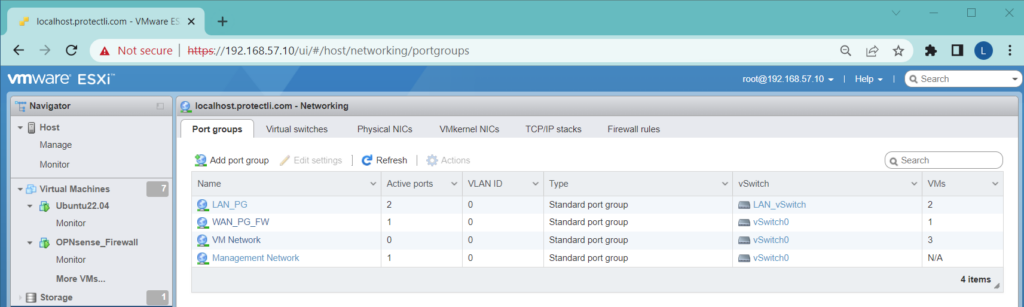
- The image below shows all port groups.
3. Creating Virtual Machine
- Navigate to Virtual Machines from within the Navigator on the left. Listed are all the VMs previously created.
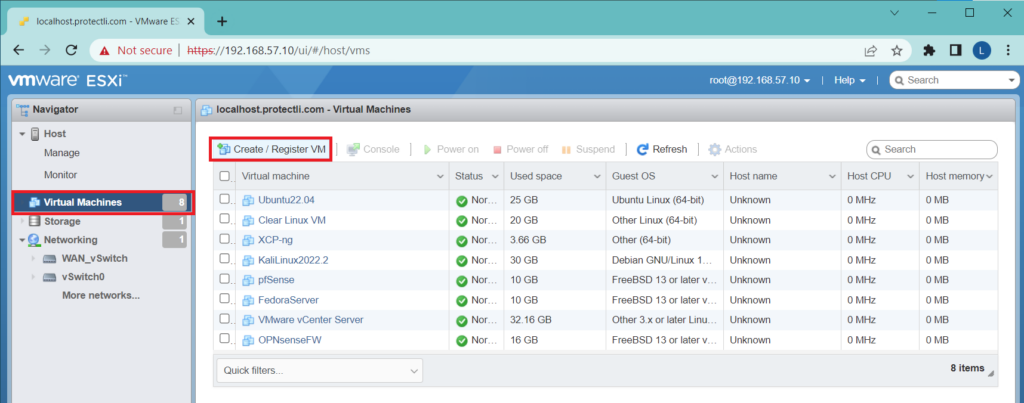
- Notice we have several VMs, but we will create another for test practice named "OPNsense_Firewall."
- Select Create / Register VM to start creating a new VM.
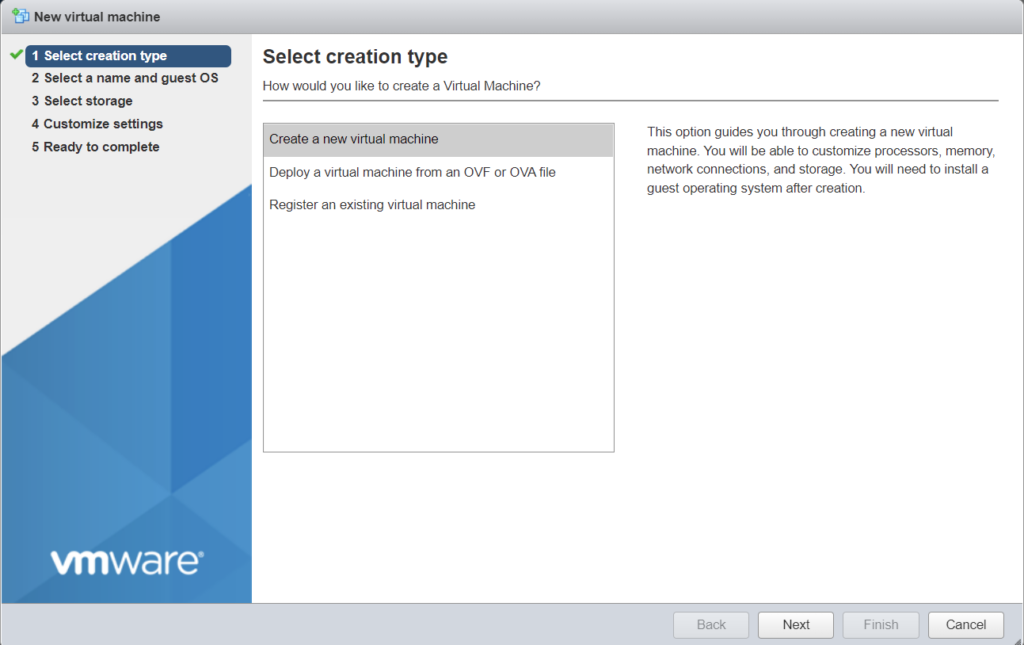
3.1 Select creation type
- We used the first option, which utilizes a ".iso" to create a new virtual machine. Select each one to read more. Use the images to follow along with the ".iso" method. VMs are powerful if installed correctly. Only change the configurations listed and shown unless experienced.
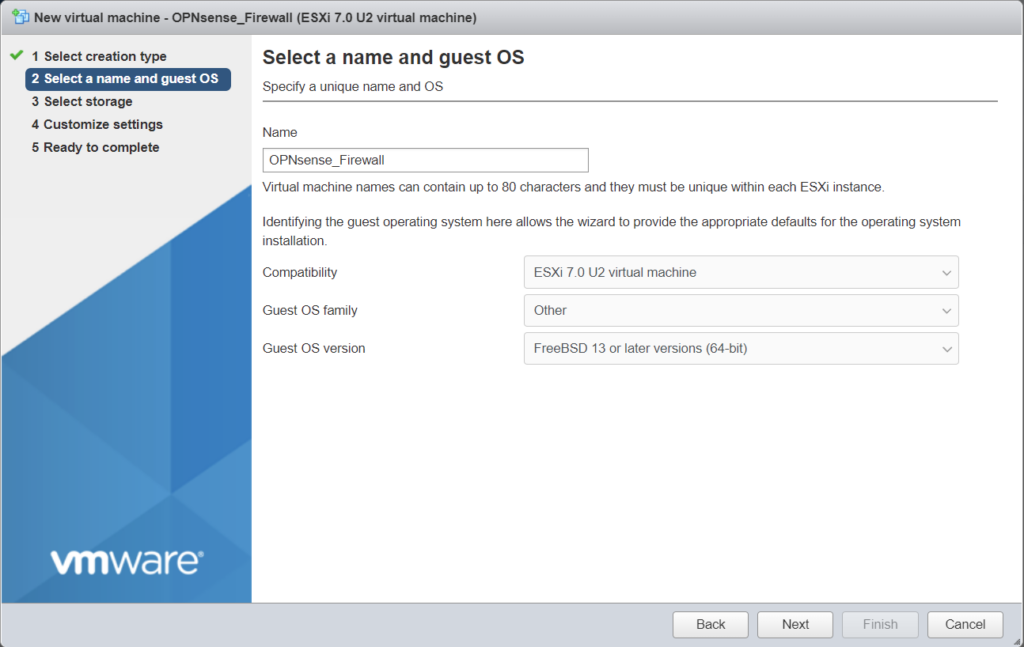
3.2 Select a name and guest OS
- Name: OPNsense_Firewall
- Compatability: ESXi 7.0 U2 Virtual Machine
- Guest OS version: FreeBSD 13 or later versions (64-bit)
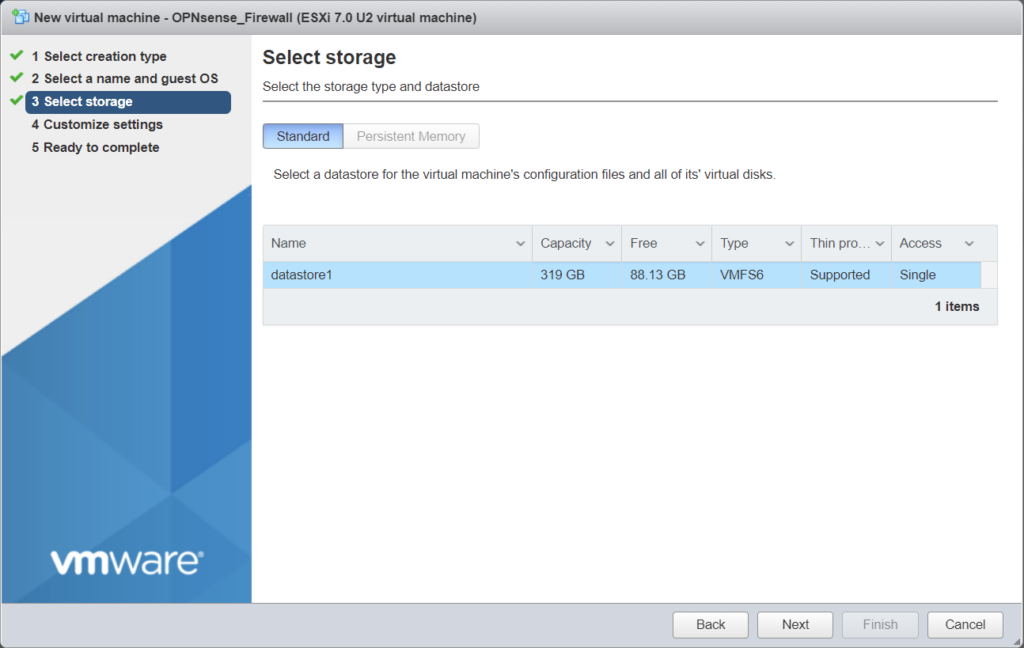
3.3 Select storage
- Select a datastore to house your VM.
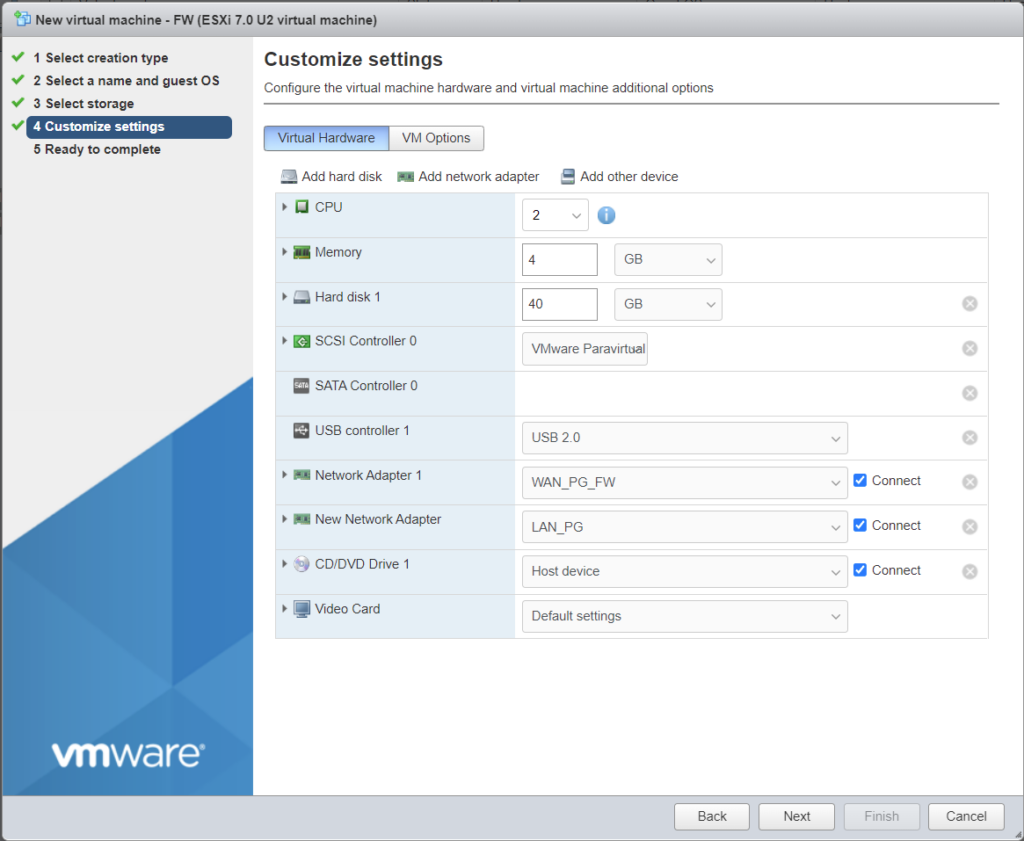
3.4 Customize settings
- CPU: 2
- Memory: 4GB
- Expand – Disk Provisioning: Thin provisioned
- Hard disk 1: 40GB
- Network Adapter 1: WAN_PG_FW
*Select: Add network adapter from above, then assign to Network Adapter 2: LAN_PG*
- CD/DVD Drive 1: use the drop-down menu to locate the uploaded file from the datastore.
- Click the Host device drop-down menu and select Datastore ISO file to open the datastore browser window.
- Select your datastore, then Upload at the top left to find and upload the OPNsense ISO file. Wait until it uploads, then proceed.
- Click the uploaded ISO and press Select.
- Ensure upload by expanding CD/DVD Drive 1 on the left and viewing the file in the CD/DVD Media section.
Ensure all settings with "connect" or "connect at power on" are checked. See the image below.
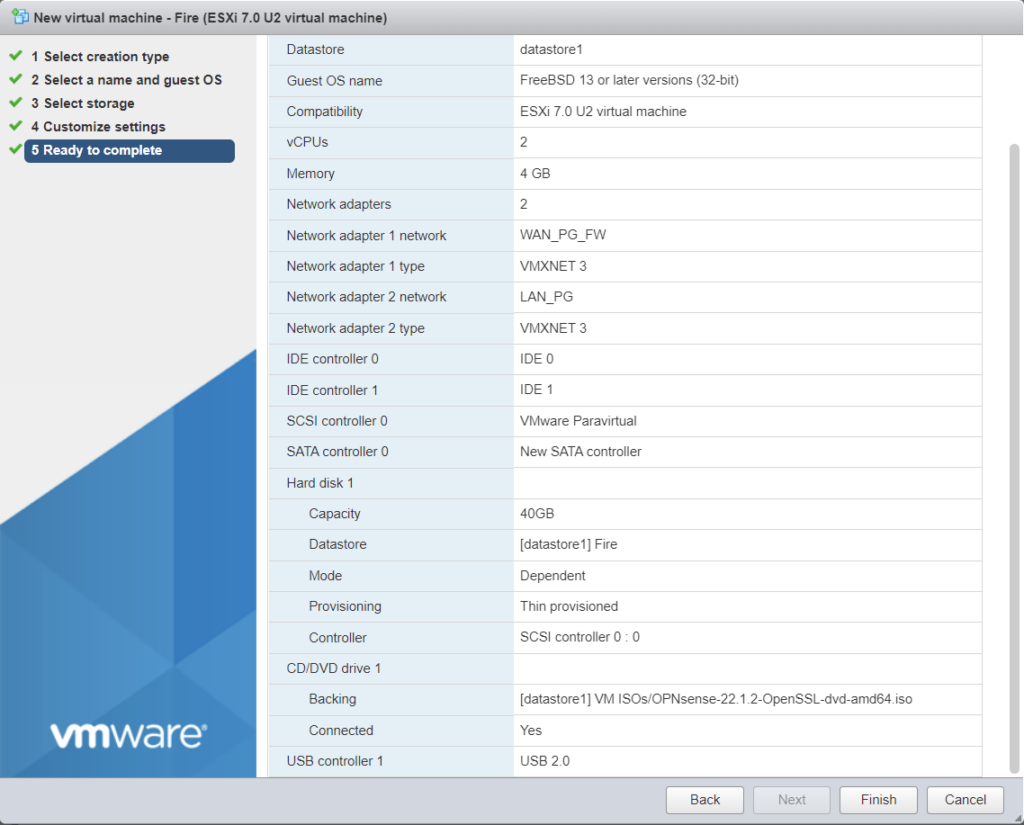
3.5 Ready to complete
- Click Finish
4. Verify Connection
- Select your newly created VM "OPNsense_Firewall" from the Virtual Machines. Examine your configurations to ensure accuracy, then select Power on.
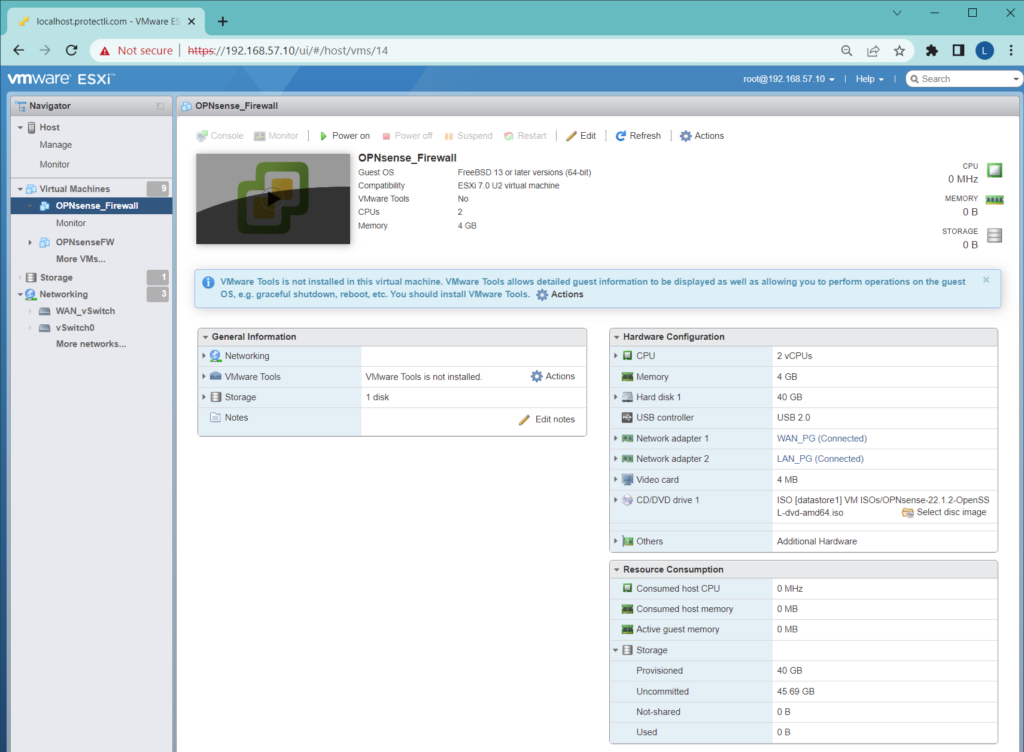
5. Install OPNsense_Firewall
- Allow OPNsense to run through all configuration modules until you see the login screen. Do not worry if something fails, but the VM manages to get to the login page. We can adjust the settings at any time once loaded. The goal is to install OPNsense on the allocated disk space instead of its current state of "live media."
*There are several ways to install a firewall on ESXi*
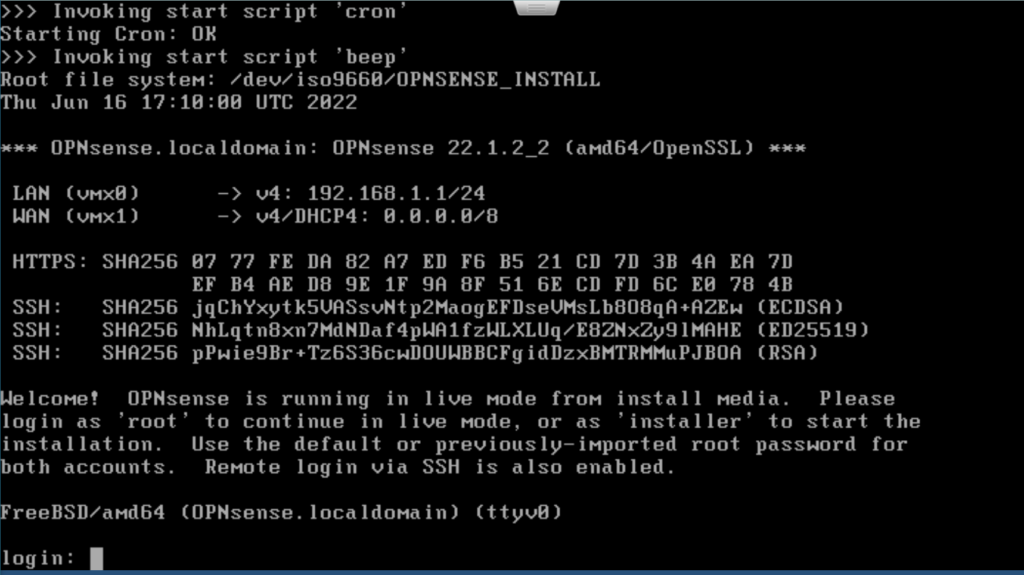
5.1 Start OPNsense Installer
- Use the default login information to access the OPNsense installer.
- Login: installer
- Password: opnsense
5.1 Write to Disk
- Make the following selections or your own when installing.
- Keymap Selection: Continue with default keymap
- Task: Install (ZFS) ZFS GPT/UEFI Hybrid
- Virtual Device type: stripe Stripe – No Redundancy
- ZFS Configuration: select VMware Virtual disk by pressing the spacebar, and a [ * ] will appear.
- Last Chance: select Yes if the correct disk is selected, then allow it to complete.
- Final Configuration: Complete Install Exit and reboot
*Connect an ethernet cable to the FW6A LAN port, and leave the WAN ethernet port connected*
5.2 Configurations
By default, OPNsense assigns the WAN to vmx1 and the LAN to vmx0, but we need to reverse this. Use the steps in option one below to adjust the settings.
- Select option 1 Assign interfaces, then follow the on-screen prompts;
- Do you want to configure LAGGs now? N
- Do you want to configure VLANs now? N
- Enter the WAN interface name: vmx0
- Enter the LAN interface name: vmx1
- Optional interfaces: enter
- Do you want to proceed? y
OR
- Select option 2 for Advanced Configuration.
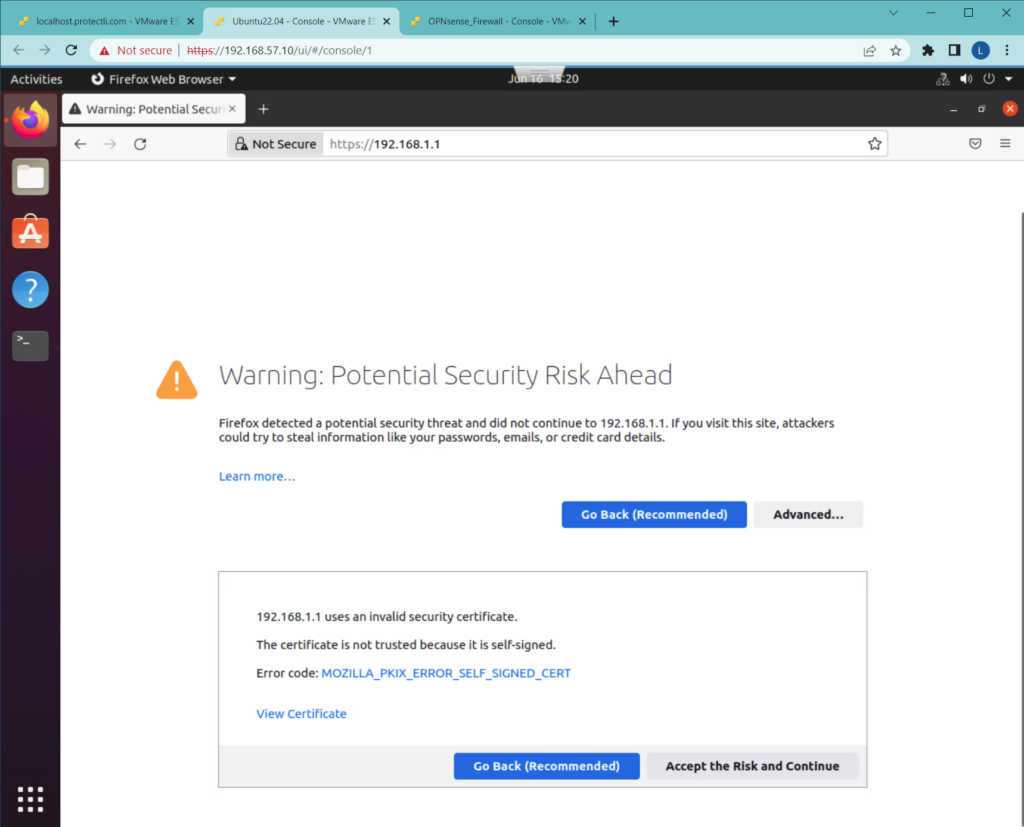
6. Accessing OPNsense GUI
- Power on any VM connected to the LAN_PG. Then, navigate to the default IP address assigned during 5.2 configurations.
- Accept the risk by selecting Advanced, then Accept the Risk and Continue.
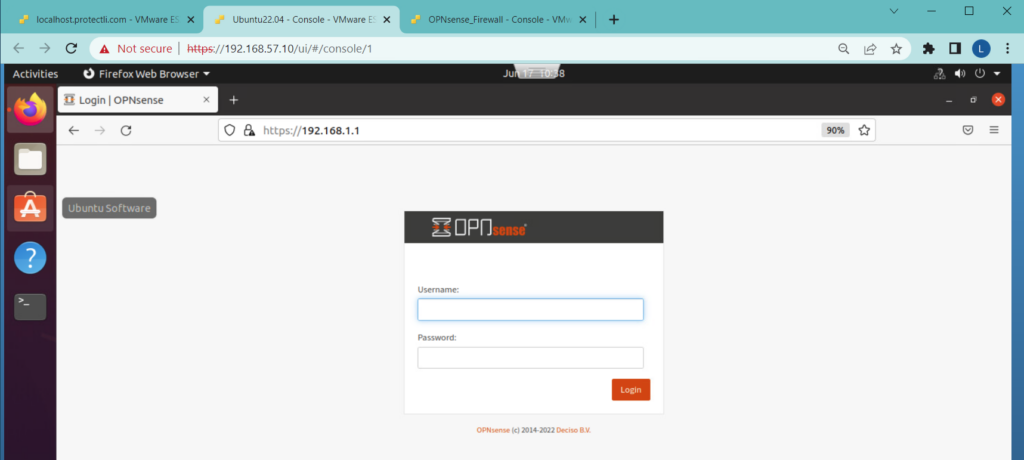
6.1 Login with the defaults
- Username: root
- Password: opnsense
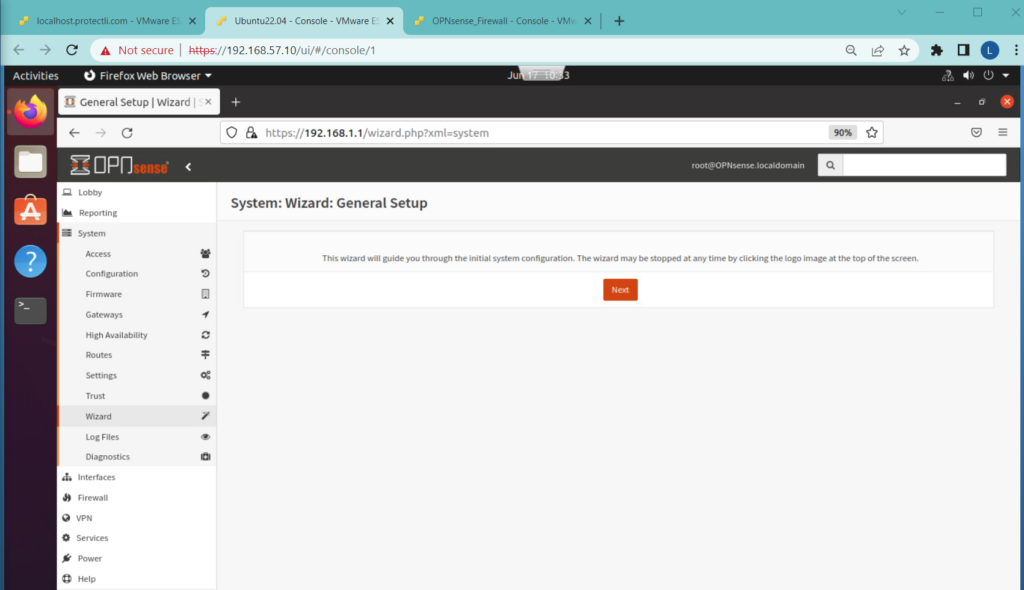
6.2 System Wizard: General Setup
- Apply the setting required by your organization or personal preference.
6.3 OPNsense Dashboard view
- Use the dashboard to verify services and more.
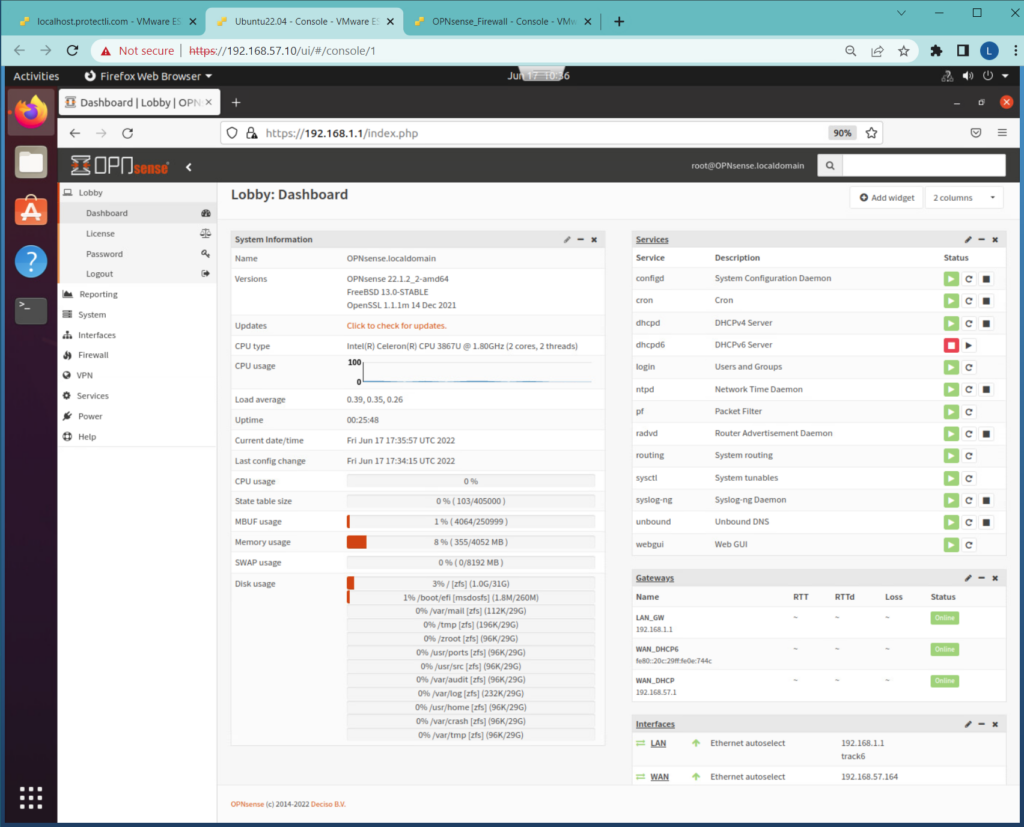
!Congratulations! You have successfully installed OPNsense on ESXi 7.
As always, if you need additional assistance, please contact us at support@protectli.com or find more information in our Knowledge Base.