Have a Question?
How to Install Windows Server and Hyper-V on the Vault
Overview
Windows Server is a server operating system developed concurrently with Windows 10. Hyper-V Server is a native hypervisor that can create virtual machines. It is included with Windows Server and some Windows client operating systems. Supported guest operating systems of Hyper-V can be found at this link. Hardware requirements for Hyper-V on Windows Server can be found at this link. This article was initially tested with Windows Server 2016, but we have recently tested Windows 2019 and 2022 as well.
**Installing Windows Server on one of our 2.5GbE capable devices like the VP2420 or VP4600 series will require additional steps to get the drivers required for the i225-V NICs. You will not have an ethernet connection until you manually install the needed drivers. This article includes a section that will detail how to do this.
Added: To install a fresh instance of Windows Server and Hyper-V onto the Vault, there is a relatively straight forward process that is very similar to installing any operating system onto any computer.
-
- Obtain the installation image
-
- Download software to transfer the installation image to a USB drive
-
- Install the new image
Obtain the Installation Image
Microsoft Hyper-V Server 2022 can be downloaded from the Microsoft Evaluation Center at this link. Scroll down and select Microsoft Hyper-V Server 2022.
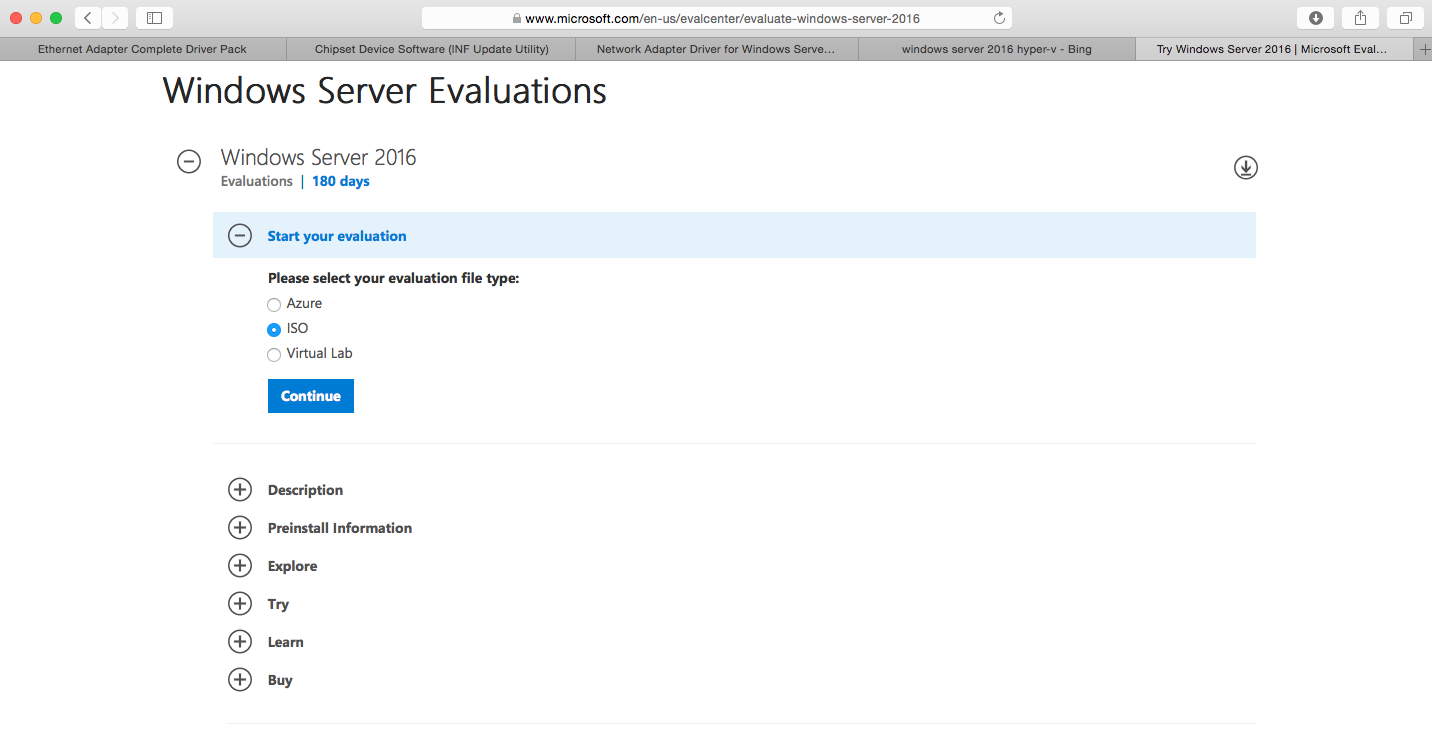
Download Windows Server 2016
Fill out the forms and follow the prompts to download the installation image. You should eventually have access to download the Window Server 2022 iso.
Select the 64-bit edition.
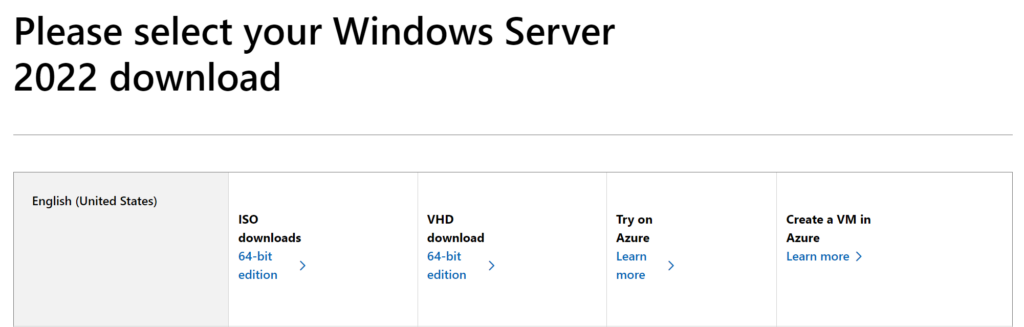
Verify the download begins and when it is completed you should have an ISO file (SERVER_EVAL_x64….) that is ~4.6GB in size.
Download software to transfer the installation image to a USB drive
There are multiple applications to transfer the installation image to a USB drive. Protectli recommends "Rufus" for Windows and "balenaEtcher" for the Mac. See this link for detailed instructions on how to create a bootable USB drive using Rufus or balenaEtcher. If you are using a Linux OS to burn the image, please follow this guide on how to utilize "WoeUSB" to properly burn a Windows image to a USB.
Install the new image
Once the installation image is properly copied to the USB drive, it is ready to be installed on the Vault.
-
- Verify that the Vault is powered down.
-
- Verify that your display or serial console is connected.
-
- Verify that an ethernet cable is plugged into the "WAN" port and is connected to a DHCP enabled switch.
-
- Verify that the USB keyboard is plugged in.
-
- Insert the USB install drive into the another USB port on the Vault.
-
- While powering up the Vault, press "F11" key and hold it down until it boots to the BIOS and you see the boot options screen.
-
- Select the USB drive to boot from.
-
- If prompted, hit any key to boot from the USB.
-
- Verify that the installation begins.
-
- Follow the prompts to do the installation.
-
- When prompted for the Operating System, select "Windows Server 2022 Standard (Desktop Experience)"
-
- Verify the installation completes, the system reboots and a prompt appears to change the user password.
-
- Type in a new password for the Administrator (use TAB to select "Reenter Password")
-
- Verify the login screen appears
-
- Login with the new password for the Administrator
-
- Verify the Server Manager Dashboard is displayed
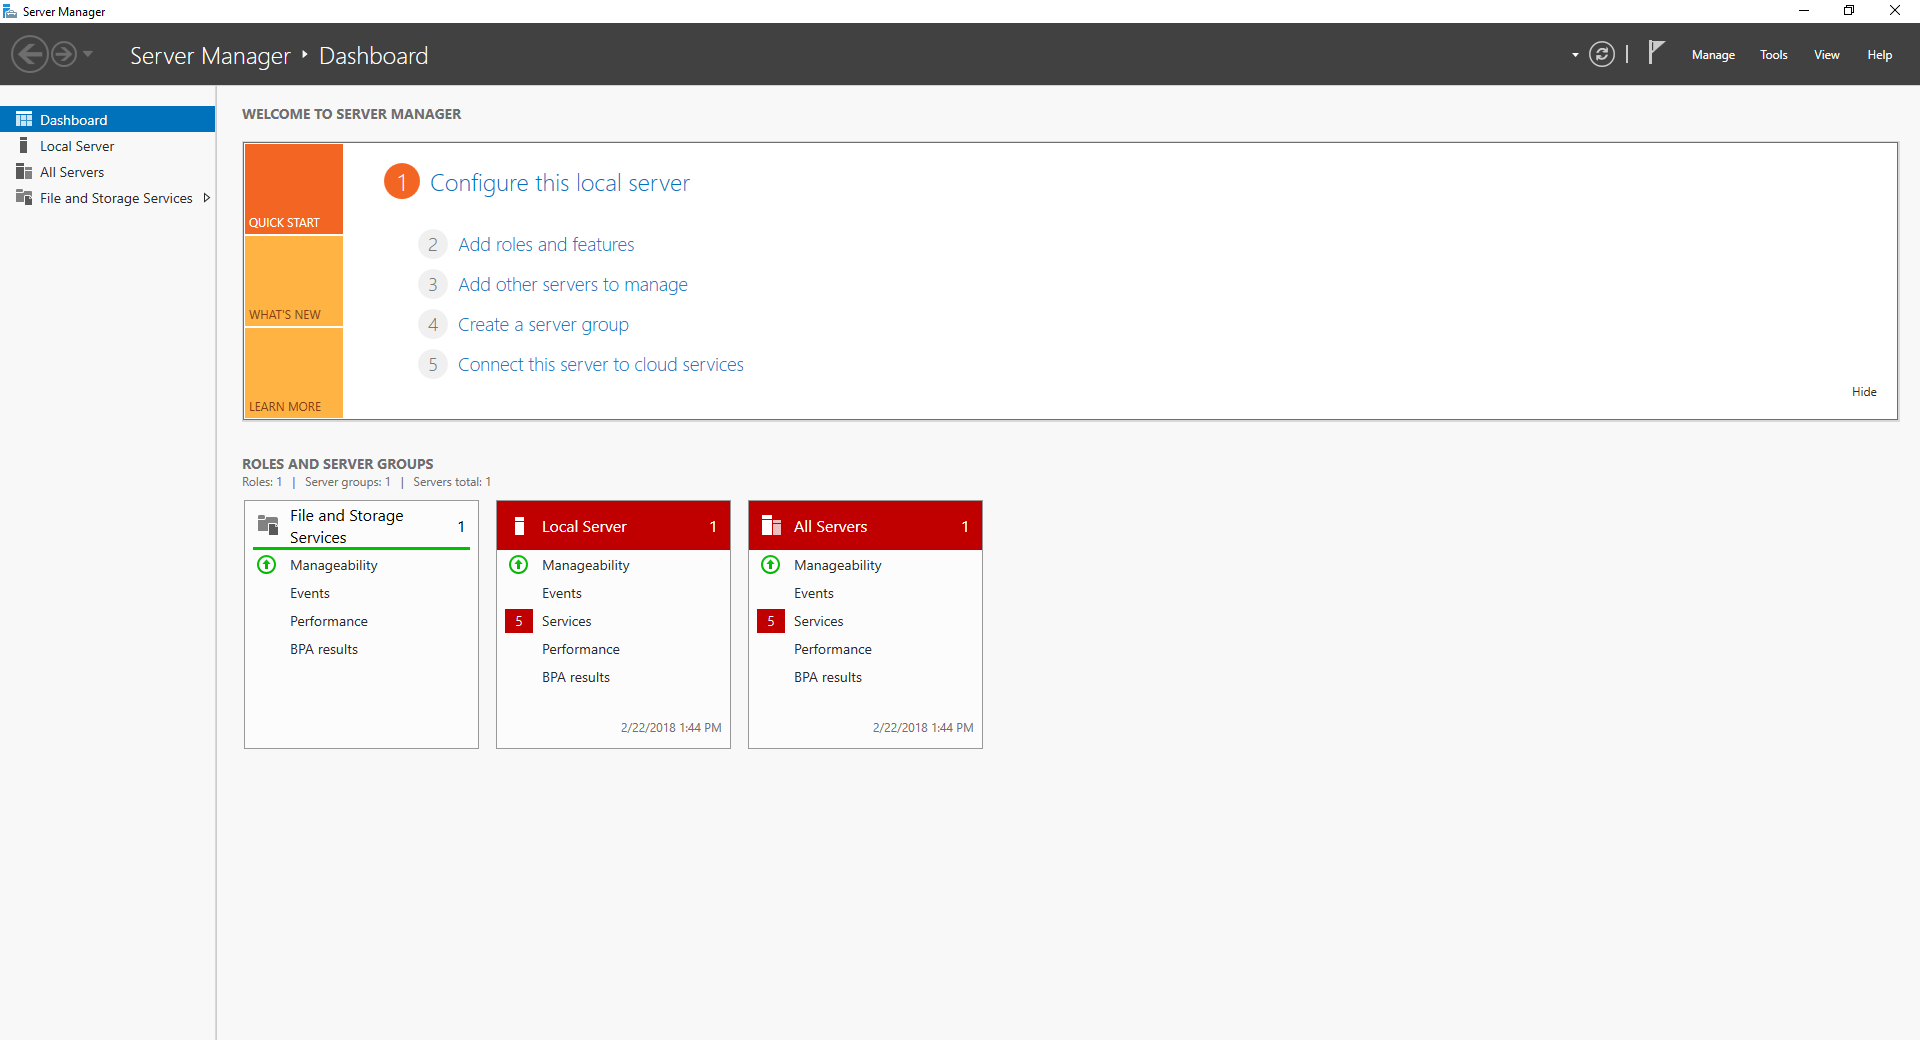
Server Manager Dashboard
Windows Server software has been successfully installed, but it may require device drivers to be installed. See this link to determine if device drivers are needed and how to install them. If you have a device with i225-V NICs (VP2420, VP4630, VP4650, VP4670), please follow the next steps to install the needed drivers for an ethernet connection.
Windows Server i225-V driver support (VP2420, VP4630, VP4650, VP4670)
i225 NIC devices, such as the VP2420 and VP4600 series will not be automatically configured. If you are not using one of these devices, you can skip this section.
This post on "Serve The Home" forums covers the steps necessary to add NIC driver support without a GUI
To install the i225 capable drivers on the desktop experience, please follow these steps:
-
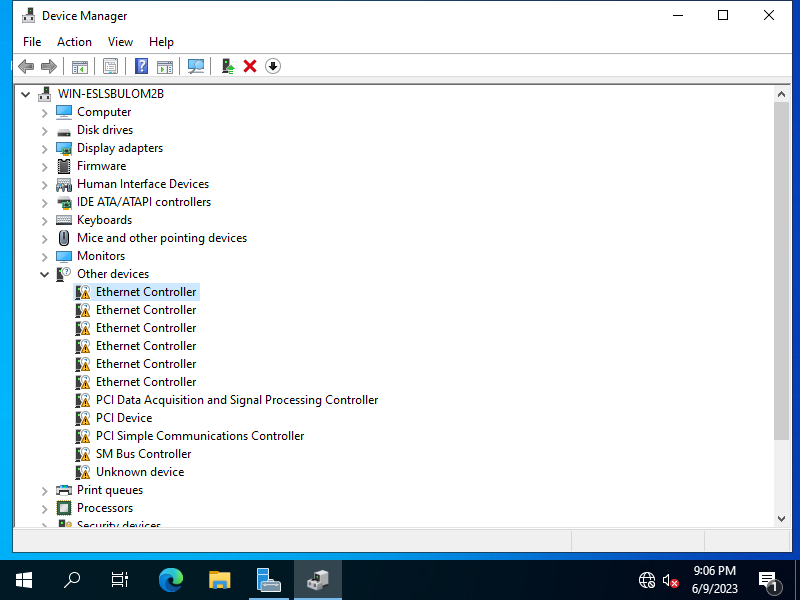
- Open the Device Manager either by searching on the Windows Search bar or find it within the Control Panel
-
- Navigate to the "Other Devices" section and locate the Ethernet Controllers (screenshot below)
3. Right click on the Ethernet Controller and select "Update driver"
4. Select "Browse my computer for drivers"
5. Select "Let me pick from a list of available drivers on my computer"
6. Select "Network adapters" from the list and hit "Next"
7. Select "Intel" as the Manufacturer and choose "Intel(R) Ethernet Controller i225-LM" as the driver
*While our devices use the i225-V NICs, these drivers will also work

8. Hit "Next" and "Yes" if prompted with an Update Driver Warning
9. Repeat for each Ethernet Controller
10. After all Ethernet Controllers have been updated, you should be able to receive an internet connection by connecting any of the Vault's Ports to a WAN connection
11. It is now recommended to run all newest updates via the Windows Updater
Fixing Missing PCI Drivers
If your unit is still missing drivers even after running all Windows updates, you may have to use some tools from Intel to download the remaining drivers.
-
- Make sure you have updated Windows completely, including optional updates
-
- Download and utilize Intel’s Chipset INF Utility to automatically install all necessary chipset drivers (Link Available Here)
-
- Utilize the Intel Driver Support Assistant (Link Available Here)
-
- If you would like to update your display drivers, download the Intel UHD Drivers that correlate with your CPU. The VP2420 and VP4600 can use the driver available here
After completing the above, you may see that a "PCI Simple Communications Controller" drive is still missing. This particular PCI Device is linked to the Intel Management Engine Interface. If you'd like to get the driver for this, you can download it from Intel at this link.
Enable Hyper-V
Hyper-V is included in the Windows Server distribution but it is not enabled by default. To enable Hyper-V:
-
- Select the Windows icon in the lower left corner and type "Turn Windows features on or off"
-
- Select the entry
-
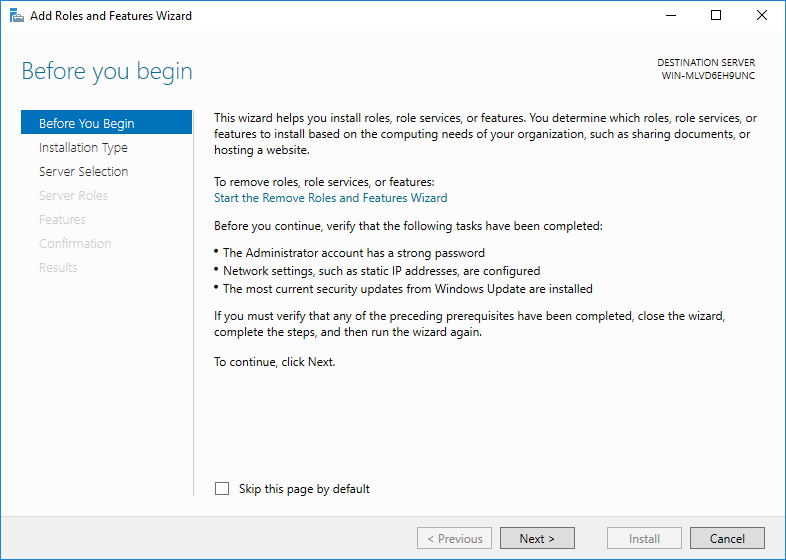
- Verify the "Add Roles and Features" Wizard window is displayed
Wizard
-
- Follow the prompts and accept the defaults
-
- When prompted for "Server Roles", select "Hyper-V"
-
- Verify Hyper-V Tools window is displayed
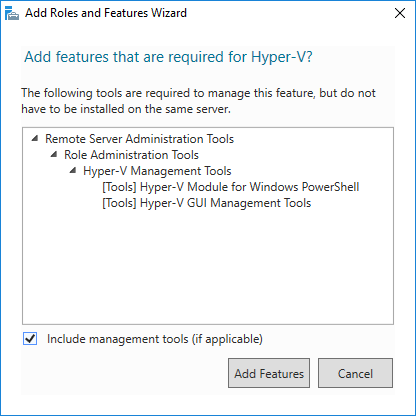
Hyper-V Add Window
-
- Select "Add Features"
-
- Continue the installation wizard and accept the defaults
-
- At the Virtual Switch page, select an Ethernet port for the Hyper-V virtual switch. Note only active ports will be displayed in this window.
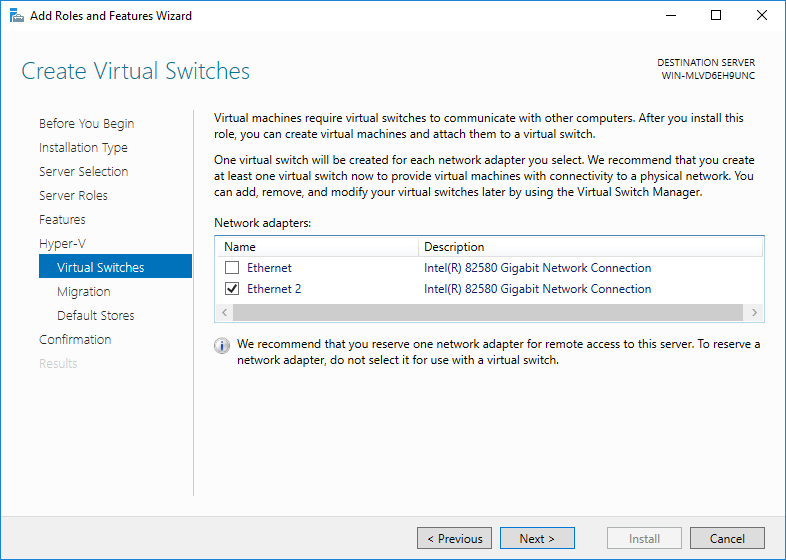
Hyper-V Virtual Switch
-
- Continue with the install wizard and confirm the installation selections
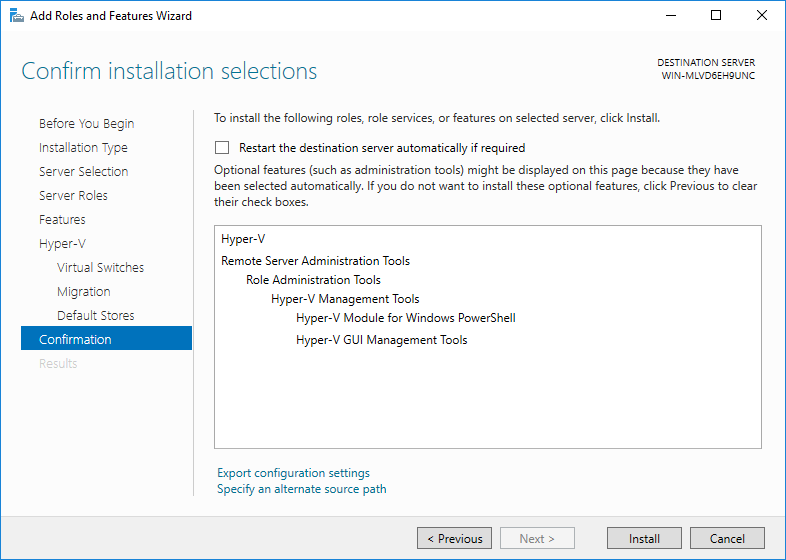
Confirm Installation Selections
-
- Verify the Installation begins
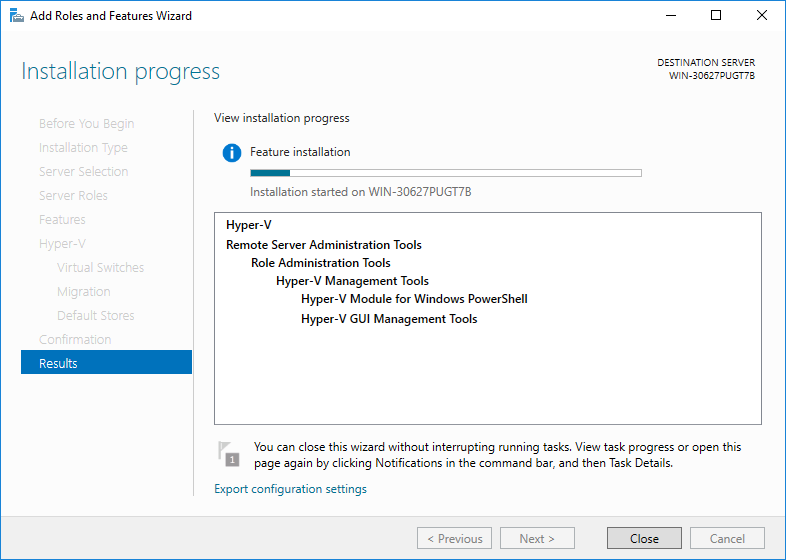
Hyper-V Installation
-
- Verify the installation is complete when the "restart pending" message is displayed
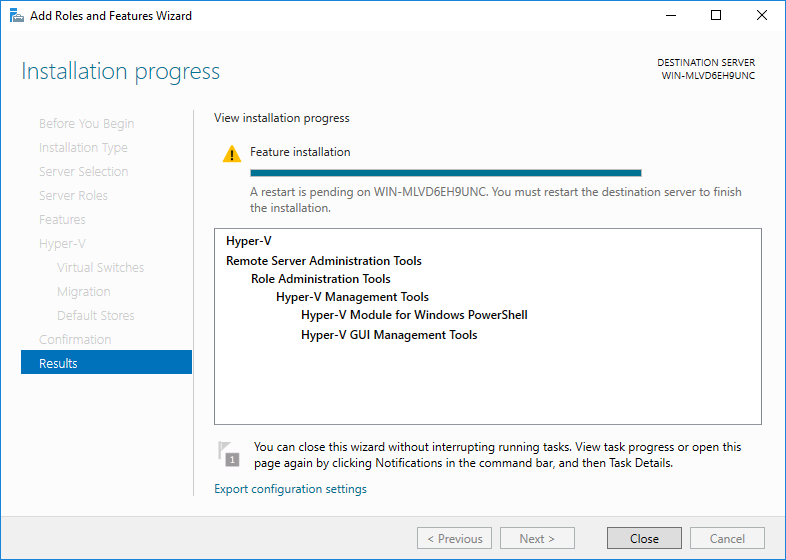
Restart Pending
-
- Restart the system
-
- Verify the system reboots and login
Launch and Configure Hyper-V
-
- Verify the Server Manager Dashboard is displayed
-
- Select Tools in the upper right hand corner of the Dashboard
-
- Select Hyper-V from the drop down menu
-
- Verify the Hyper-V Manager window is displayed
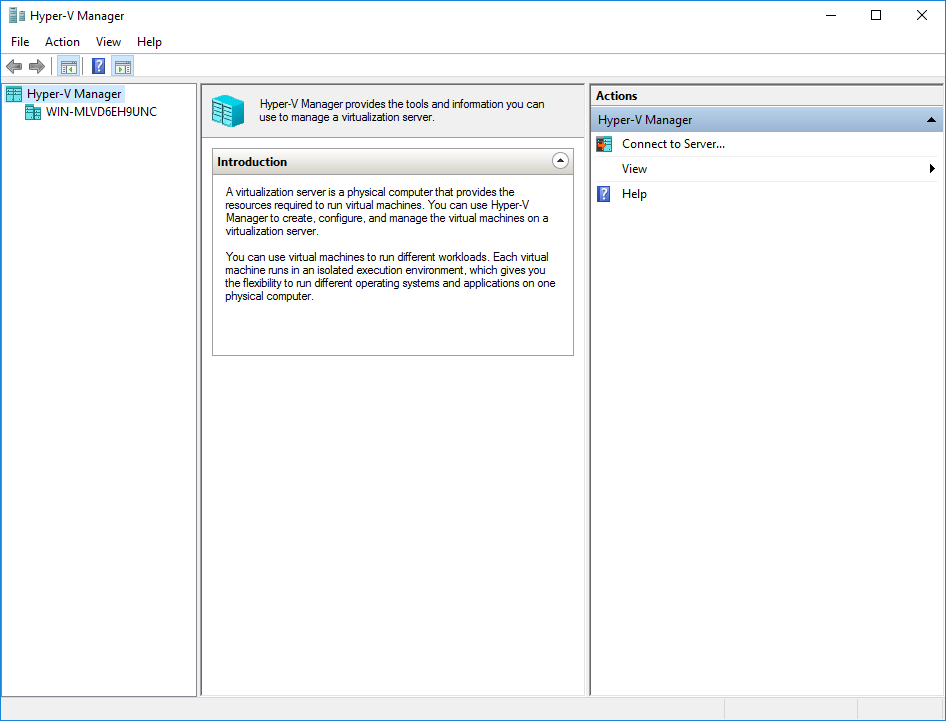
Hyper-V Manager
-
- Select the local machine (WIN-XXX)
-
- Verify this VM is displayed
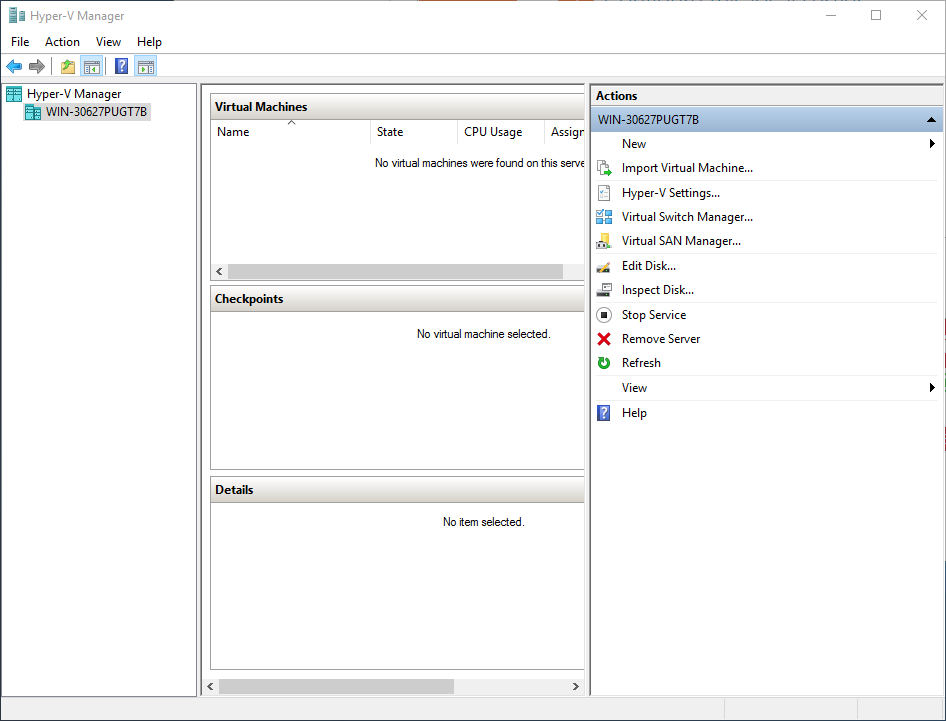
Local VM
Add another Virtual Machine (VM)
-
- Select "New" in the top right corner of the Hyper-V manager and select "Virtual Machine" from the drop down list
-
- Verify the VM Wizard window is displayed
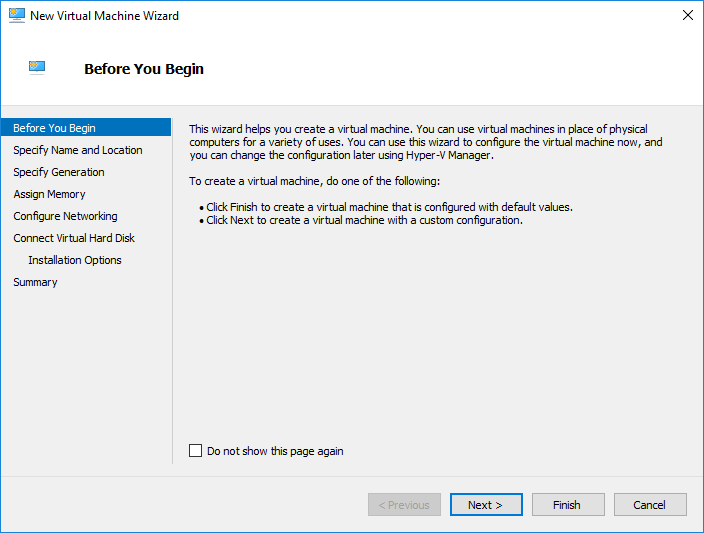
VM Wizard
-
- Select "Finish" in this example to accept the default configuration and let wizard create a new VM
-
- Verify a New VM is created
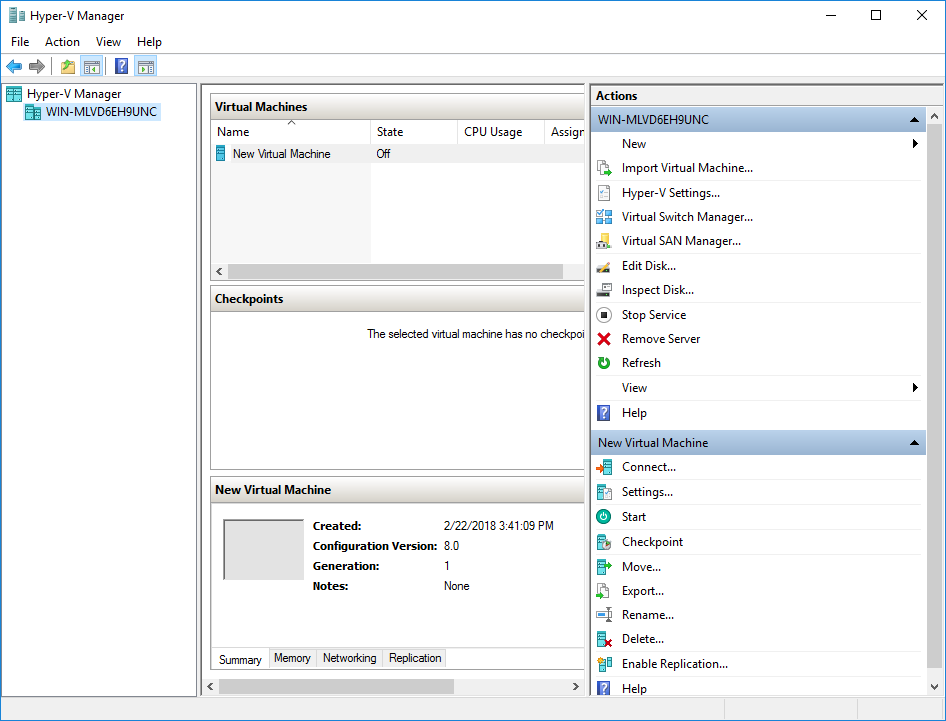
New Virtual Machine
At this point Windows Server and Hyper-V have been installed and initially configured.
If you have any question, feel free to reach out to us at support@protectli.com, or find more information in our Knowledge Base.