Have a Question?
pfSense®CE Configuration Recommendations
pfSense® CE Configuration Recommendations
Overview
pfSense® CE is an open source routing and firewall software which is based on FreeBSD. An article covering installation can be found at this link. This article offers some basic recommendations to configure pfSense® CE on the Vault. Some of these recommendations had been in other articles, but for ease of use, we are consolidating them here in one article. This article includes the following areas of interest:
- Thermal Monitoring
- Enable Cryptographic Hardware assist with AES-NI and BDS
- Power Management with PowerD
- Enable Optional (OPT) ports
At the bottom of this article, there is a table with downloadable configuration files for each of the Vaults that include the settings described below.
Thermal Monitoring
The Vault has a solid state, compact design. The case is designed to dissipate the heat generated by the unit. Although the case may be warm to the touch, it most likely indicates that the system is functioning correctly. However, Thermal Monitoring can be used to verify the Vault is operating under normal thermal conditions. Intel based CPUs have built in thermal monitoring and pfSense® CE can access it to display temperatures on the dashboard. The following article will describe how to enable and monitor the thermal sensors.
Enable Thermal Monitoring
Enabling Thermal Monitoring is done through the pfSense® CE WebUI.
- Browse to the pfSense® CE Dashboard, default 192.168.1.1 on the LAN port
- Select "System –> Advanced" and click on the "Miscellaneous" tab
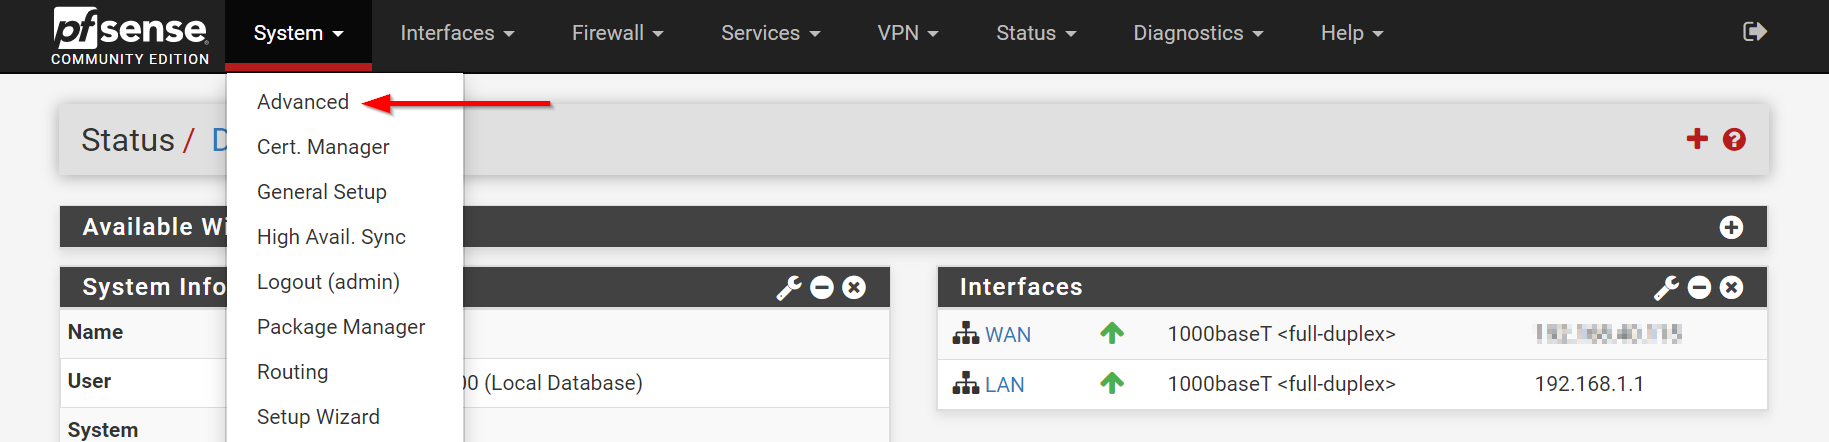
System->Advanced
- Scroll down to "Cryptographic & Thermal Hardware"
- Click on "Thermal Sensors."
- From the drop down, choose "Intel Core* CPU…"
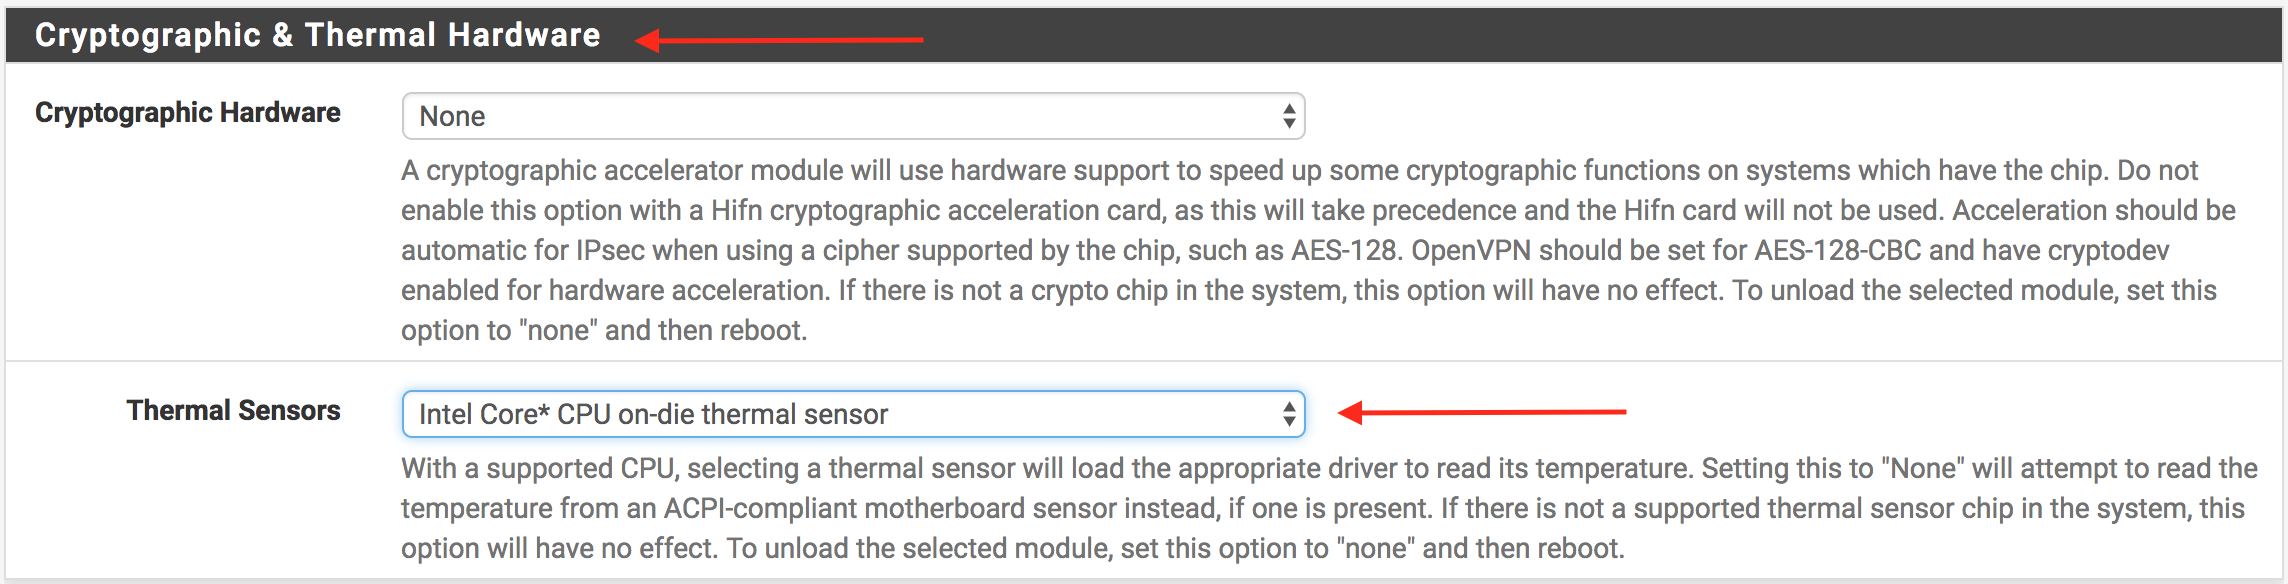
System->Advanced->Miscellaneous->Cryptographic & Thermal Hardware
- Click "Save" button at the bottom of the page
- Verify success message is displayed at the top of the page
- Thermal monitoring of the CPUs is now enabled
Display Thermal Sensors on the Dashboard
The preceding steps enabled thermal monitoring. The following steps will show how to display thermal monitoring on the dashboard.
- Select the Dashboard
- Click the "+" icon in the upper right corner
- Verify the "Available Widgets" box appears
- Click the "+" next to Thermal Sensors
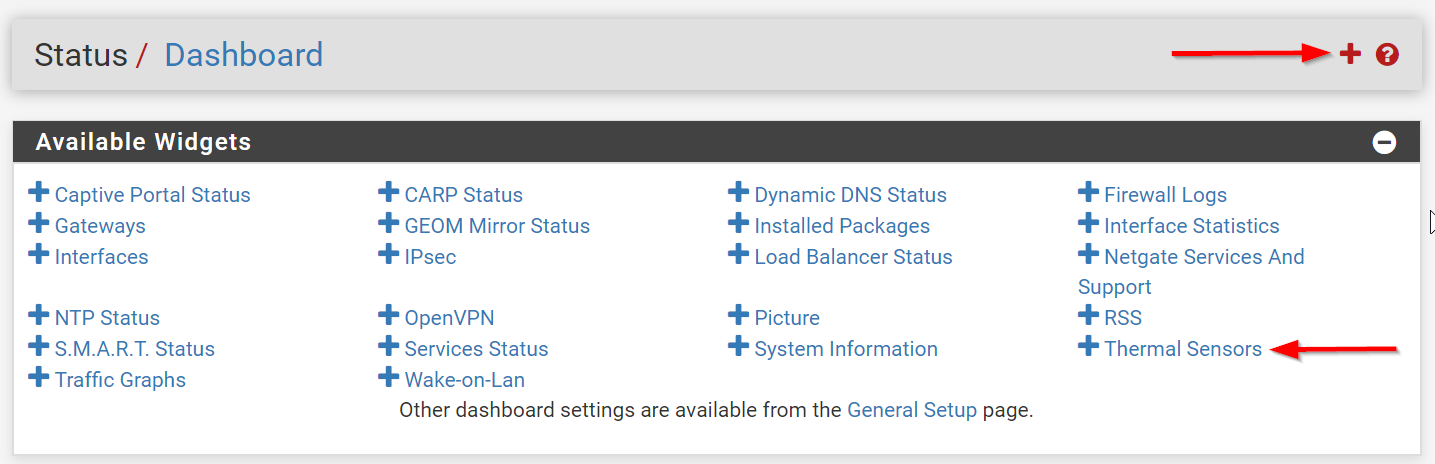
Dashboard->Available Widgets
- Verify the Thermal Sensors box is displayed at the bottom of the dashboard
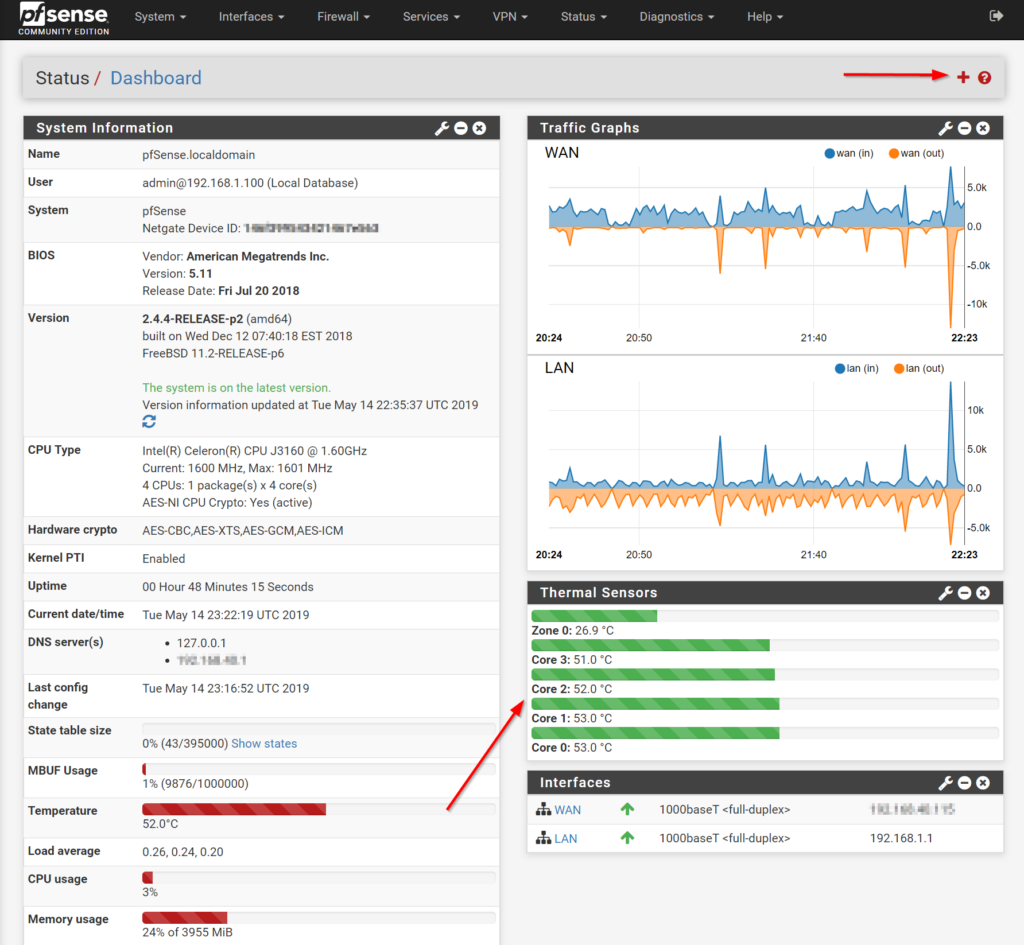
Dashboard with Thermal Monitoring, Idle
The screenshot above shows an example of the FW4B that is essentially idle for over 40 minutes. Note that the core temperatures range from 51 to 53 degrees C. This is well within normal range.
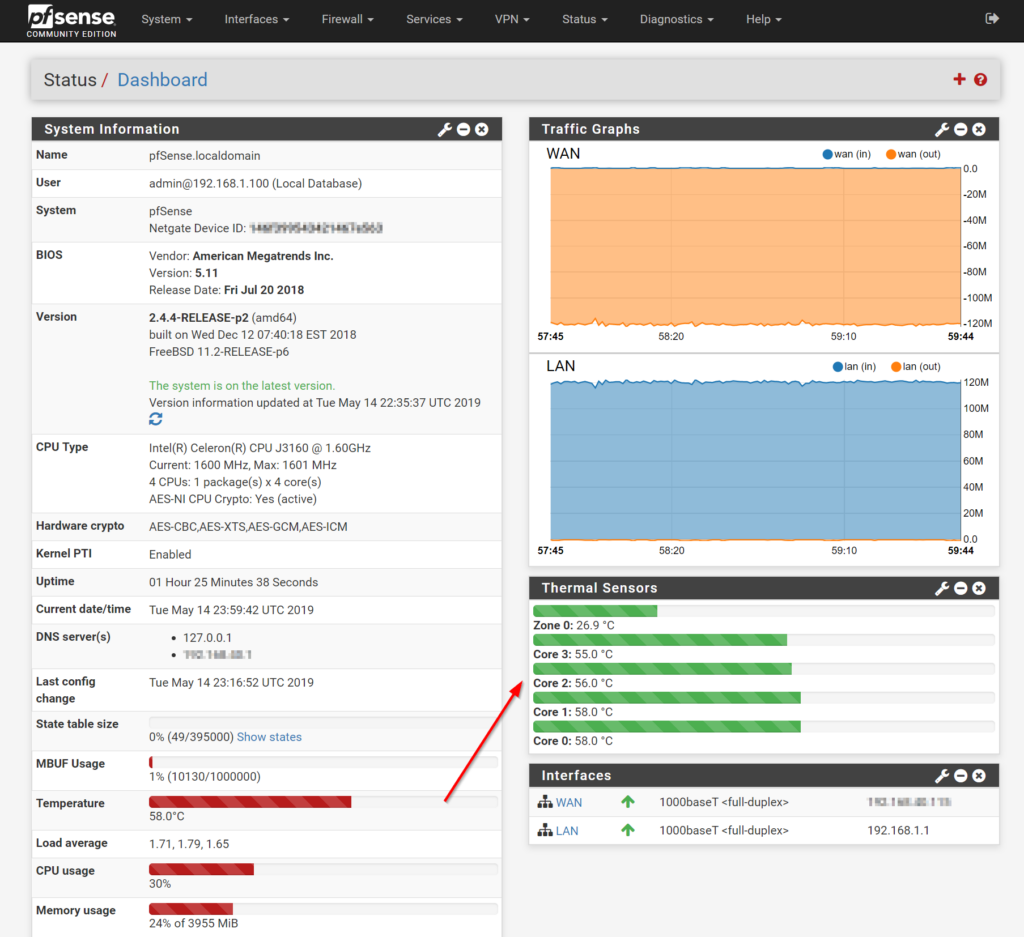
The screenshot above shows an example of the same FW4B that is running an iperf test at linerate for over 40 minutes. Note that the CPU usage has increased from 3% to 30% and core temperatures range from 55 to 58 degrees C. Although this may seem high, and the case may be warm to the touch, it indicates that the case is functioning correctly and dissipating the heat. The Intel TJmax core temperatures from ark.intel.com for each of the processors is displayed in the table below.
| Platform | CPU | TJmax |
|---|---|---|
| FW1 | J1900 | 105 C |
| FW2 | J1800 | 105 C |
| FW2B | J3060 | 90 C |
| FW4A | E3845 | 110 C |
| FW4B | J3160 | 90 C |
| FW6A | 3865U | 100 C |
| FW6B | 7100U | 100 C |
| FW6C | 7200U | 100 C |
Enable Cryptographic Hardware Support
Enabling Cryptographic Hardware Support is done through the pfSense® CE WebUI.
- Browse to the pfSense® CE Dashboard, default 192.168.1.1 on the LAN port
- Select "System –> Advanced" and click on the "Miscellaneous" tab
System->Advanced
- Scroll down to "Cryptographic & Thermal Hardware"
- Click on "Cryptographic Hardware."
- From the drop down, choose "AES-NI and BSD Crypto Device"
![]()
System->Advanced->Miscellaneous->Cryptographic & Thermal Hardware
- Click "Save" button at the bottom of the page
- Verify success message is displayed at the top of the page
At this point cryptographic hardware support should be enabled.
Power Management with PowerD
All of the Vault series use Intel CPUs that have Power Management features that allow the selection of power management modes. The power management modes trade performance vs. power by adjusting the frequency based on system load. PowerD is a power control utility built into pfSense® CE, which is inherited from the underlying FreeBSD operating system. In this section, we will enable PowerD and select the optimum performance vs. power settings.
Enable PowerD
In this example we will enable PowerD within the pfSense® CE WebUI.
- Browse to the pfSense® CE Dashboard, default 192.168.1.1 on the LAN port
- Navigate to the System tab and select Advanced from the drop down menu
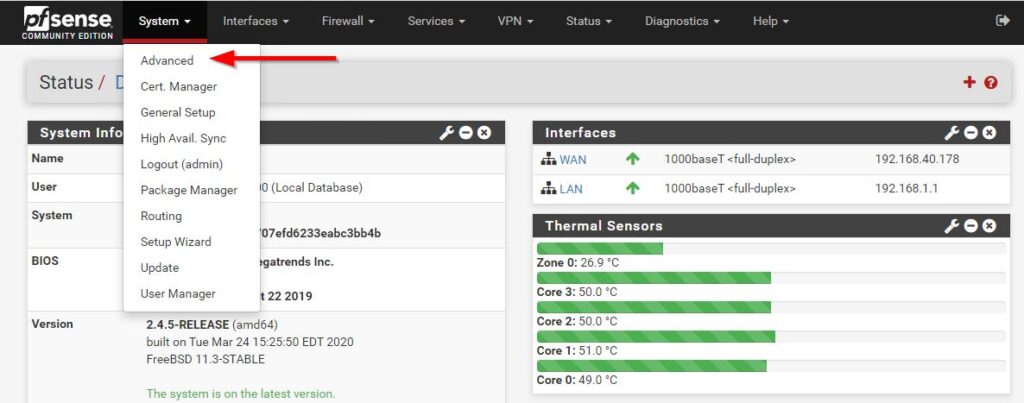
pfSense® CE Dashboard
- Verify the Advanced page is displayed
- Select the Miscellaneous tab
- Verify the Miscellaneous page is displayed
- Scroll down to the section labeled Power Savings
- To enable PowerD, check the box next to Enable PowerD
- Verify Hiadaptive is selected for the power modes as shown in the image below
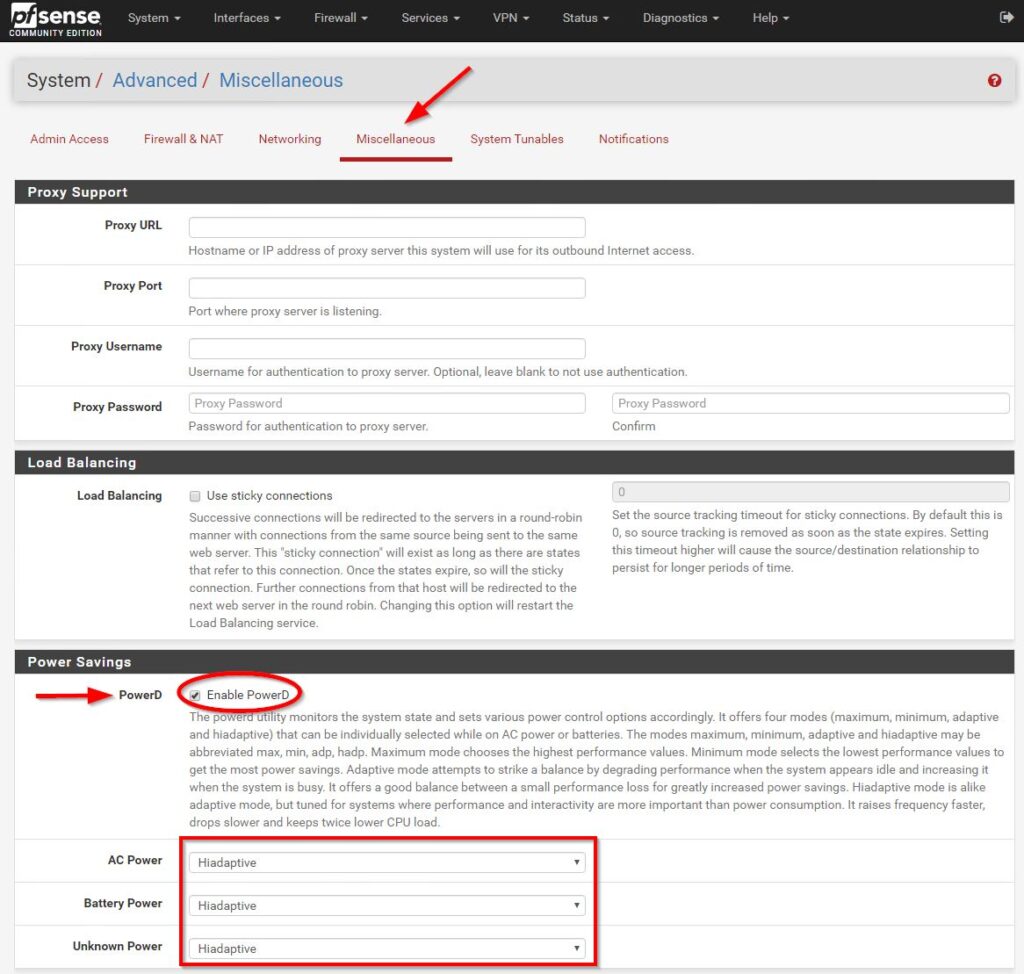
PowerD Settings
- Scroll down to the bottom of the page and click Save
- Verify a message stating "The changes have been applied successfully" is displayed at the top of the page.
At this point, PowerD should be enabled for optimum power management.
How to Restore a Config File
- Verify pfSense® has been installed correctly
- Verify the correct configuration file has been downloaded from the table below and pfSense® will be able to access it
- Log into the WebGUI. This is 192.168.1.1 by default.
- The default pfSense® login user is 'admin' and password is 'pfsense'
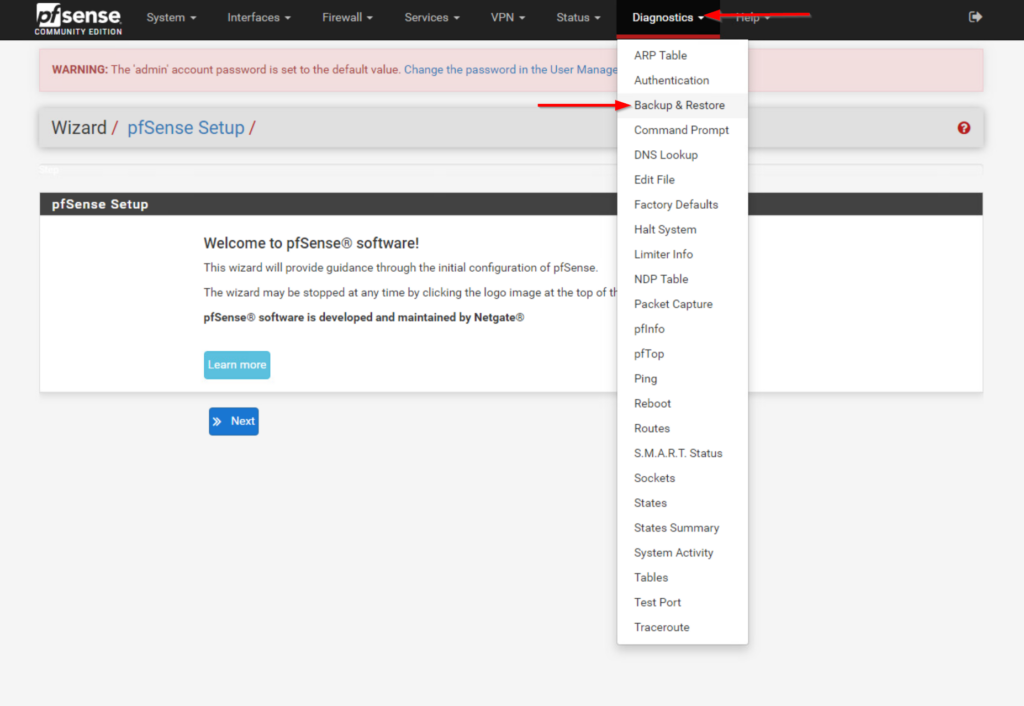
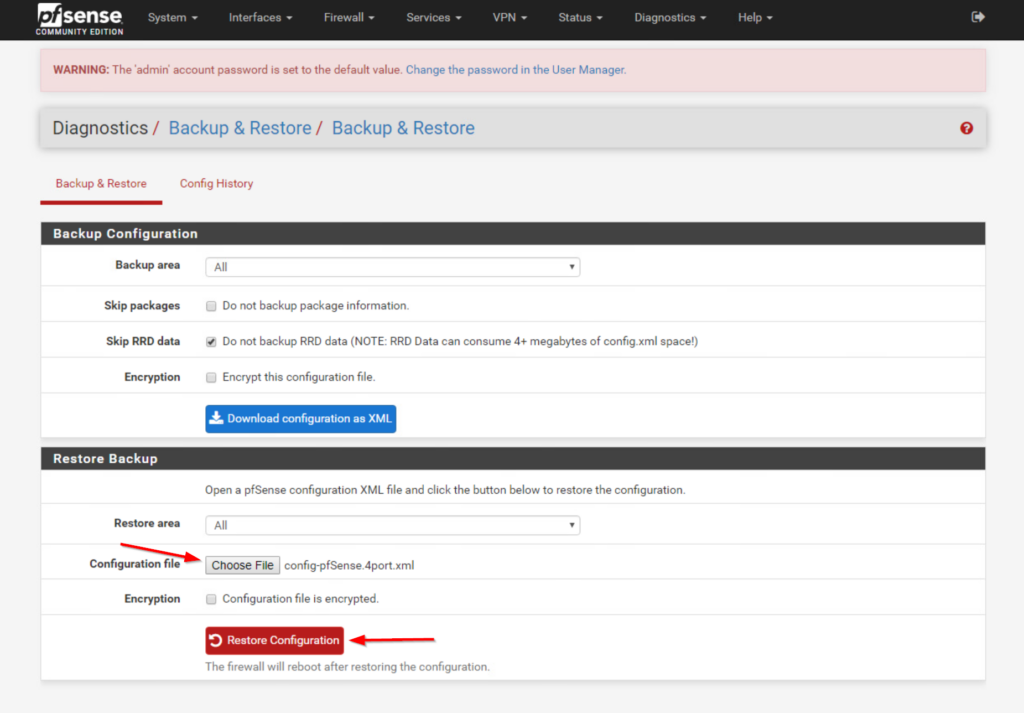
- Click Diagnostics on the top of the GUI
- From the drop-down menu click Backup & Restore
- Click Choose File
- Select the appropriate config, click open
- Click Restore Configuration
If you experience any issues, please feel free to reach out: support@protectli.com. You can find additional information in our Knowledge Base, or reference pfsense.org directly.