Have a Question?
OPNsense Optional Port Configuration
OPNsense Optional Port Configuration
This article covers configuring OPT ports for use in OPNsense. This will include: assigning the interfaces, enabling DHCP, and a basic firewall rule to allow connection to the internet.
Prerequisites
- OPNsense installed and access to the web interface. OPNsense 20.7 was used for this article
Assigning and enabling Interfaces
This section covers assigning OPT interfaces and enabling them with a static IP address. Typically interface assignments are done when installing OPNsense and correcting the port order as noted in our OPNsense Install article. The interface will still need to be enabled. This article will assume no OPT interfaces are assigned.
- Verify the Vault is powered on and OPNsense is up and running
- Access the OPNsense web interface
- The default web address is 192.168.1.1
- The default login credentials are
- Username: root
- Password: opnsense
- From the OPNsense web interface dashboard, select Interfaces on the left column
- Under the interfaces column select Assignments
- Select the + for each interface you would like to add, then select Save.
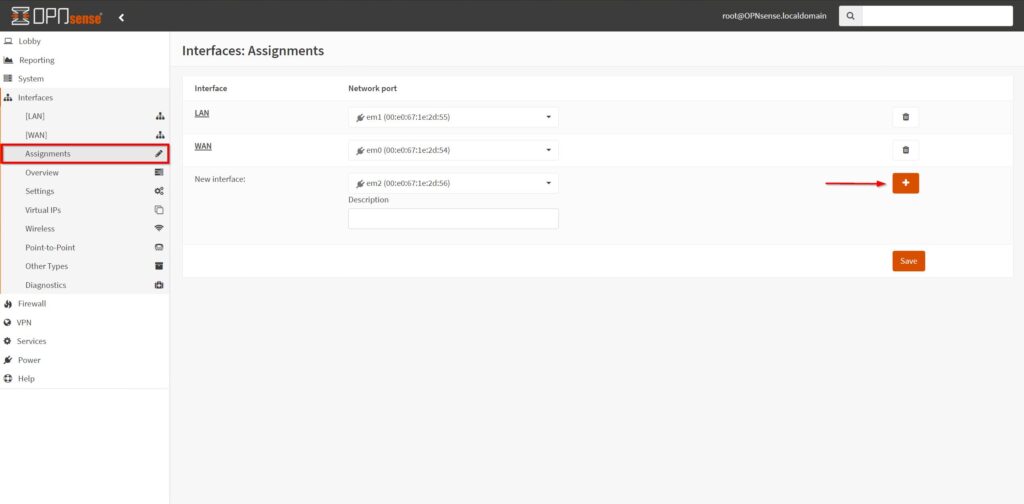
- Once the interface is assigned, it will appear in the interfaces column.
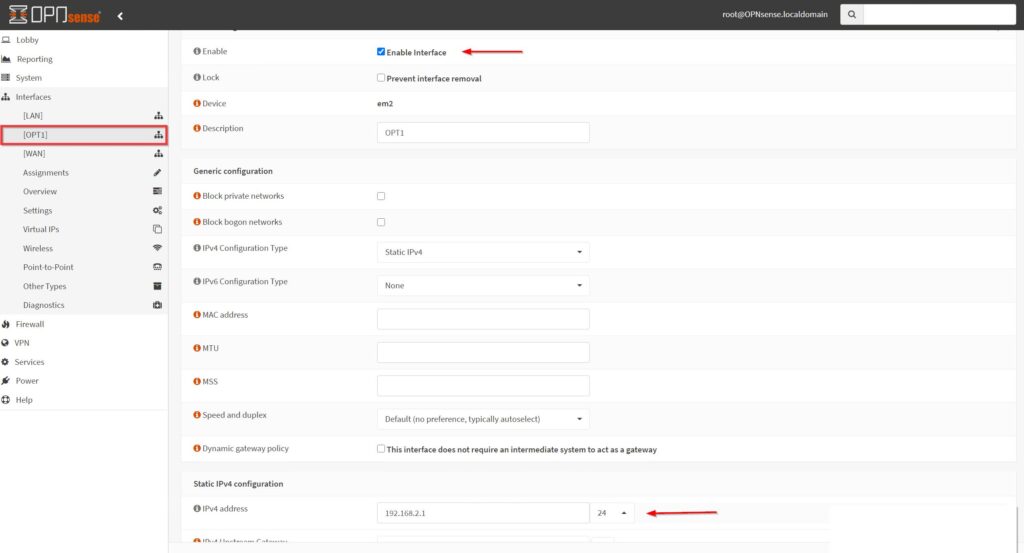
- Select the OPT interface to bring up the "Basic configuration" menu
- To enable a interface:
- Check the box next to Enable Interface
- Change IPv4 Configuration Type to Static IPv4
- Assign a unique IPv4 address, we are using 192.168.2.1 with a subnet mask of 24 for this example
- Note each additional interface will need a different subnet (example 192.168.3.1, 192.168.4.1, ect.)
- Select Save at the bottom of the page, then Apply changes at the top
Enable DHCP
Now the interface is assigned with an IP address, a DHCP server can be enabled to hand out IP addresses on the subnet
- Select Services from the left column menu, then DHCPv4
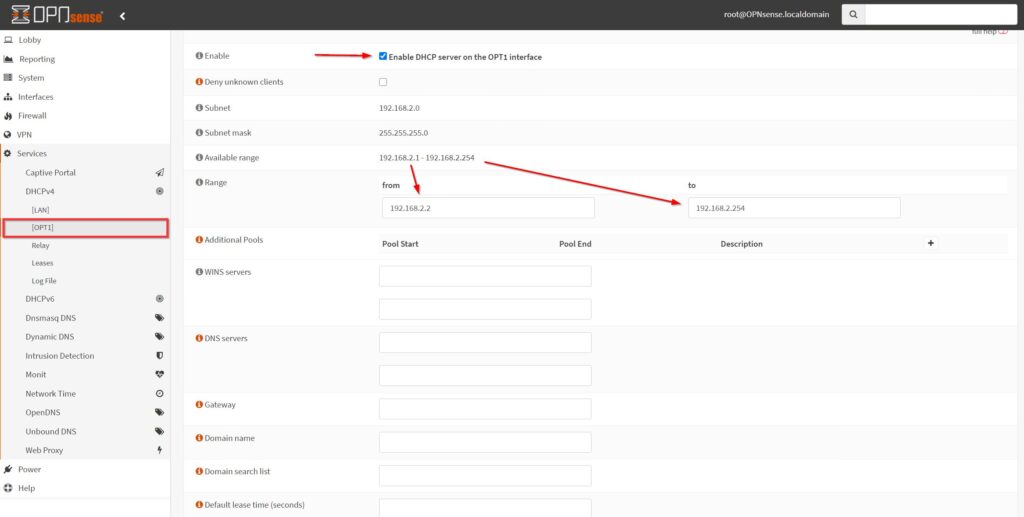
- Select the assigned OPT port to bring up the DHCP configuration menu
- Check the box next to Enable DHCP Server
- Fill in a Range for the IP address pool. The "Available range" can be used as guidelines for the IP address pool. Leave the default gateway(192.168.2.1) out of the range.
- We used 192.168.2.2 to 192.168.2.254 for this example
- Select Save at the bottom
Firewall Rule
Now the interface is enabled with an IP address assigned, and a DHCP server is handing out IP address, a simple firewall rule is needed to allow access to the internet.
- Select Firewall from the left column menu, then Rules
- Select the OPT interface assigned, this will bring up the Firewall Rules for this interface
- Select Add in the top right corner
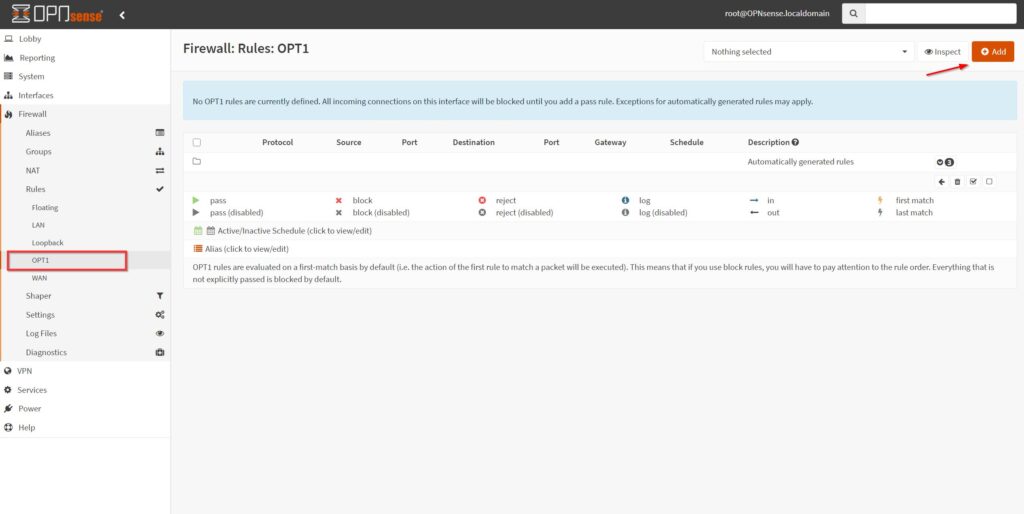
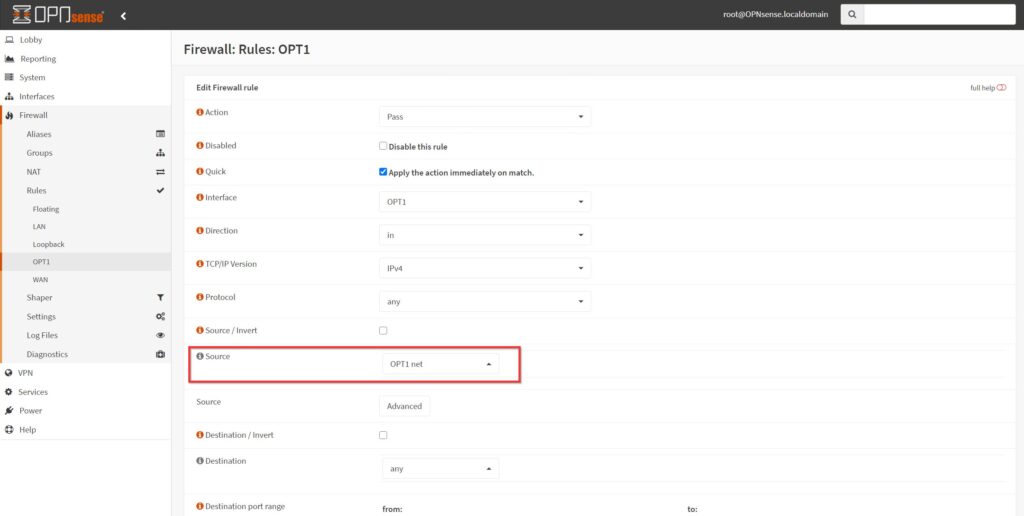
- A basic pass rule is necessary using the default rule configuration with the following change
- Source – (OPT assigned) net
- Note: The "OPT net" source from the dropdown menu might require scrolling through the options to find the correct choice
- Source – (OPT assigned) net
- Select Save at the bottom, then Apply Changes at the top right
The OPT port should now be functioning just as the default LAN port. This step can be repeated to enable additional ports depending on your device. If you have any trouble or additional questions feel free to reach out either by opening a ticket here https://protectli.com/submit-ticket/ or send us an email here support@protectli.com