Have a Question?
How to Setup Xen Orchestra Community Edition on the Vault
Overview
Xen Orchestra (XOA) Community Edition allows users to manage XCP-ng and Xen Server (Citrix Hypervisor). Since XOA is open-sourced, all paid-to-use features are available through the Community Edition. While their community is active in helping each other solve paid feature questions, the official XCP-ng team does not support this edition of XOA. Use the official XOA edition if you plan on using it within enterprises or in a professional environment. The main difference between the free and paid edition is their support level. Visit the community support page at https://xen-orchestra.com/docs/community.html#current-version or XENs support pricing at https://xen-orchestra.com/#!/xo-pricing.
The instructions below outline how to install XOA Community Edition on our Protectli FW6E using Debian 11 as our Linux distribution.
Install XCP-ng
First you’ll need to install XCP-ng. You can follow our knowledge base article here for instructions.
Creating a Storage Repository and Importing the ISO
- Navigate to the Debian Download page here and download Debian 11-3.0.
- Enter your host's XOA UI by typing its IP into your URL
- Navigate to the +New tab on the left and select Storage.
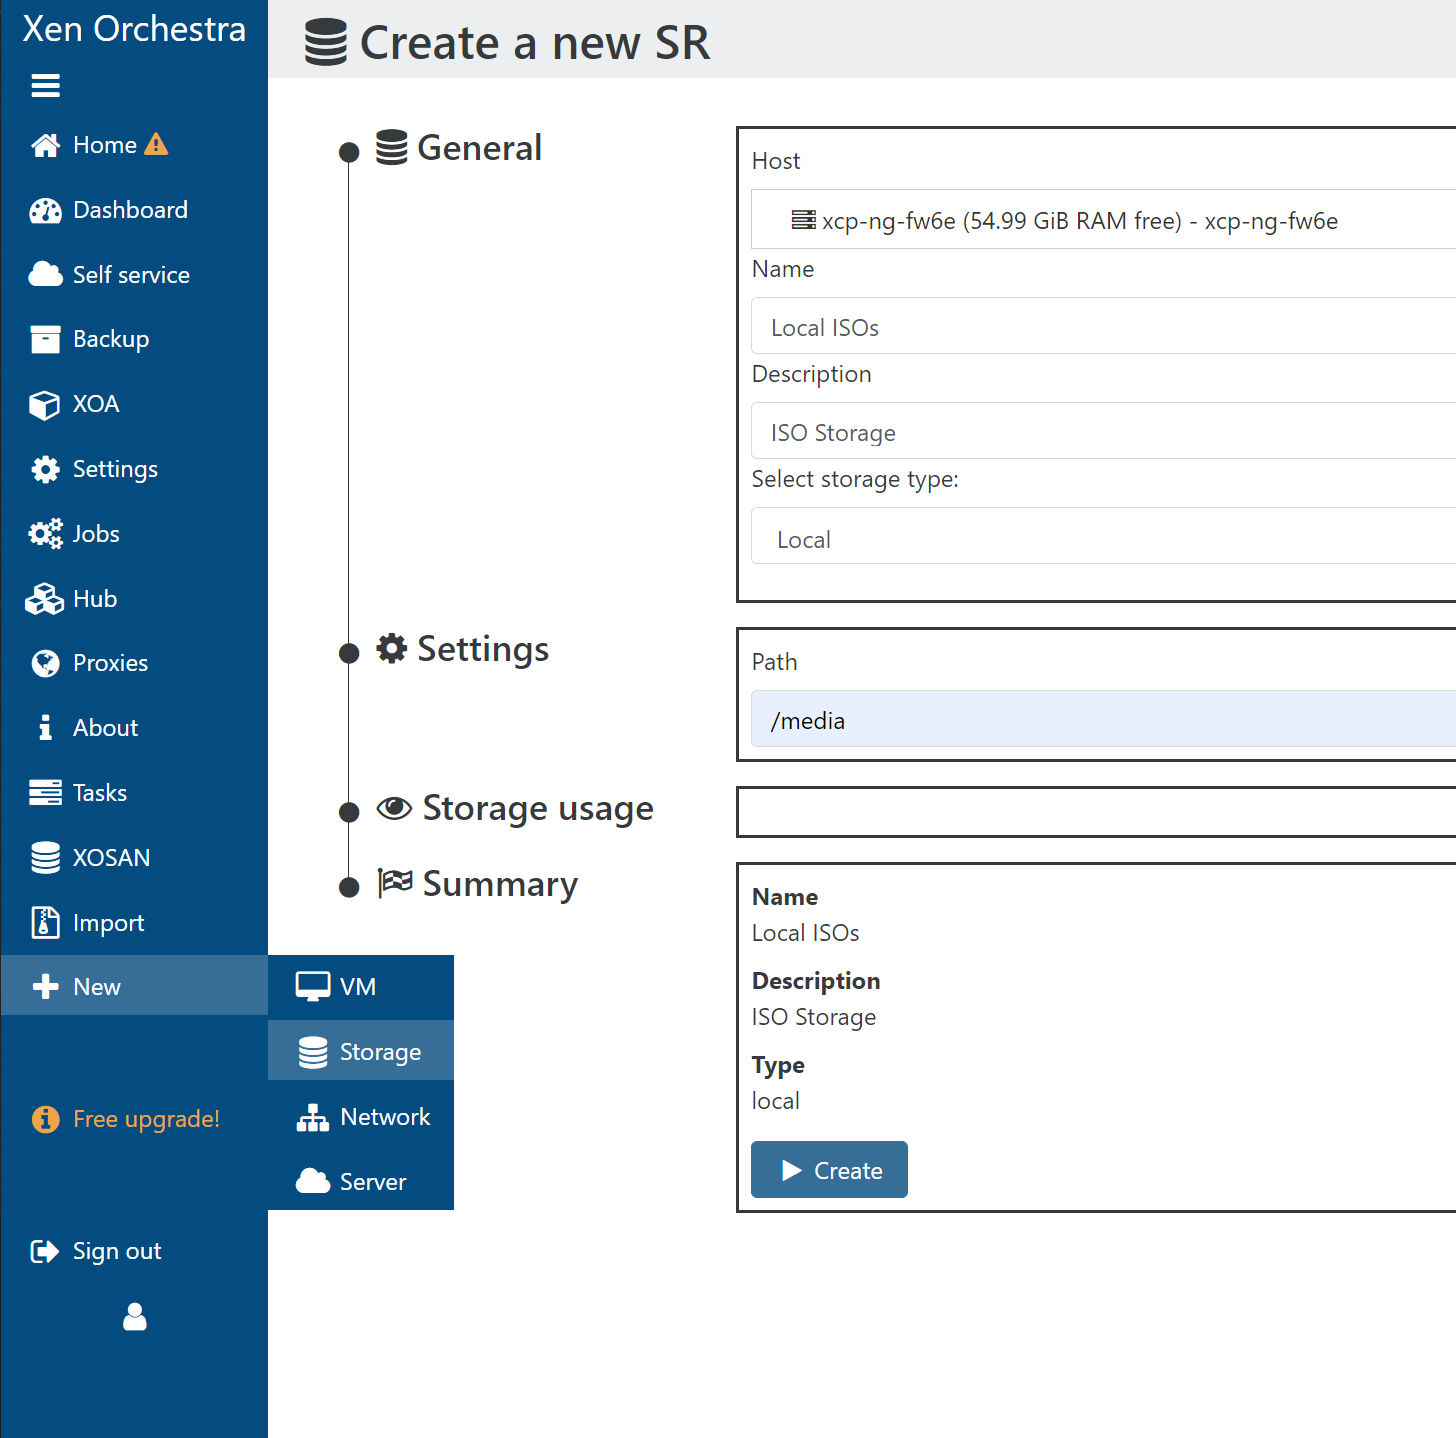
Create a new Storage Repository
- Select your local host for Host.
- Use Local ISOs for the Name of the Storage Repository
- Use ISO Storage for your Description
- Use /media for your Path
- Press Create

Import ISO
- At the top, select the ISOs storage repository. You can then drag and drop the image onto the box.
Configuring the VM and Installing Debian 11
- After successfully importing the ISO, Navigate to the +New tab and select VM.

- For Template, select Debian Bullseye 11
- For Name, use Debian 11 XOA
- For vCPUs, select 2
- For RAM, select 4
- For ISO/DVD, select Debian 11 Image
- Press Create.
Configuring Debian 11
- Navigate to the Console tab on the top row to view the VM's console
- Go through the Debian 11 installation process
- For Hostname, use Debian 11
- For Root Password, select your own
- For Partition disks, select Guided – use entire disk
- For Partitioning scheme, select All files in one partition (recommended for new users)
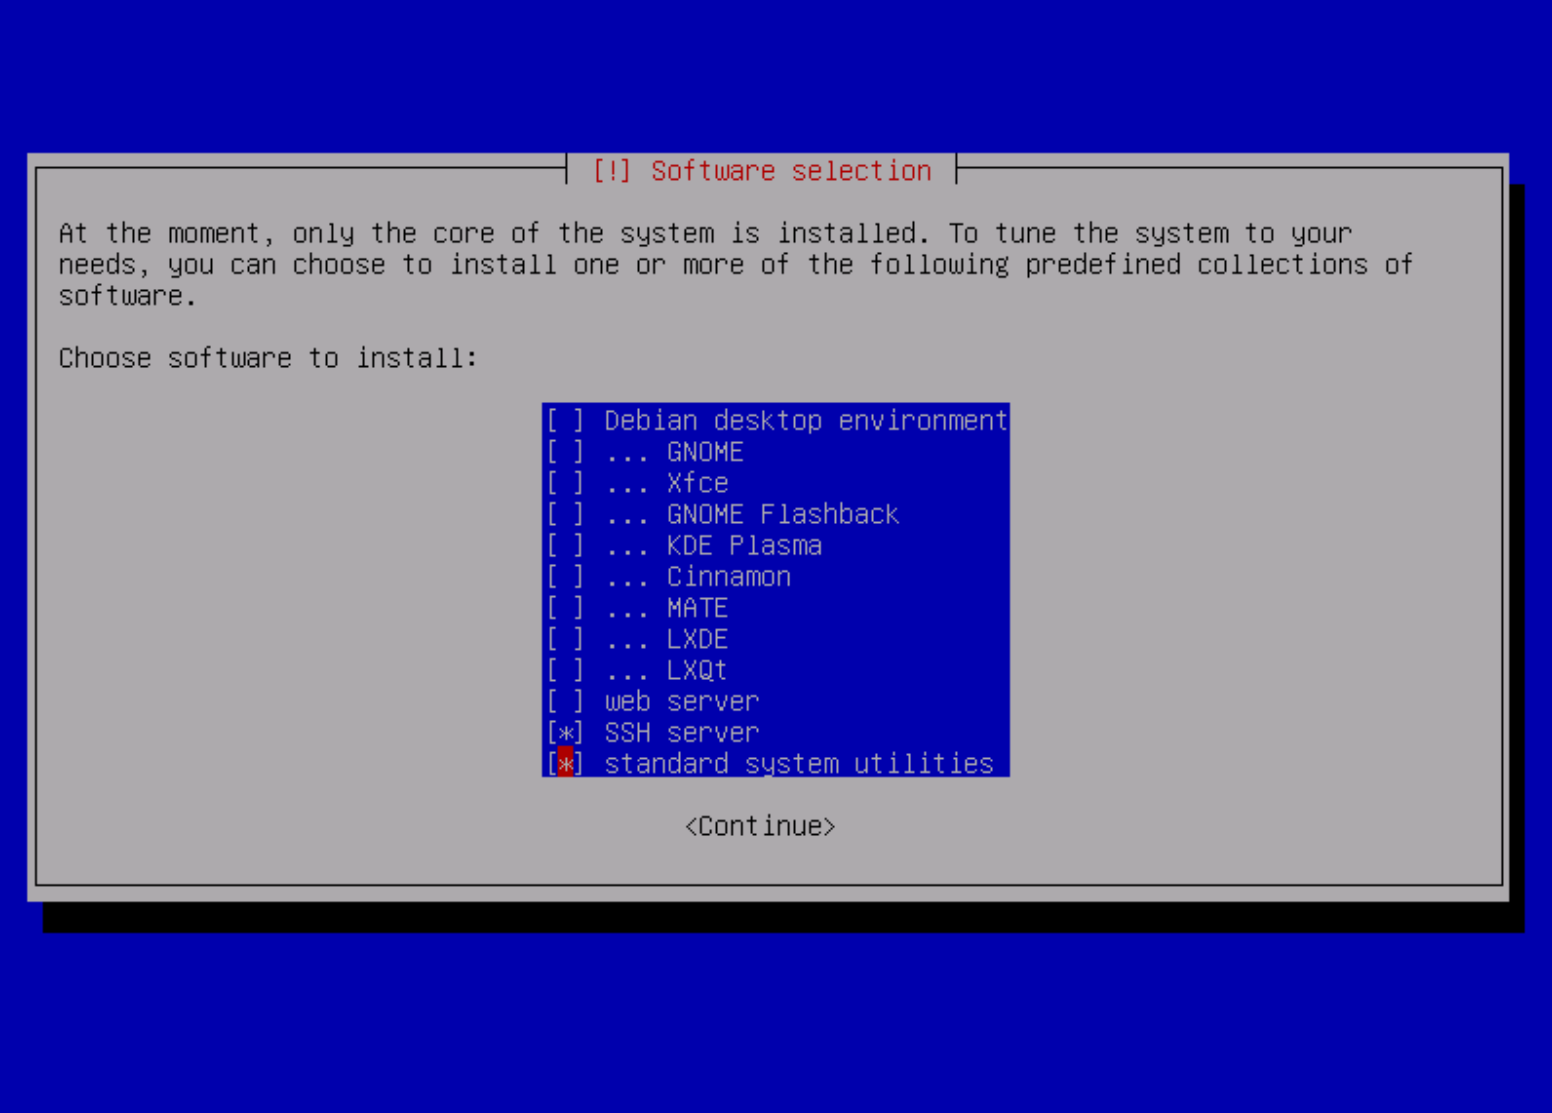
Software Selection
- For Software Selection, select SSH Server and Standard System Utilities
- You can make selections by pressing the space bar.
- For Install the GRUB boot loader, select yes.
- Select /dev/xvda when asked which device for the boot loader installation
Run the following command after logging in as Root user
-
#apt update
Installing XenServer's Guest Tools
Next we'll be installing XenServer's guest tools. It's necessary to communication between the VM and guest OS. XCP-ng recommends installing guest tools on all VMs as it also provides better overall performance as well. Attach guest tools ISO by selecting the disk above the console screen then run the following commands.
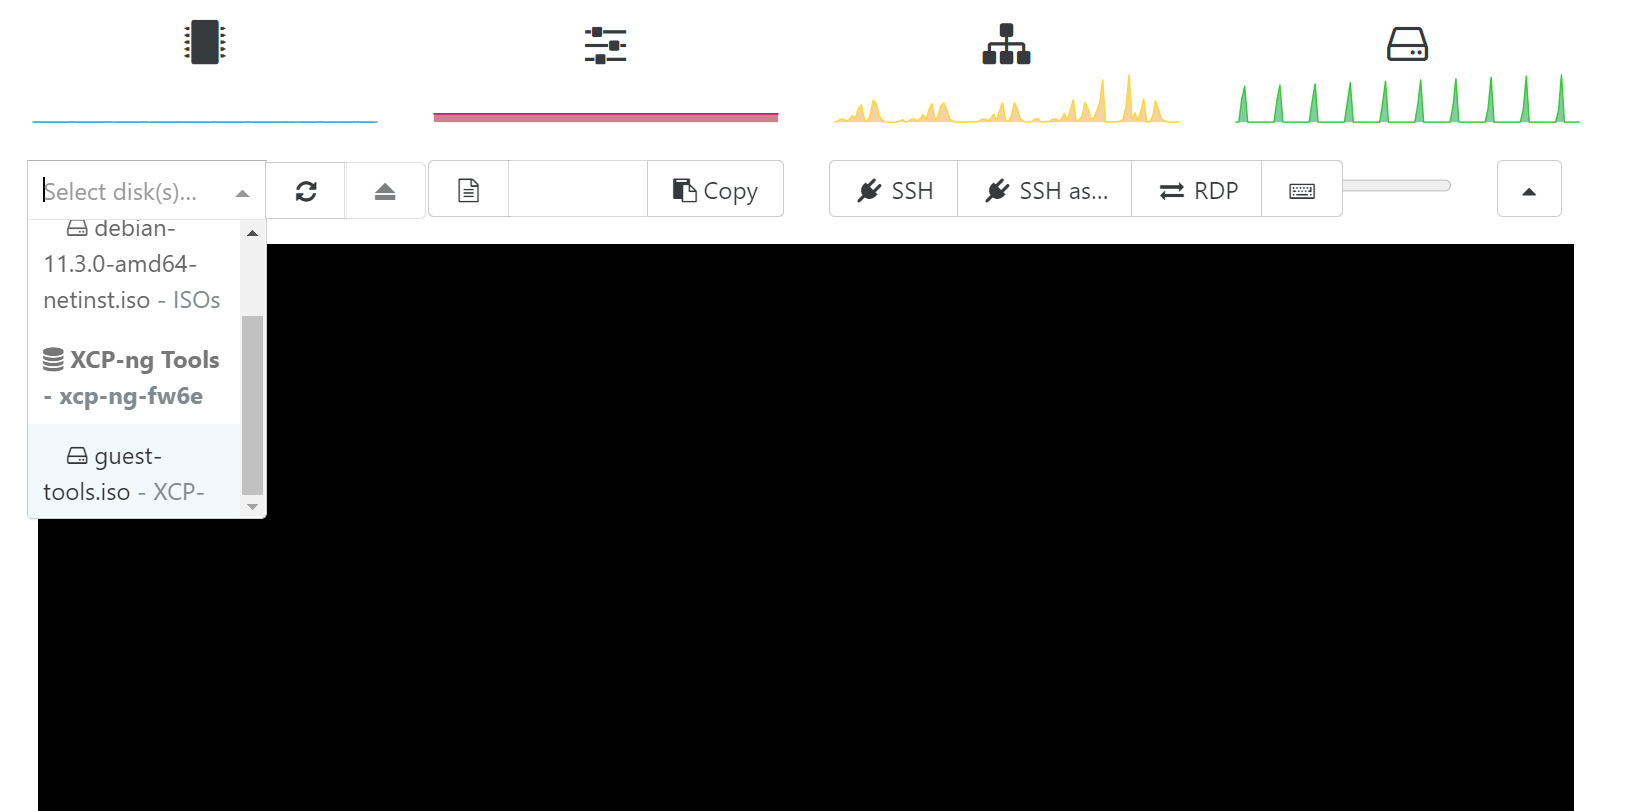
Selecting Guest Tools ISO
-
#mount /dev/cdrom /mnt -
#bash /mnt/Linux/install.sh -
#umount /dev/cdrom
Enabling SSH as Root User
Then we'll be editing the SSH Config file to enable SSH as root user. Using the root user will help ease the installation by allowing copy/paste functions.
-
#nano /etc/ssh/sshd_config - Navigate to PermitRootLogin, replace "prohibit-password" to "yes" and remove the comment

SSH Config
- Save and restart OpenSSH by using the following command
-
#systemctl restart ssh
-
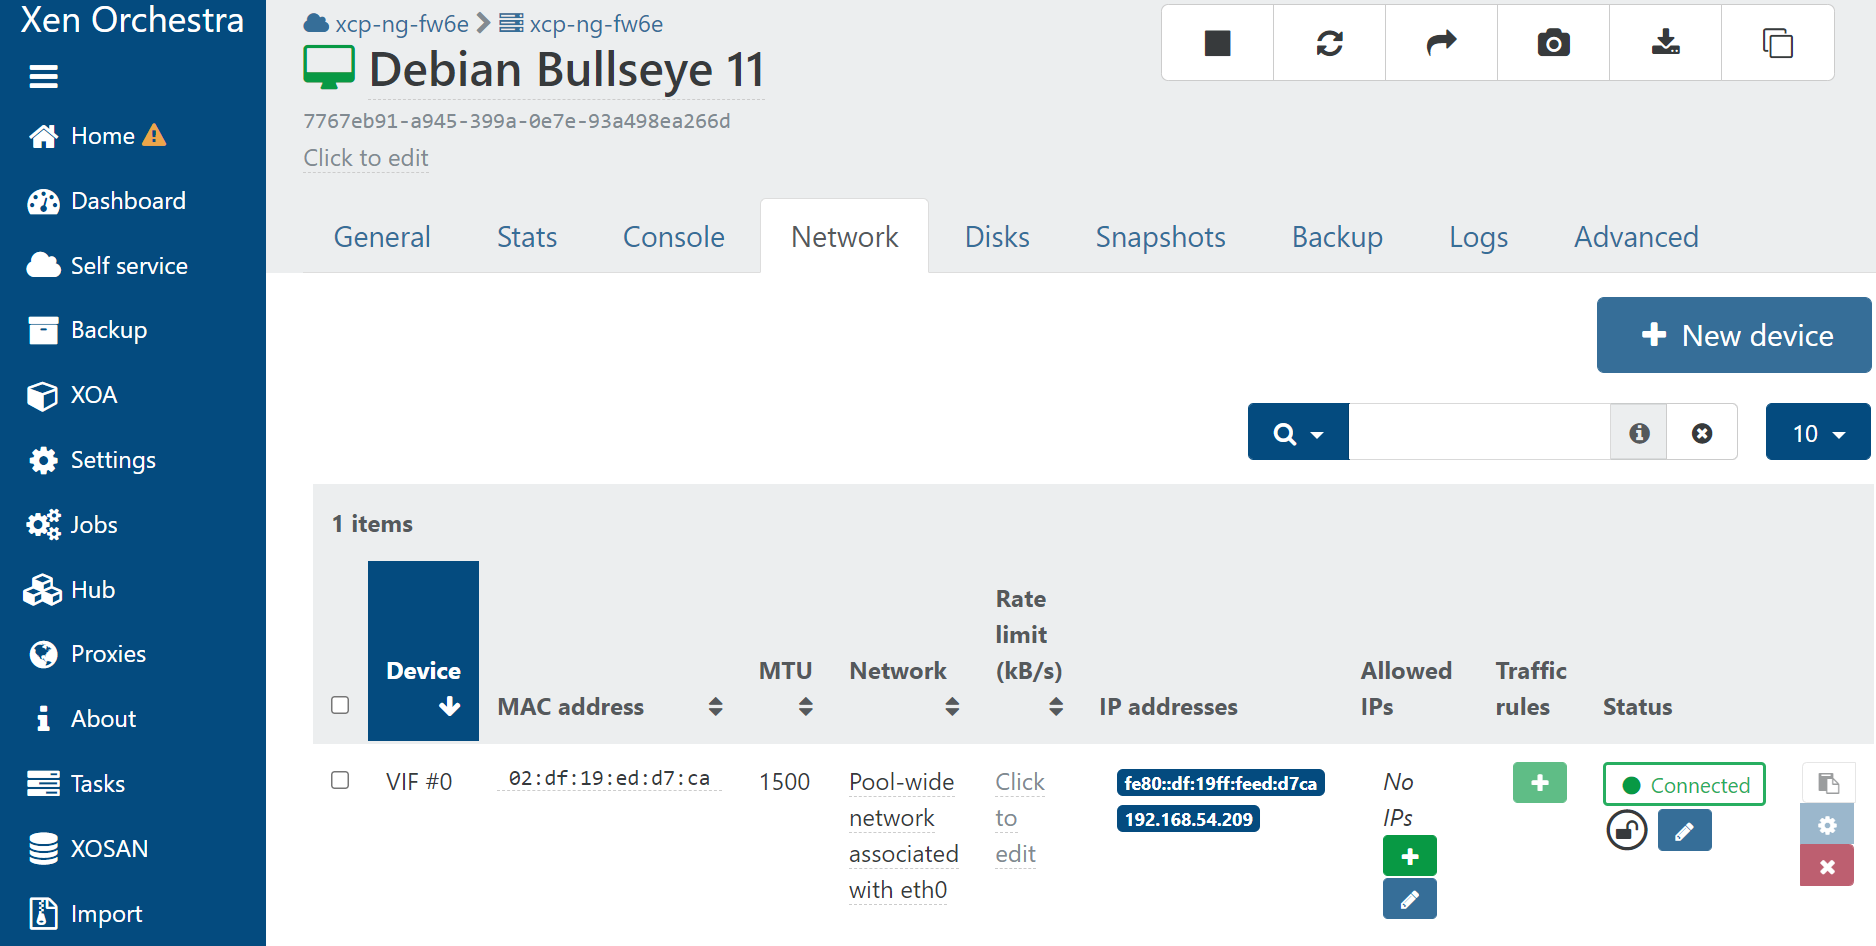
- Continue the rest of the installation as the root user via SSH. You can see your IP Address by navigating to the Network tab above the console screen and copying the IP address under the IP Addresses column.
Debian VM homepage
Alternatively, you can use the following commands to find the IP Address.
-
#hostname -I -
#ip a
Installing Community XOA
We’ll be using a Github script to install XOA. All source code is directly pulled by default from the official repository. You can also reference how to run the script via the Github link here.
Use the following commands
-
#apt install git -
#git clone https://github.com/ronivay/XenOrchestraInstallerUpdater.git
Enter the folder and copy config as "xo-install.cfg". Use the following commands
#cd XenOrchestraInstallerUpdate#cp sample.xo-install.cfg xo-install.cfg
Now we’ll need to generate a certificate/key pair with OpenSSL
-
#mkdir -p /etc/ssl/xo -
#openssl req -nodes -x509 -newkey rsa:2048 -keyout /etc/ssl/xo/key.pem -out /etc/ssl/xo/cert.pem -days 365 -subj "/CN=xen-orchestra"
Run the install/update with #./xo-install.sh and observe the installation!
After successfully installing XOA, you should be able to access the Web UI by typing in the IP Address from the Debian 11 VM into the address bar and using the default user/password
- User: admin@admin.net
- Password: admin
If you have any questions, feel free to reach out to our support team at support@protectli.com