Have a Question?
How to Configure Protectli Wifi Kit in OpenWrt on the Vault.
Overview
The WAP01K WiFi Kit can be configured on OpenWrt with a compatible vault. Check out our KB article "WiFi on the Vault" to ensure compatibility. By default, OpenWrt does not download the required drivers, but they can be added via the GUI "LuCi" or the package manager "opkg." The WAP01K WiFi Kit only works with the FW1, FW2, FW4A, FW2B, FW4B, and FW6E; therefore, ensure you have the proper hardware. Follow the steps below to learn how to install WiFi on the vault.
Note: This article uses the WAP01K Wifi Kit to show the installation process but will work with other compatible WiFi Kits. See the table below to identify the required packages for your WiFi Kit.
Important Note for those with the mPCIe or M.2 WiFI card: These cards will not be recognized by the OS unless you manually change the firmware. The proper files may be downloaded here: wifi-fix-standalone-0.3.1.tar
You will need to extract the files found within the 'vendor' folder, and place them in OpenWRT's lib/firmware/ath10k/QCA6174/hw3.0
You must reboot afterwards.
A common method to do this is to use scp via a Windows PC while connected to the Vault's LAN port. You may use any method you are comfortable with to transfer the files to the correct OpenWRT directory.
Required Packages
The following packages are required to install the WiFi Kit (WAP01K);
- hostapd
- kmod-rt2800-usb
| Module SKU | WAP01K | WM-PCIE-001 | WM-M2-001 |
|---|---|---|---|
| Chipset | Ralink RT3070 | QCA6174A-5 | QCA6174A-5 |
| Packages | hostapd kmod-rt2800-usb | hostapd ath10k-firmware-qca6174 kmod-ath10k | hostapd ath10k-firmware-qca6174 kmod-ath10k |
Command line (CLI) Package Installation
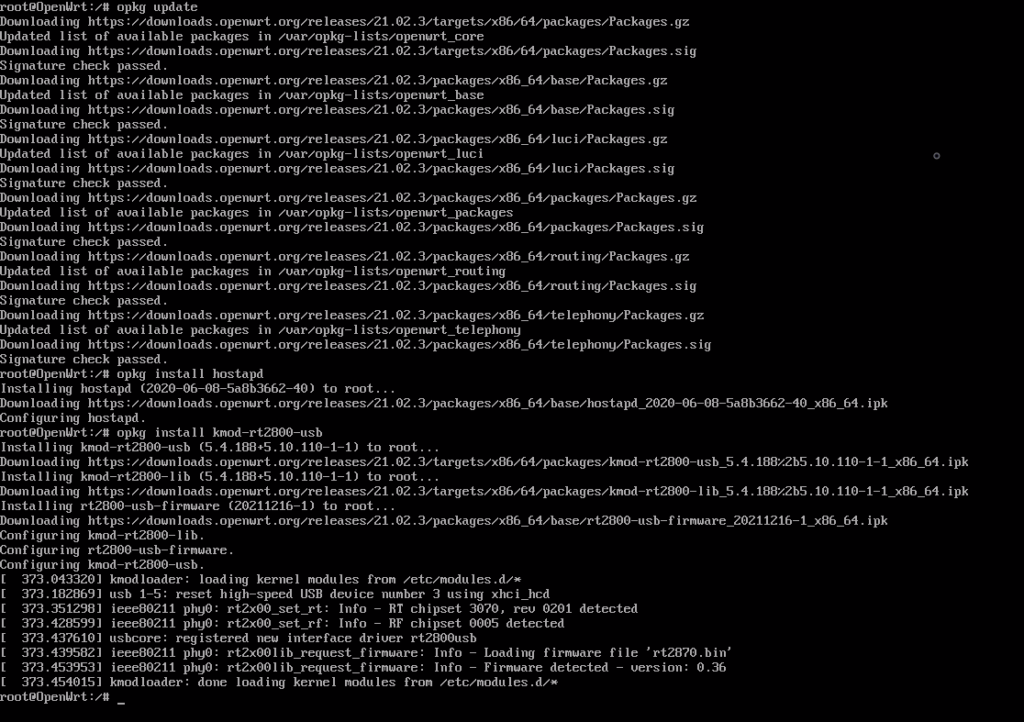
To install using the command-line, use the package manager. Run the installation commands below to check if the package is installed or start the installation. Up-to-date packages will display as such; otherwise, the package will begin to install. Listed below are the exact commands for CLI installation. Ensure each package states, "Signature check passed" after completing the command.
- opkg update
- opkg install hostapd
- opkg install kmod-rt2800-usb
WebGUI Package Installation (LuCi)
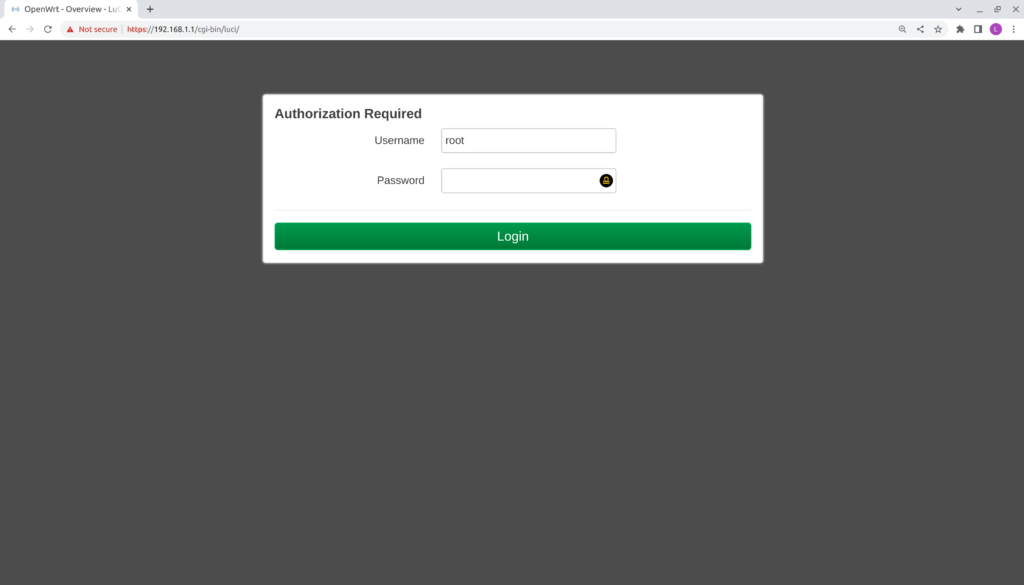
To access LuCi web GUI visit https://192.168.1.1/cgi-bin/luci/ after connecting to the vault's LAN port via an ethernet cable. Open a browser, We used the chrome browser, but others will work.
- Navigate to https://192.168.1.1
- Verify LuCi log-in page appears.
- Default Login:
- username: root
- password: [your password]
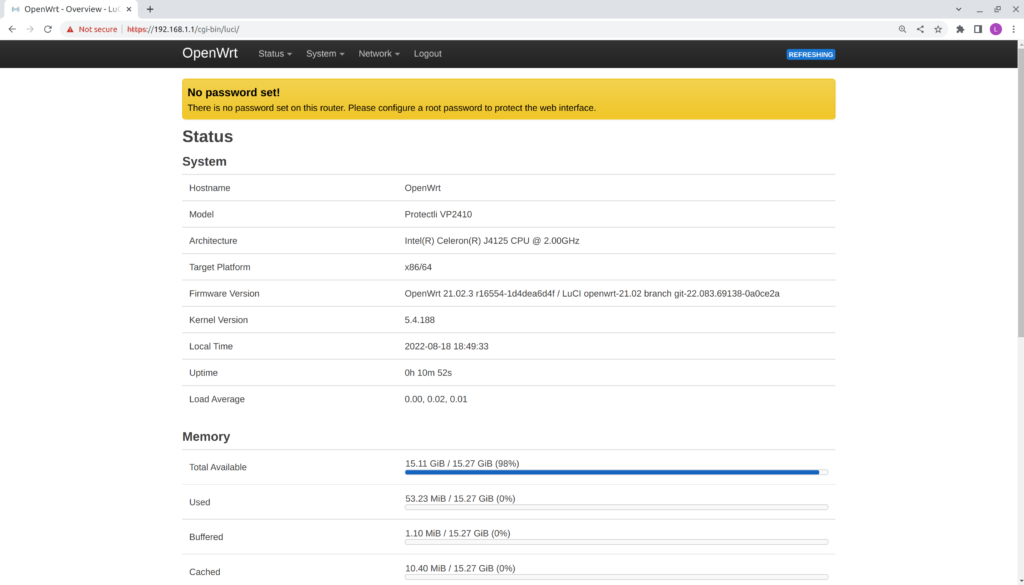
- Verify the status page is displayed.
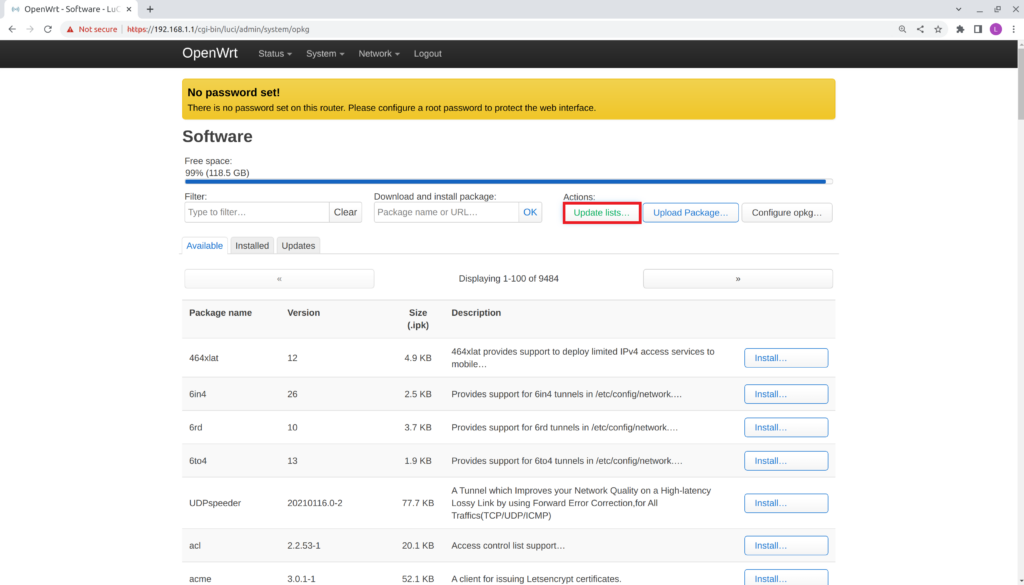
- Hover over the System tab and select Software.
- Verify the Software window is displayed.
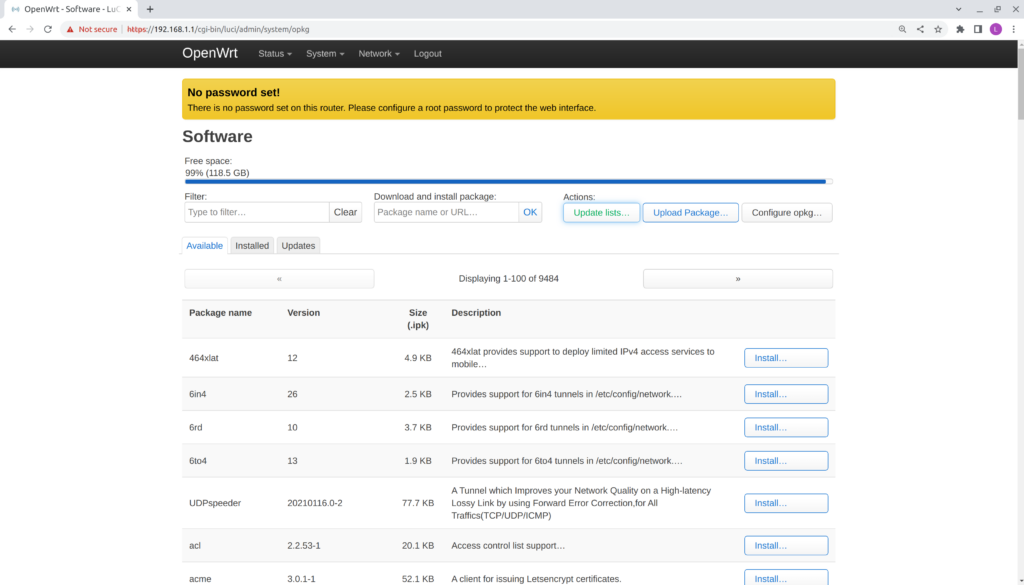
- Select Update lists from the Actions section.
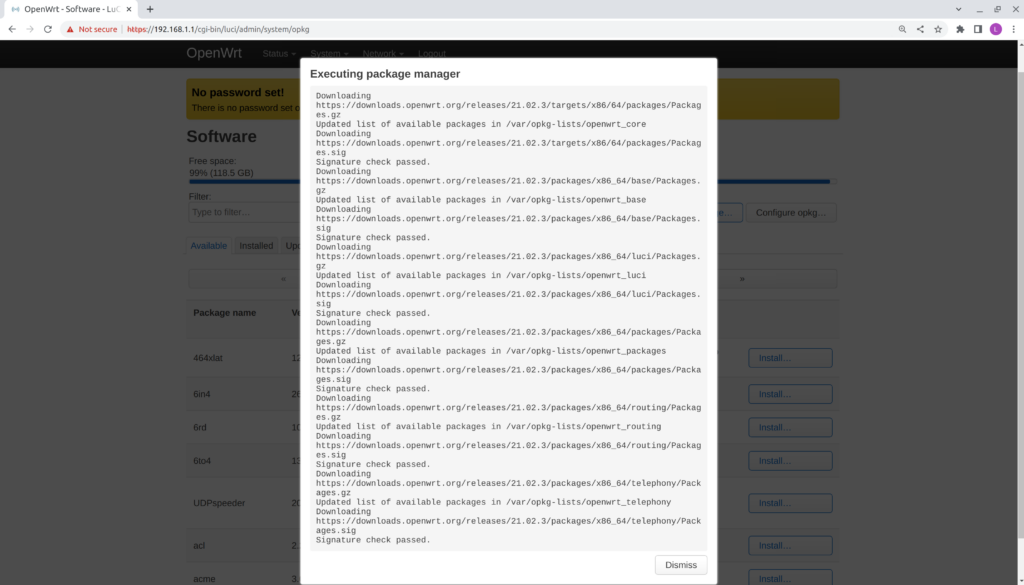
- Verify the Executing package manager window is displayed.
- Verify that all Signature checks passed.
- Select Dismiss.
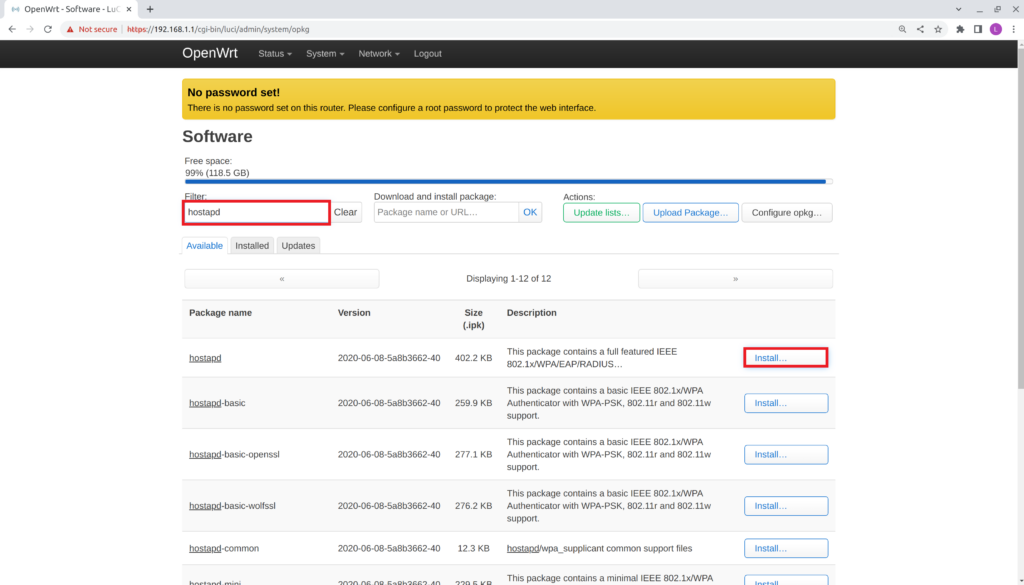
- Type hostapd in the Filter section.
- Verify the packages are filtered below.
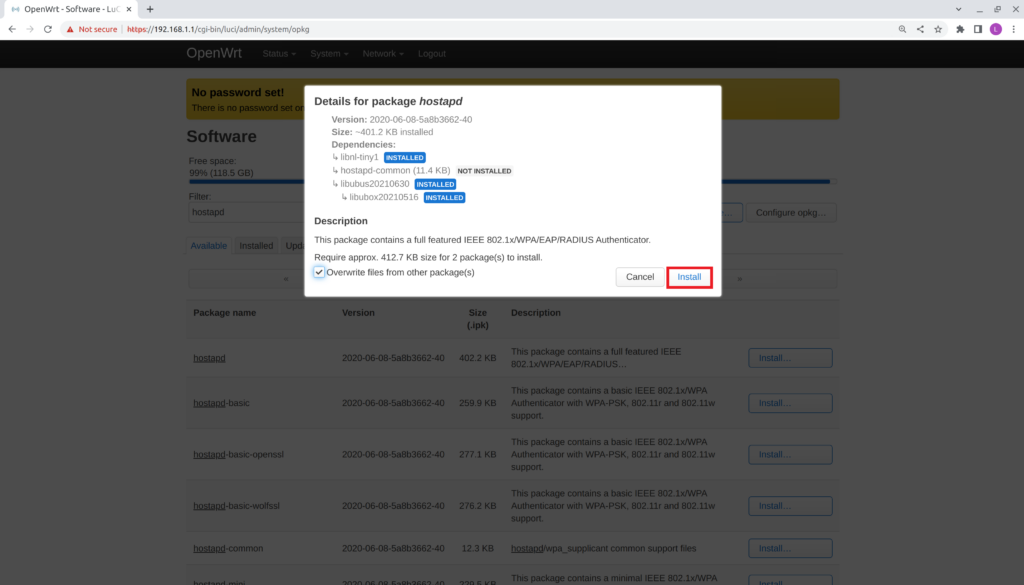
- Select Install for the hostapd package.
- Verify the Details for the package hostapd window that appears.
- Check the box Overwrite files from other packages(s)
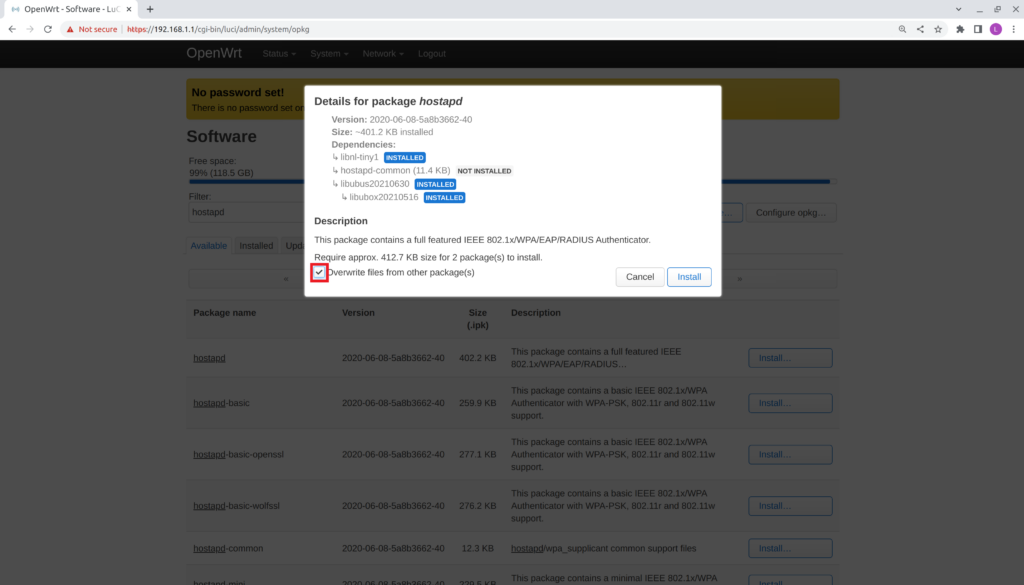
- Verify it remains checked.
- Select Install.
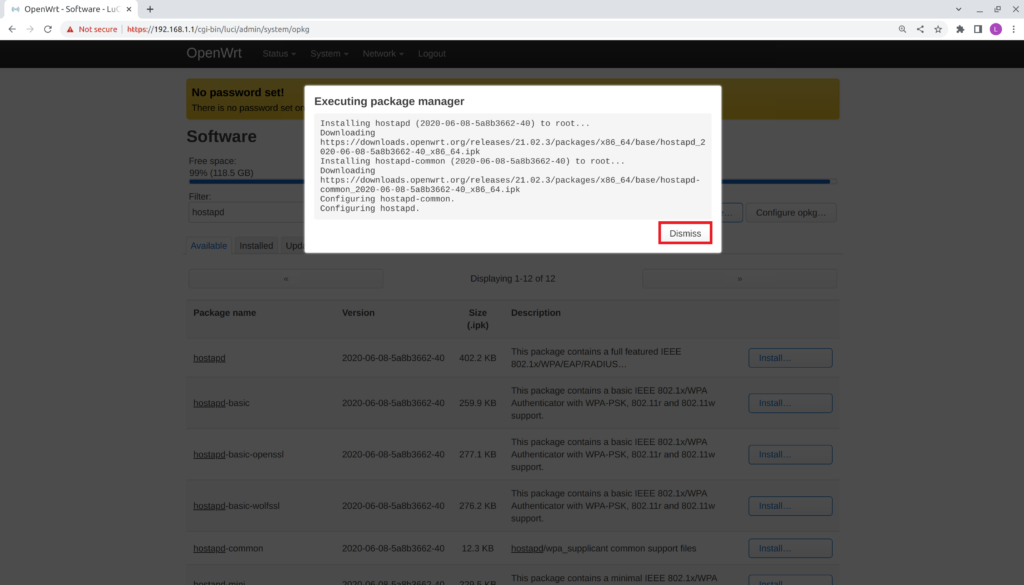
- Verify the Executing package manager window appears and that no errors are present.
- Select Dismiss
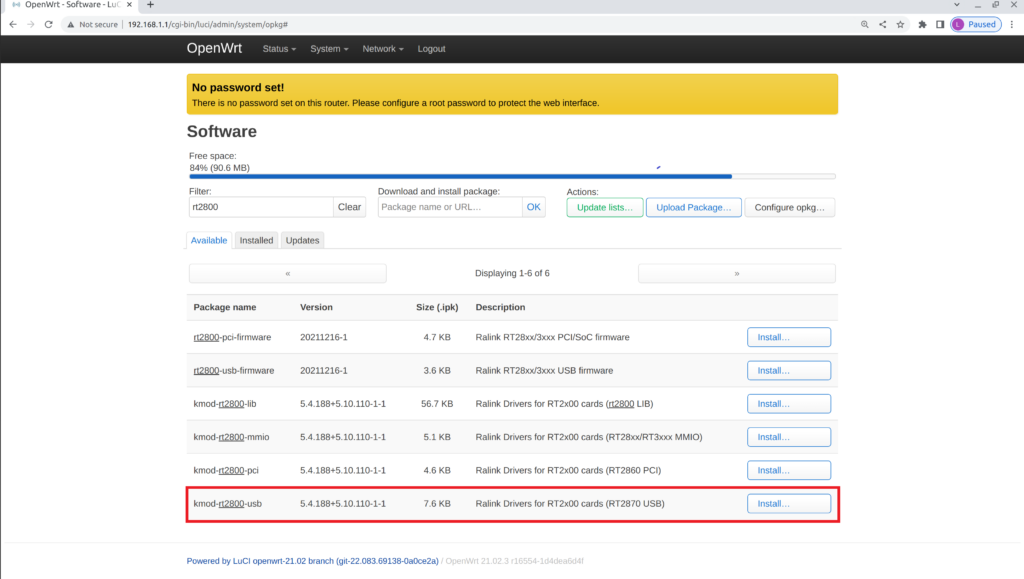
Repeat the previous steps to install the other required package "kmod-rt2800-usb."
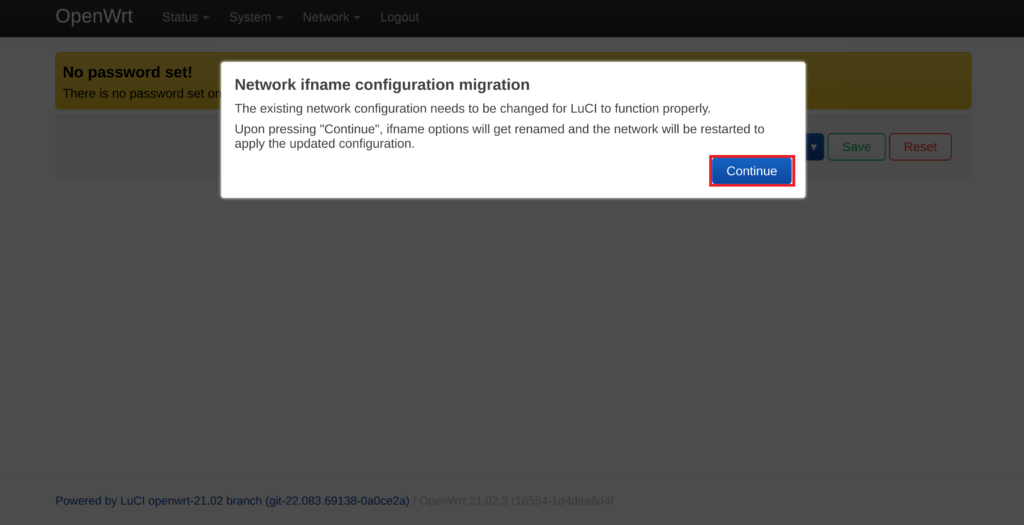
Now all packages are installed, navigate to the Network tab and select Interface. OpenWrt will display the "Network ifname configuration migration" notification; select Continue.
Restart OpenWrt by typing "reboot" in the terminal or by navigating to the Systems tab and selecting Reboot. After the reboot, log back into LuCi web GUI.
Configure Interface
From the Status page, navigate to the interfaces.
- Hover over the Network Tab and select Interfaces

- Verify the interfaces window is shown
- Select Add new interface
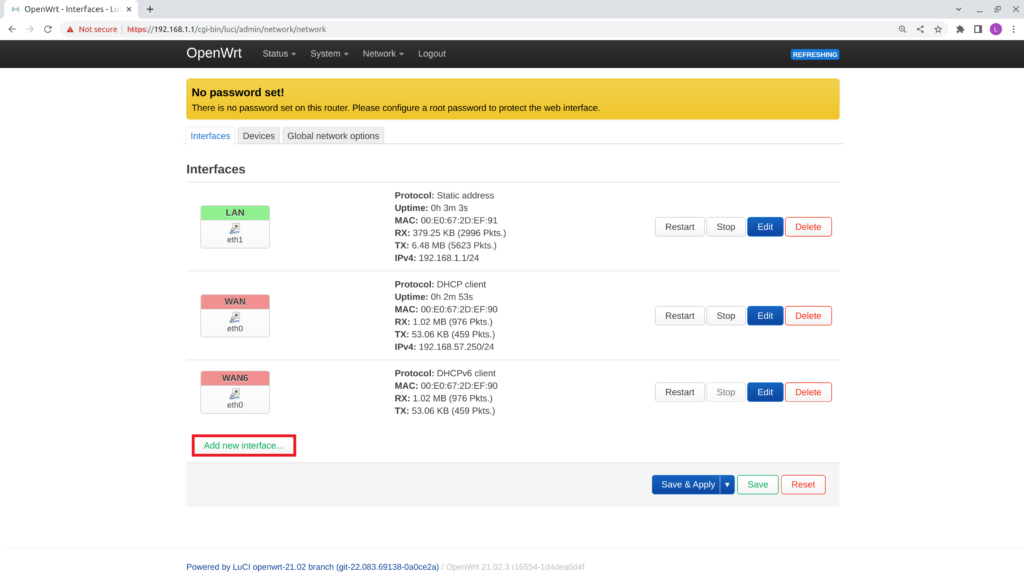
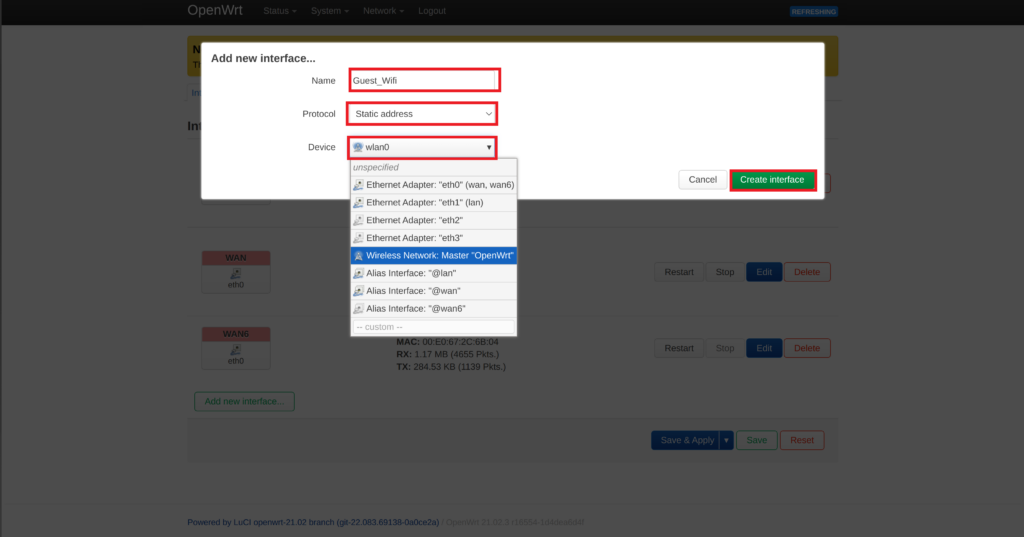
- Verify the Add new interface configuration window appears.
- Name: Guest_Wifi
- Protocol: Static address
- Device: wlan0
- Select Create interface
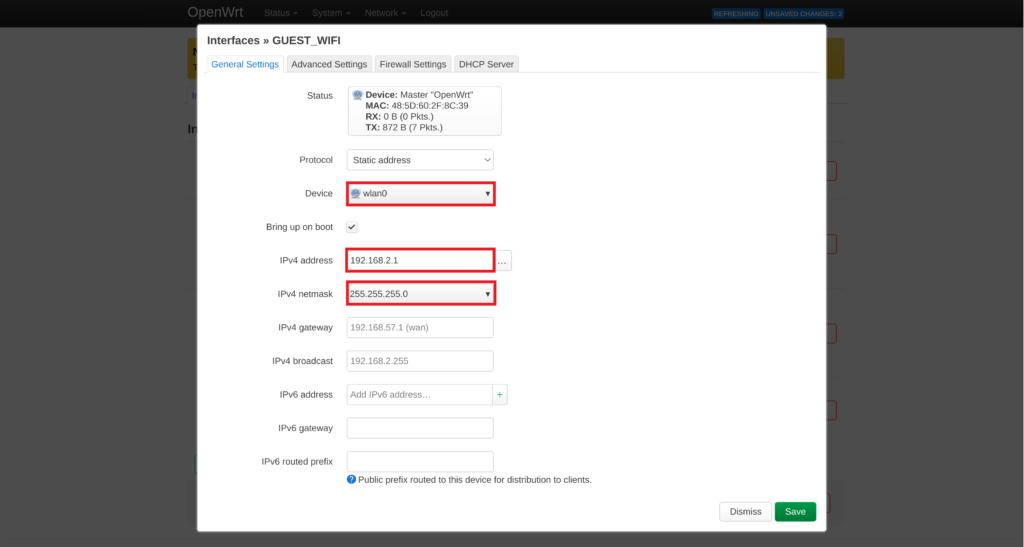
- Verify the newly created configuration window appear with more options.
- Under the Interface Configuration, General Settings tabs, edit the following:
- Device: wlan0
- IPv4: 192.168.2.1
- IPv4 netmask: 255.255.255.0
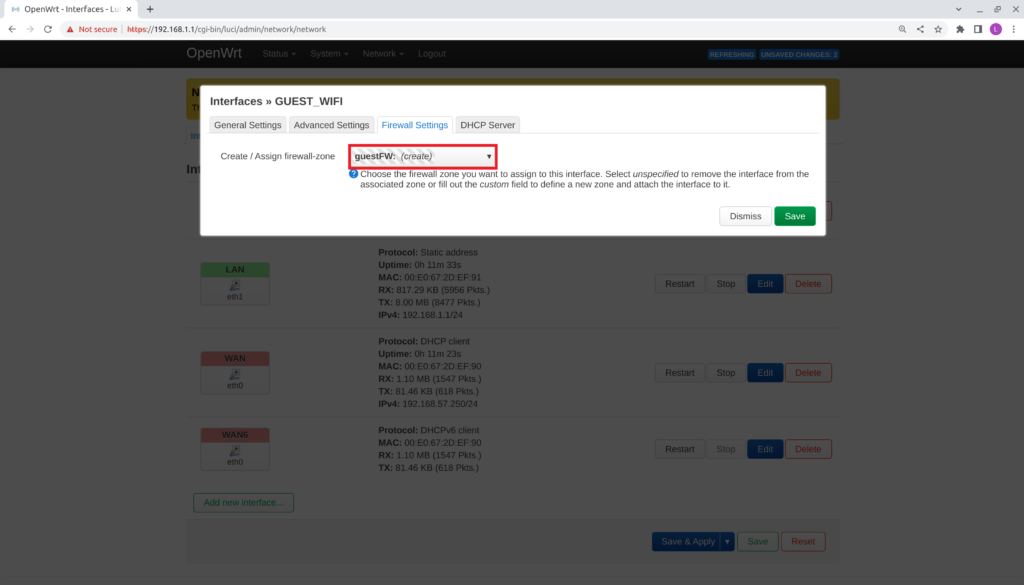
- Switch to the Firewall Settings tab
- Select custom within Create /Assign firewall-zone dropdown.
- Insert custom name: guestFW
- Press Enter
- Select custom within Create /Assign firewall-zone dropdown.
- Switch to the DHCP Server tab
- Select Set up DHCP Server
- Save
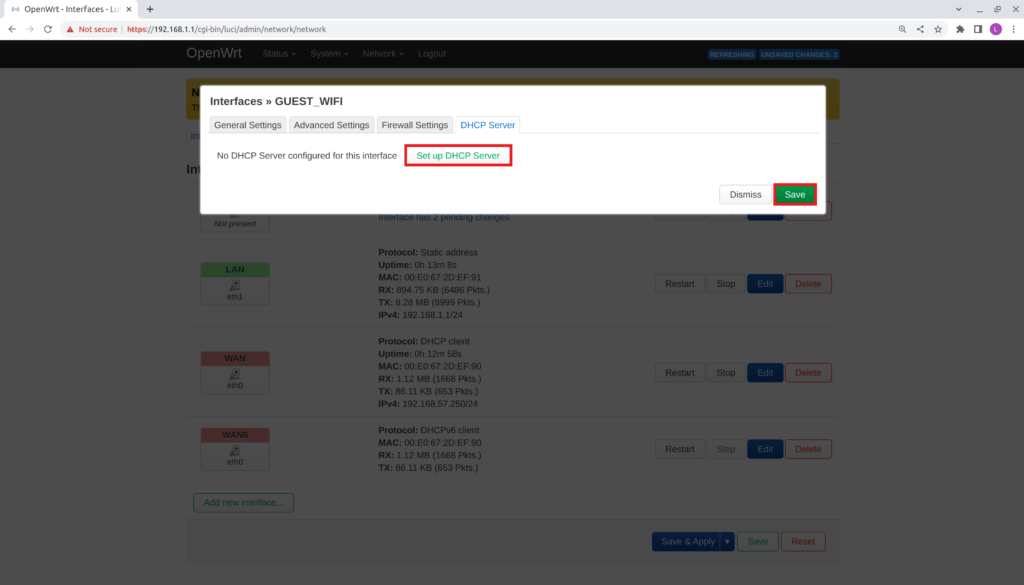
- Select Save & Apply
Configure Wireless Settings
From the current page, navigate to the wireless settings.
- Hover over the Network tab, then select Wireless.
- Verify the Wireless Overview page is shown.
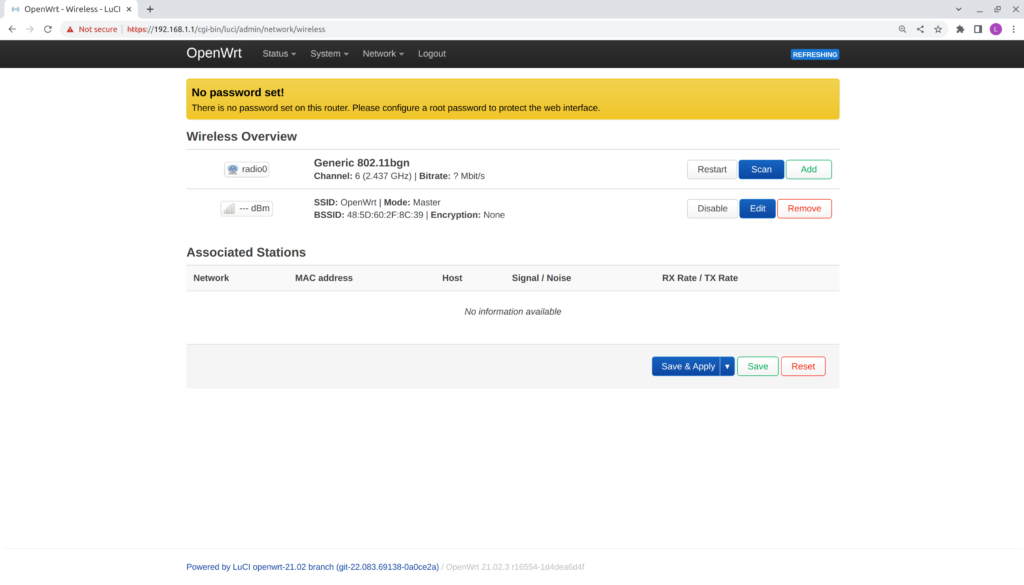
Note: Enable the wireless card if it is disabled.
- Select Edit on the wireless card.
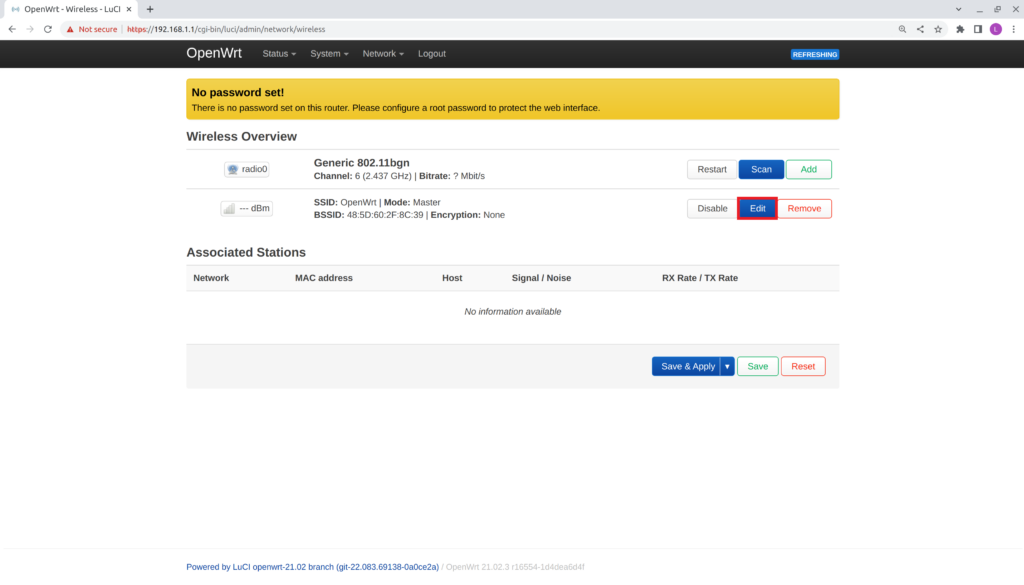
- Verify the Wireless Network: Master "OpenWrt" (wlan0) window opens to edit the settings.
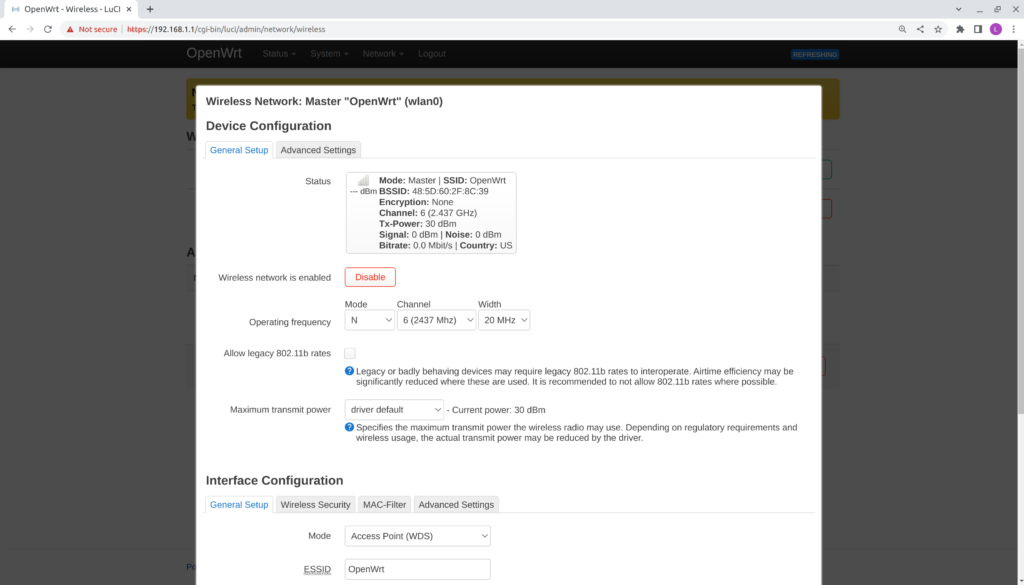
- Under the Interface Configuration, General tab below:
- Mode: Access Point
- ESSID: OpenWrt
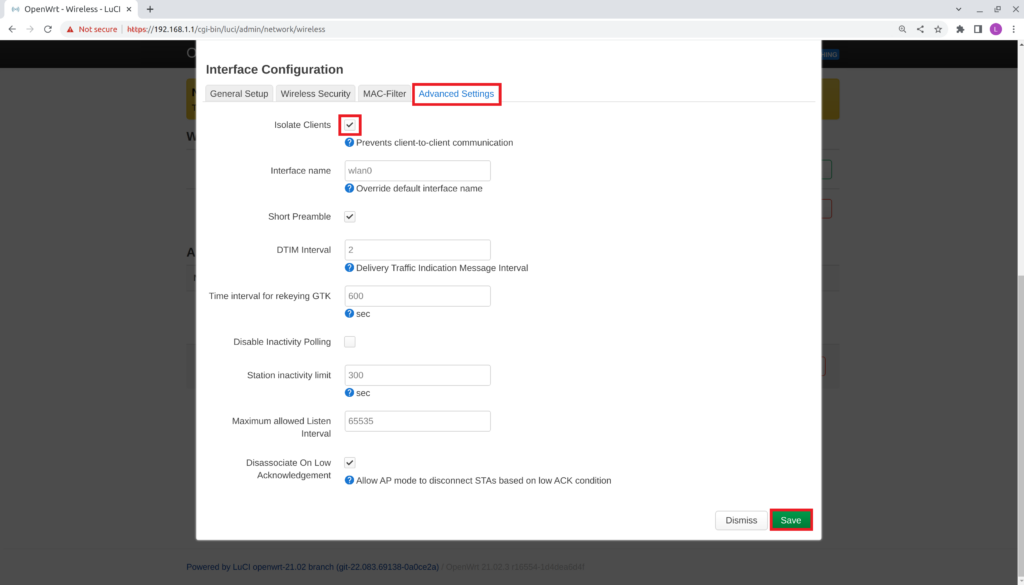
- Select Save & Apply
Create WiFi Firewall / Traffic Rules
Now create the firewall rules to allow inbound and outbound traffic. From the current page, conduct the following:
- Hover over Network, then select Firewall.
- Verify the Firewall – Zone Settings page appears.
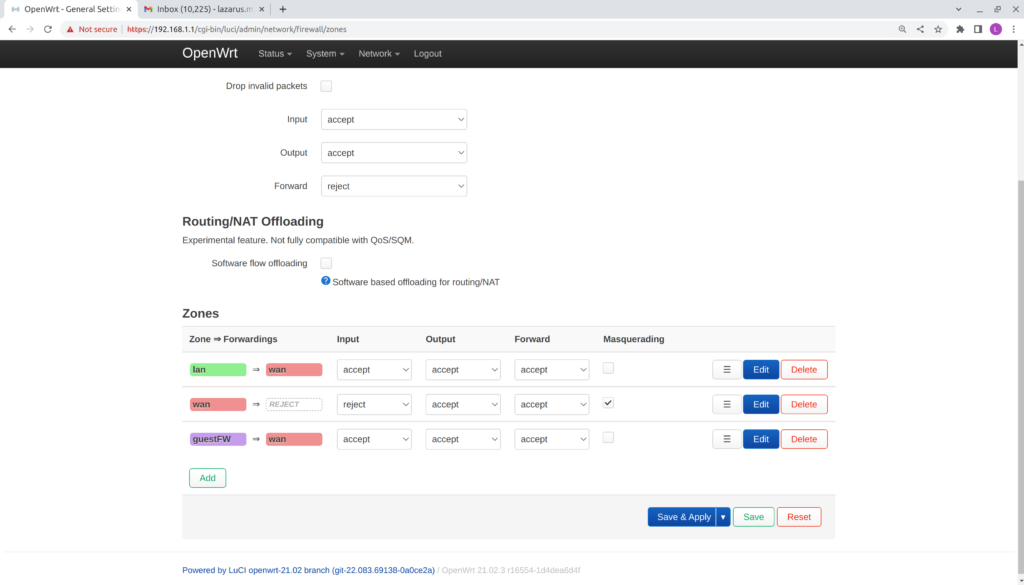
- Scroll down to verify the new firewall rule you created under the Zones section, "guestFW."
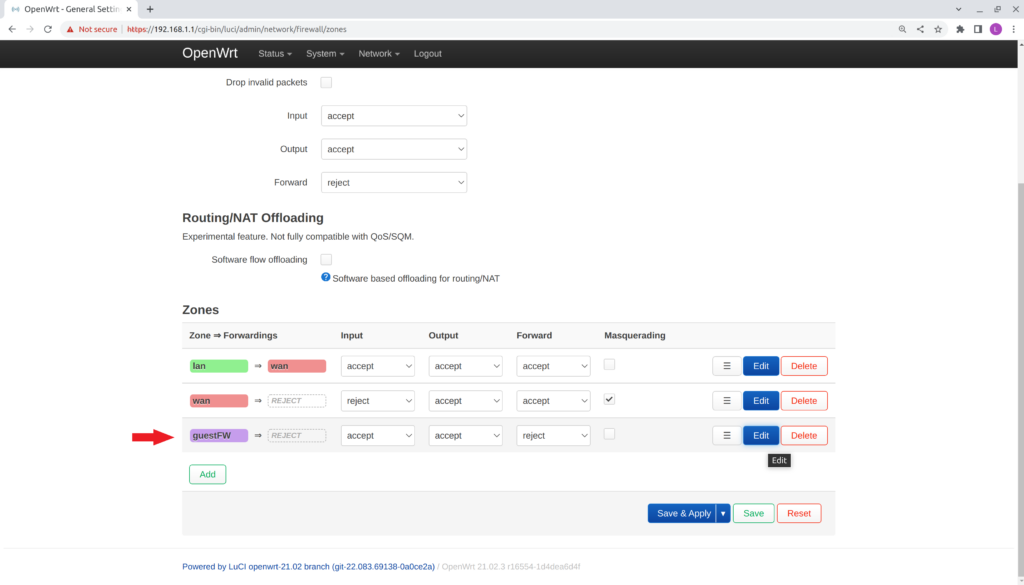
- Set the guestFW zone rules:
- Input: accept
- Output: accept
- Forward: accept
- Select Edit on the guestFW rule settings.
- Verify the Firewall – Zone Settings window opens.
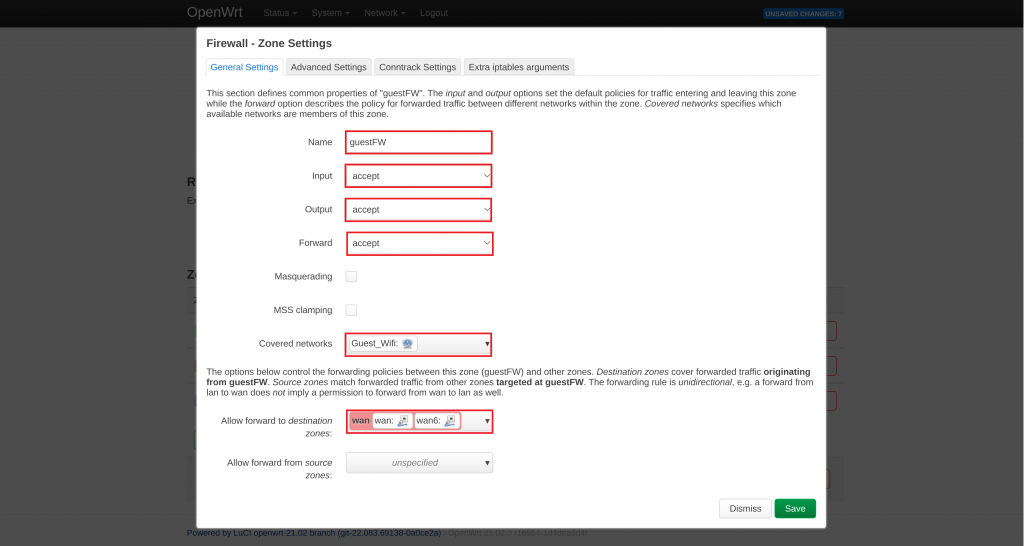
- Adjust your setting to the following;
- Name: guestFW
- Input: accept
- Output: accept
- Forward: accept
- Covered networks: Guest_Wifi
- Allow forward to destination zones: wan
- Select Save
- Switch to the Traffic Rules tab.
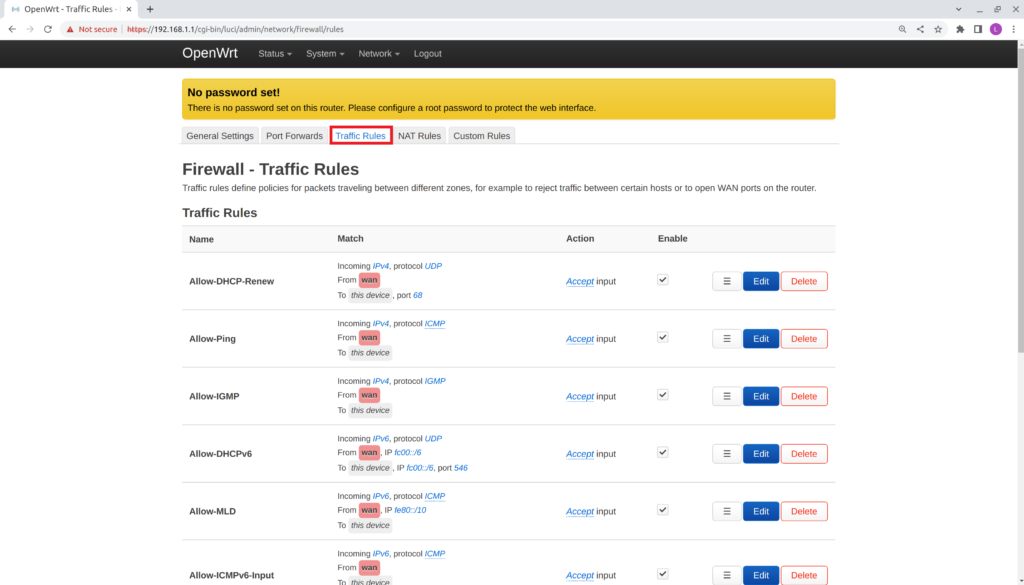
- Scroll down and select Add
- Verify the Firewall – Traffic Rules -Unamaed rule window appear
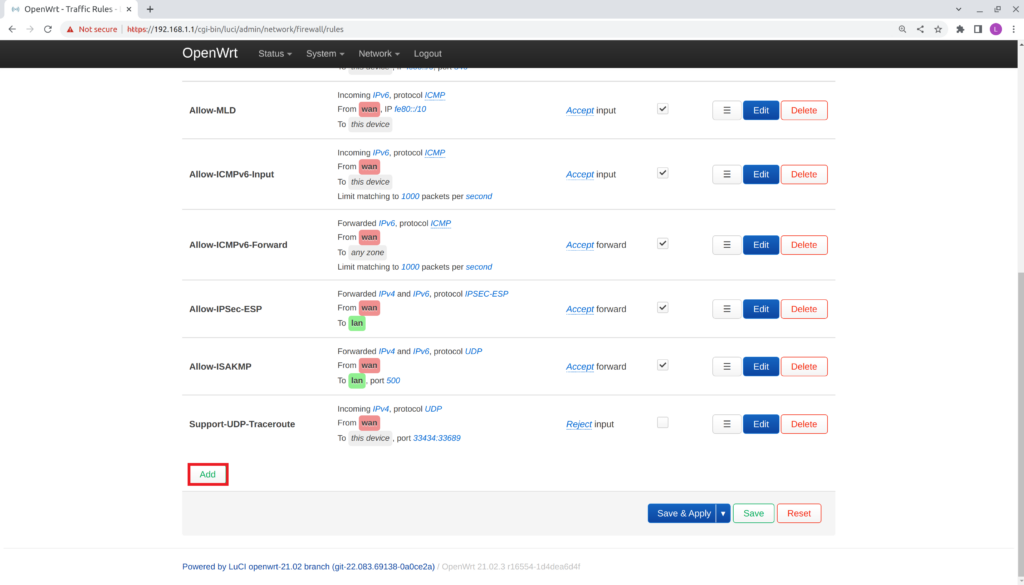
- Under the General tab, edit the following:
- Name: guestDHCP
- Protocol: UDP
- Source zone: guestFW
- Destination zone: Device (input)
- Destination port: 67
- Action: accept
- Select save.
- Verify the new DHCP rule is created.
Note: The settings above will not bridge your existing network. We added a wireless network to separate the management network and enabled wireless isolation for all clients connecting to it.
At this point, you have successfully configured the WiFi Kit in OpenWrt. Keep in mind this is an unsecured network; therefore, all settings should be adjusted. For advanced configuration standards on LuCi GUI or the command line, visit OpenWrt documentation by clicking here.
As always, if you need additional assistance, please contact us at support@protectli.com or find more information in our Knowledge Base.