Have a Question?
Adding WiFi to ESXi 8 VM on the vault
WiFi on ESXi Overview
Based on your network configuration, a PCI device such as a WiFi Kit may be required. This article explains how to install Protectli M.2 802.11ac WiFi Kit to a virtual machine on ESXi 8 on the vault via ESXi Host Client. Ensure you have change configuration privileges prior to attempting to install the WiFi Kit. By default, connected devices are recognized by ESXi but will not automatically work.
Prerequisites
- ESXi installed on the vault with configuration privileges.
- Protectli WiFi Kit should be installed.
- At least one virtual machine created.
Useful links:
Verify Installation and Enable PCI passthrough
Log in to the user interface via the IP you established during your ESXi installation then follow the steps below.
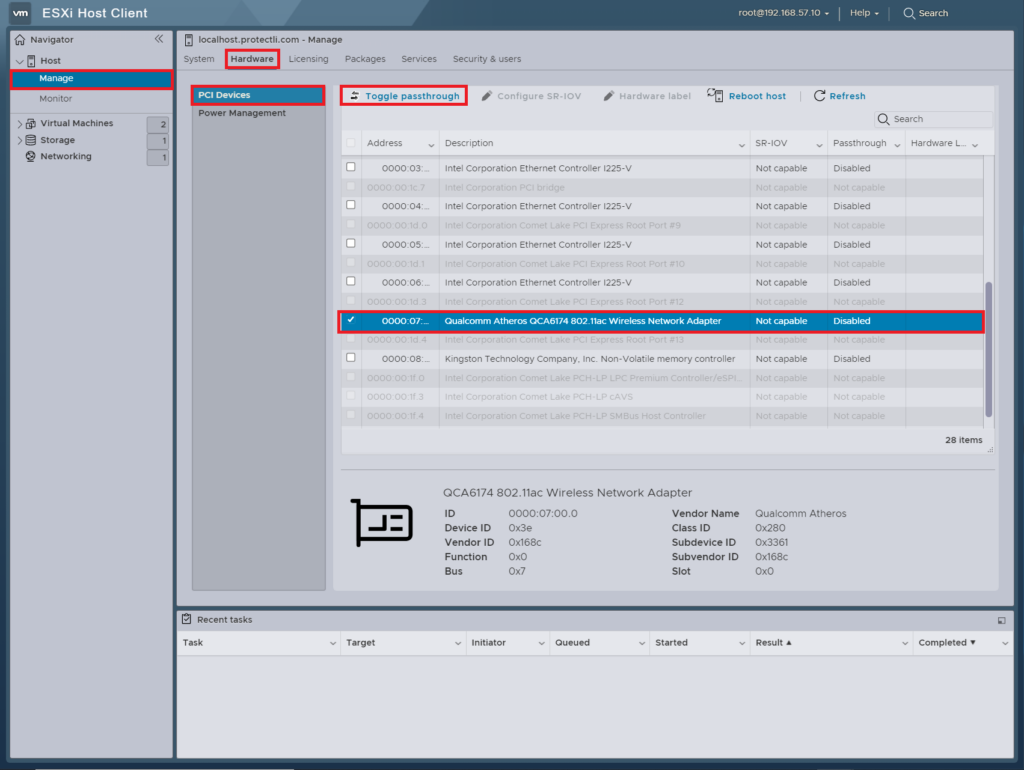
- From ESXi Navigator pane, select Manage.
- Within Manage, select the Hardware tab.
- On PCI Devices, scroll to select QCA6174 802.11ac Wireless Network Adapter
- At the top, hit the Toggle passthrough option.
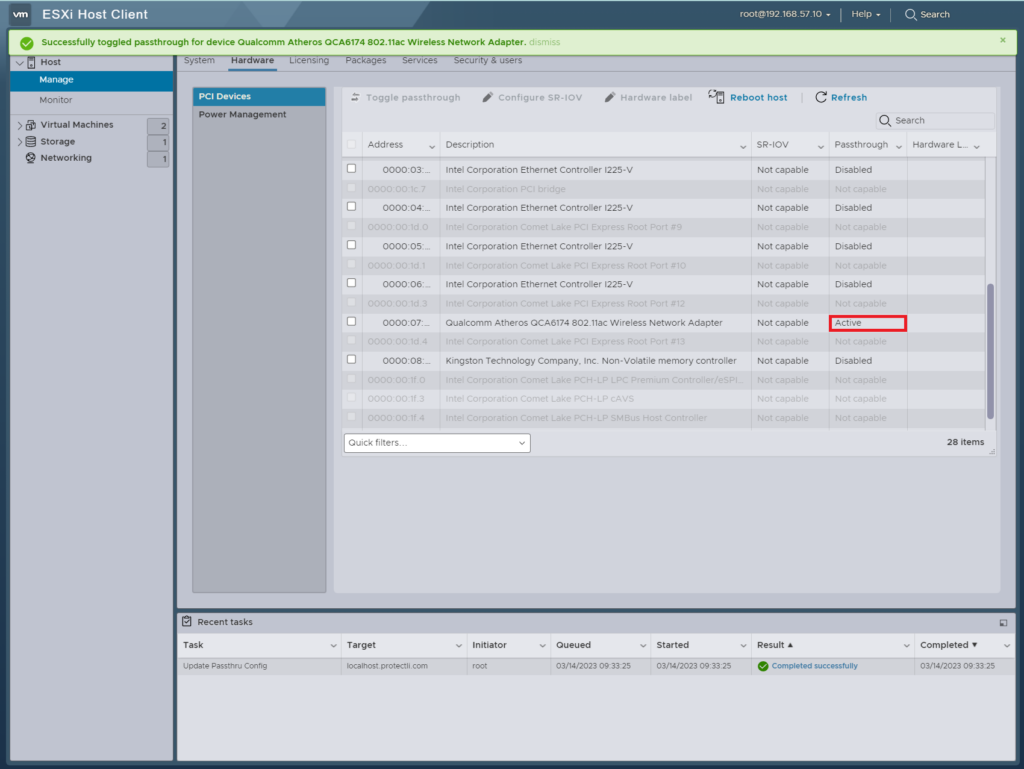
Once enabled you will see the passthrough option change from disabled to Active as show on screen.
Transfer the Downgrade File to the Virtual Machine.
Current the VM is using the default network connection. Prior to changing the default adapter to the wireless adapter, we need to transfer the downgrade script to the VM.
The easiest way is to log into VM and download it directly from our site. It is located at the bottom of the page, labeled "wifi-fix-standalone-0.3.1.tar" click here.
Configuring the VM Wireless Network Adapter
Locate and select the edit button for the virtual machine you will be using to attach the WiFi Network Adapter.
Note: *We used Ubuntu 20.04 for this example but others will work similarly.*

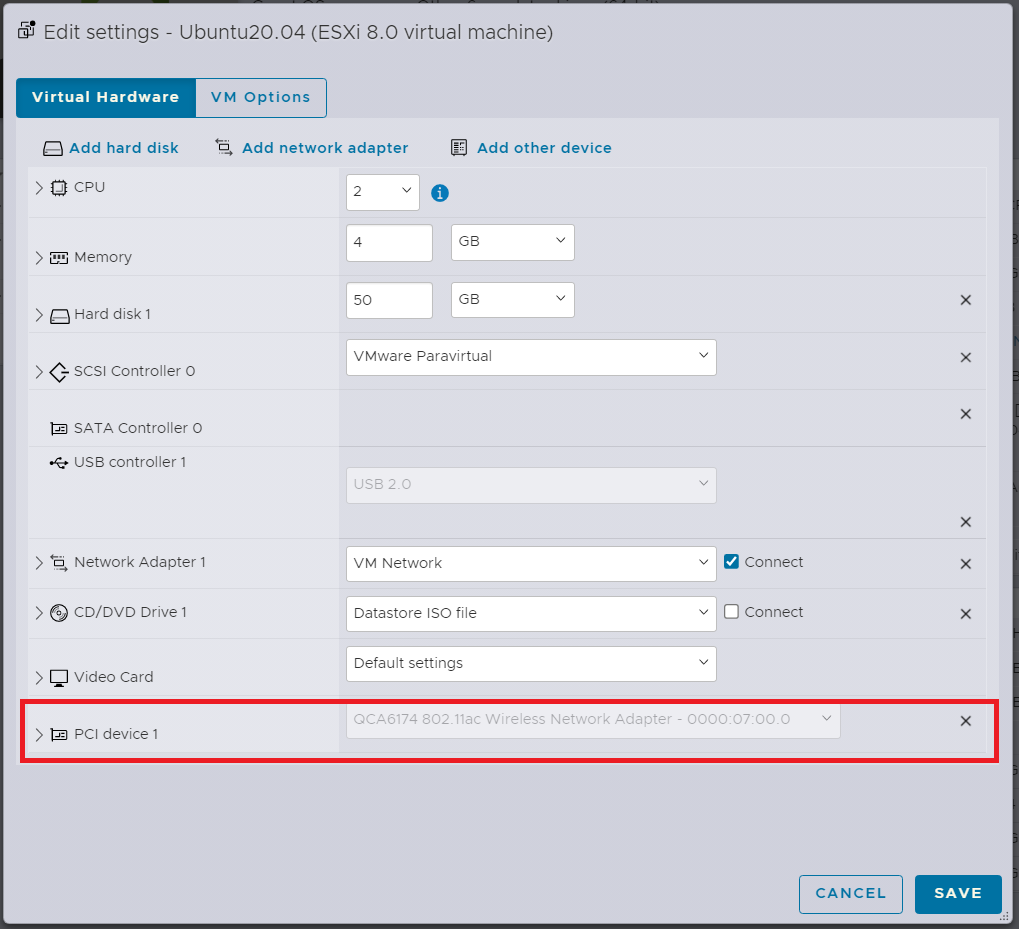
Once inside the settings complete the following:
- Within the Virtual Hardware tab,
- Select Add other device.
- Then, PCI device
- Save your settings
The New PCI device will appear on the Virtual Hardware tab with the QCA6174 802.11ax Wireless Network Adapter.
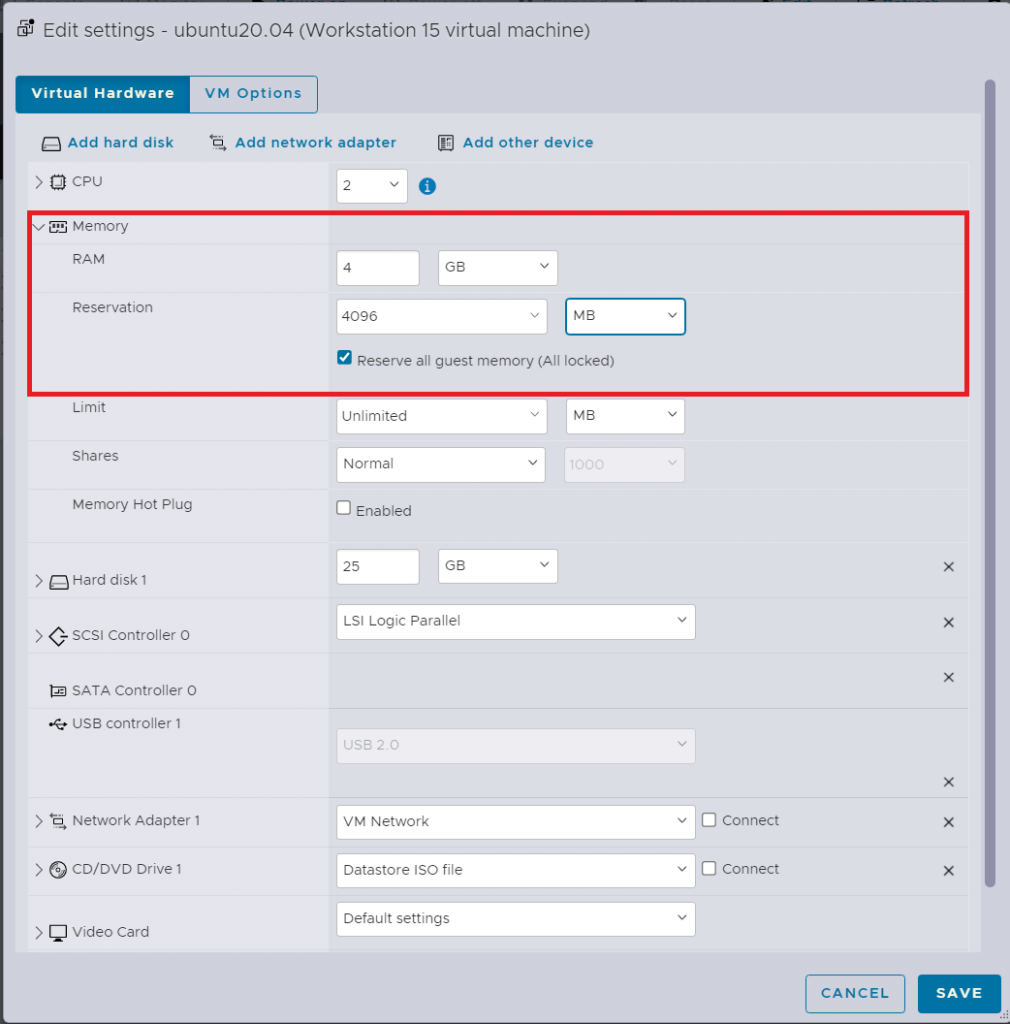
Next, ensure the Reserve all guest memory (All locked) is checked.
As stated in the notes section of the newly attached PCI device, "Some virtual machine operations are unavailable when PCI/PCIe passthrough devices are present. You cannot suspend, migrate with vMotion, or take or restore snapshots of such virtual machines."
- Expand the Memory section
- Check the Reserve all guest memory (All locked) box.
- The reservation size should be the same as the RAM size, in this case 4096 MB or 4 GB.
- Disconnect the default Network Adapter.
- Save your settings.
* For more information on these setting, visit ESXi documentation page by clicking here.
*** If you did not complete the memory lock above, the following failed message will appear after powering on***
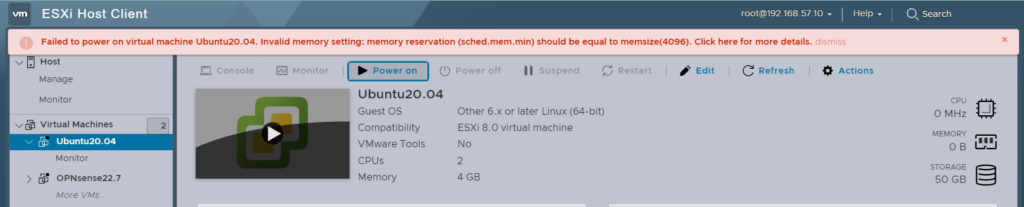
- Remove the default Network Adapter 1 (VM Network) by deselecting Connect or pressing the "X" to completely remove it.
- Power on your virtual machine.
Re-establishing the Connection
Once logged into the VM you will not have an internet connection since we removed the default VM Network. To re-establish a connection using the WiFi Kit, follow the process below.
- Locate the download file.
- Right click the folder and select Extract here.
- Open the newly extracted folder that appears.
- Open the next folder labeled wifi-fix-standalone.
- Right click in the open space, then select Open in Terminal.
- In the terminal, run the command sudo ./wifi-firmware-downgrade.sh
- Enter your password and press enter.
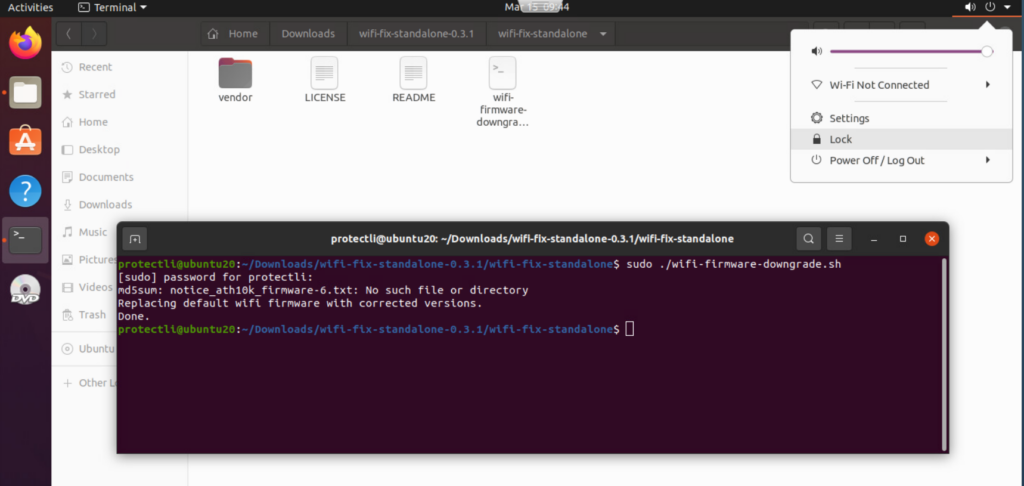
You will see Done once completed. Open you WiFi settings and notice the signal has appeared.
Congratulations, you are now using Protectli WiFi Card to get an internet connection to this VM.