Have a Question?
How to Create a Bootable USB drive for Software Installation
The Vault can be used for many different applications including Windows, general Linux Distributions, Firewalls, Network Management Applications, and other uses. The common requirement for all of these applications is that the operating system must be installed on the Vault. The Vault is like any other computer, in that you can use a monitor and keyboard, along with an installation USB to install an operating system. This article will explain how to create a bootable USB drive for software installation.
For creating a bootable USB with Windows, Protectli recommends a tool called Rufus. The home page for Rufus is https://rufus.ie/. The Windows system requirements are listed on the Rufus homepage. For creating a bootable USB with a Mac, Protectli recommends balenaEtcher (https://www.balena.io/etcher/). please see below. Note that before the USB drive can be created, the desired installation image for the application should have been previously downloaded to the computer and, if necessary, uncompressed. Examples are below.
Note: Please only use either Rufus or balenaEtcher as these have been tested and confirmed methods.
Create Bootable USB Drive – Windows
- Download the Rufus tool from the home page to a Windows computer
- Verify an executable file with a name of rufus-3.5 or similar is downloaded
- Select the Rufus application from Windows and verify that the main menu pops up
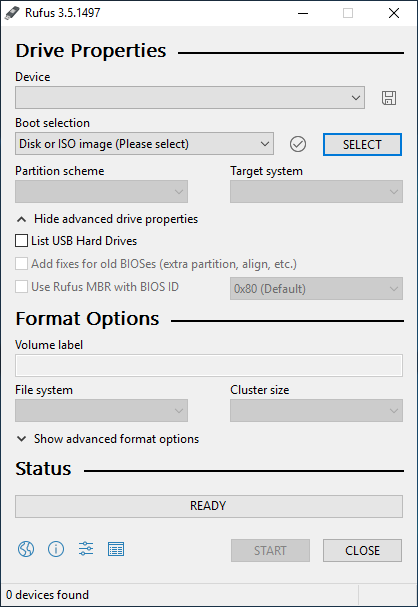
Rufus Main Menu
- Insert a USB drive that is large enough to hold the installation image into a USB port on the PC
- Verify that Rufus recognizes the USB drive
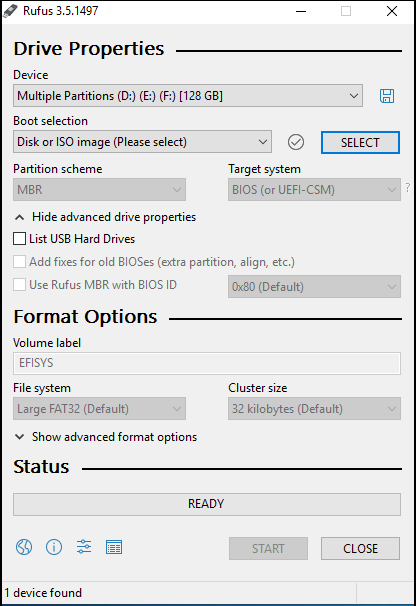
Rufus Detects USB Drive
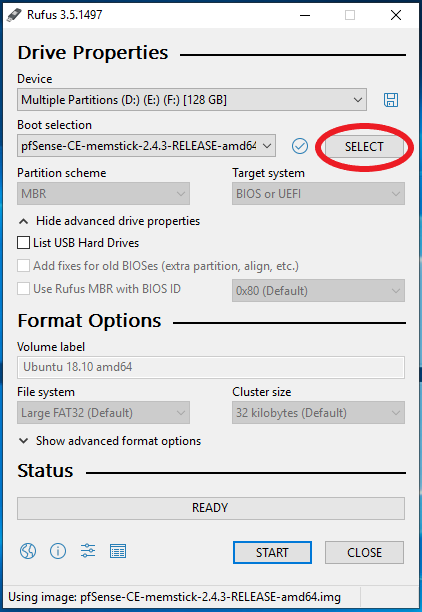
- Click on the button circled below to bring up a list of installation images previously copied to the Windows PC
Rufus Select Image
Rufus will display a window on the PC. Navigate to the folder on the PC which has the desired bootable images. The desired file may not be displayed if it is not the same type as selected in the Rufus tool. In that case click on the drop down menu in the lower right corner of the window and select "All Files" to display all the files in the folder.

Rufus Select All Files
- Select the desired bootable image on the PC and verify that it is displayed in the Rufus tool at the bottom of the window
Rufus Selected Image at bottom of tool
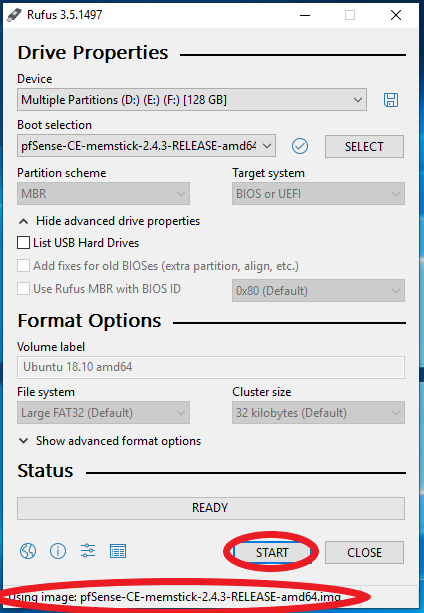
- Press the Start button
- Verify the warning appears and select Ok
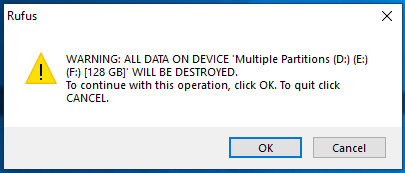
Rufus Warning Message
- Verify the installation file is copied to the USB, application status is "READY" and the green bar is complete
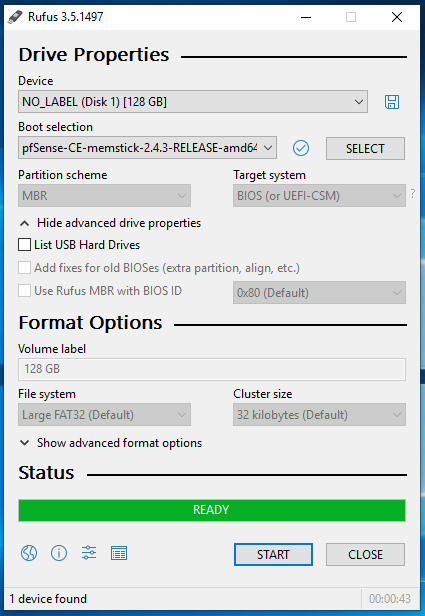
Rufus Ready Message
- Safely remove the USB drive from the Windows computer
Create Bootable USB Drive – OSX
- Download balenaEtcher to an OSX computer
- Verify a DMG file is downloaded (likely to your Downloads folder)
- Double click the DMG and follow the instructions to drag the Application into your "Applications" folder
- Open balenaEtcher

- Select the Operating System installation image that was downloaded by clicking "Select Image"
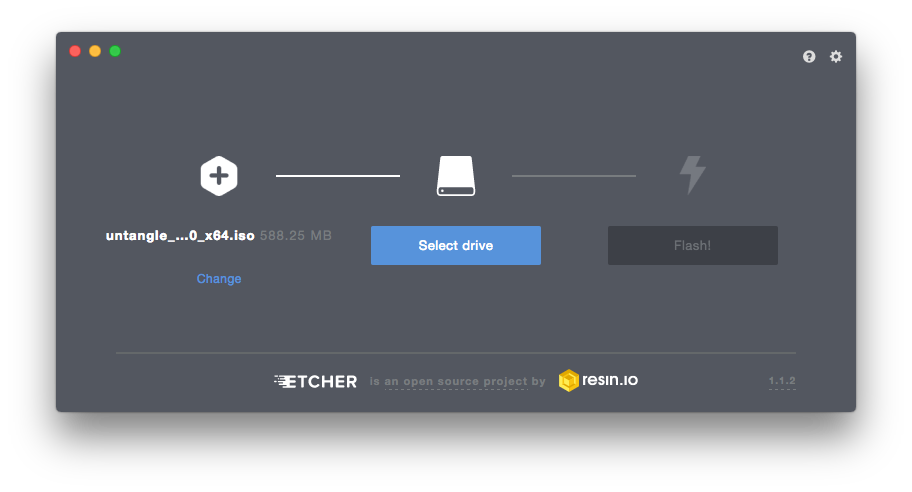
- Select the USB drive that you with to use to 'install' the image onto
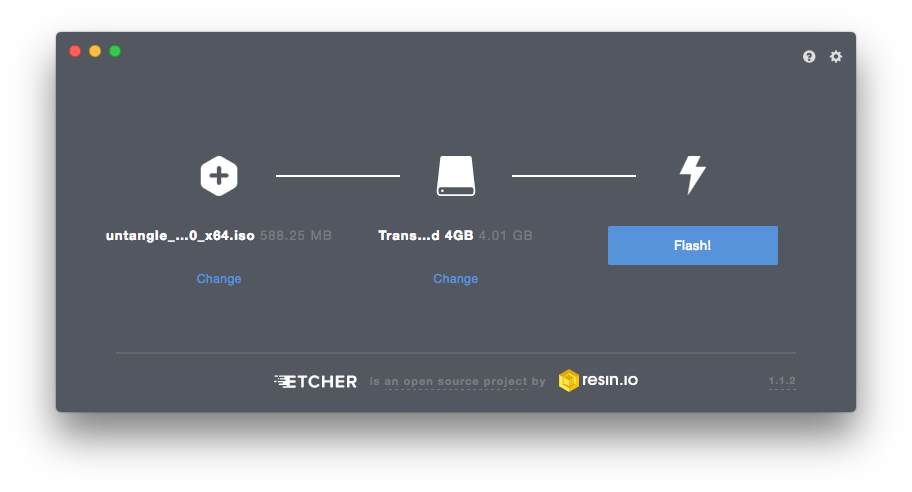
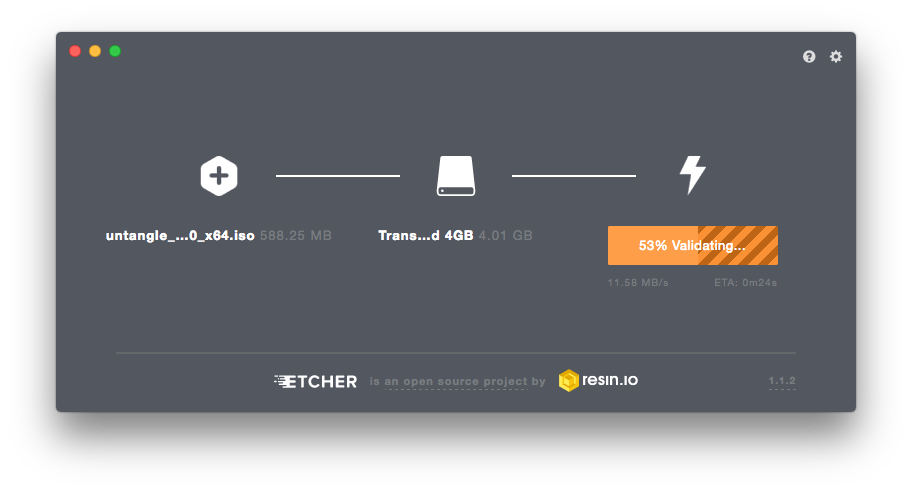
- Click 'Flash' To complete the operation
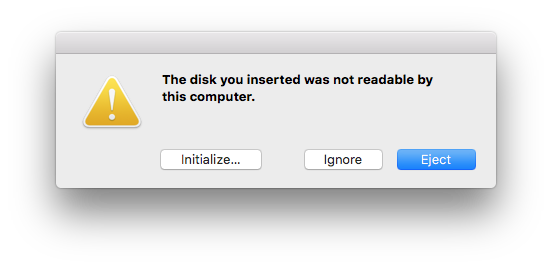
- Upon completion, OSX may try to mount the disk image, but depending on the Operating system intalled, it may not be readable. At this point, be sure to choose "Eject" in order to remove the USB drive and use it for installing the operating system onto the Vault. The error "…not readable…" is not a concern.
Install Application Software onto the Vault from USB
Now that the bootable USB drive with installation of the application software has been created, the software must be loaded onto the Vault. If there is no bootable image on the internal mSATA drive of the Vault, the Vault will automatically boot to the USB and begin the installation. If there is already a bootable image on the internal mSATA drive of the Vault, you must select the USB via the boot selection screen.
- Insert the USB drive into the vault
- Boot the Vault to the boot selection menu by holding down the F11 key during power up
- Verify the Vault boots automatically from the USB or the boot source selection screen appears
- If the selection screen appears, select the USB drive as the boot source and verify that the installation begins
- Follow the installation instructions for the specific software that is being loaded onto the Vault

Boot Selection Screen
See the Protectli Knowledge Base for specific applications and instructions on how to install them.
See this link for instructions on how to enter the BIOS or Boot Selection screen at boot.
If you need additional assistance, please feel free to reach out at support@protectli.com. You can also find more information in our Knowledge Base.